From “Flying Blind” to Data-Driven Confidence
Are you tired of pouring money into Google Ads and feeling like you’re “flying blind”? Campaigns are running, clicks are accumulating, and budgets are being spent, but a nagging question remains: what’s actually working? Without clear data, decision-making is based on guesswork, and proving marketing ROI feels nearly impossible.
This guide walks through setting up Google Ads conversion tracking using Google Tag Manager, step-by-step, while highlighting common pitfalls to avoid. Beyond the technical setup, it integrates strategic measurement principles to ensure you understand why specific actions matter. By the end, you’ll have a foundation for making data-driven marketing decisions, optimizing campaigns for real results, and demonstrating ROI.
Table of Contents
Understanding the ‘Why’ Before the ‘How’
Before diving into the technical setup, establish a strategic foundation. The biggest mistake in measurement is starting with tools without knowing what questions need to be answered. This section integrates principles from the Actionable Measurement Framework, ensuring every technical step is grounded in clear business purpose.
What is a Conversion? The Heart of Your Business Outcome
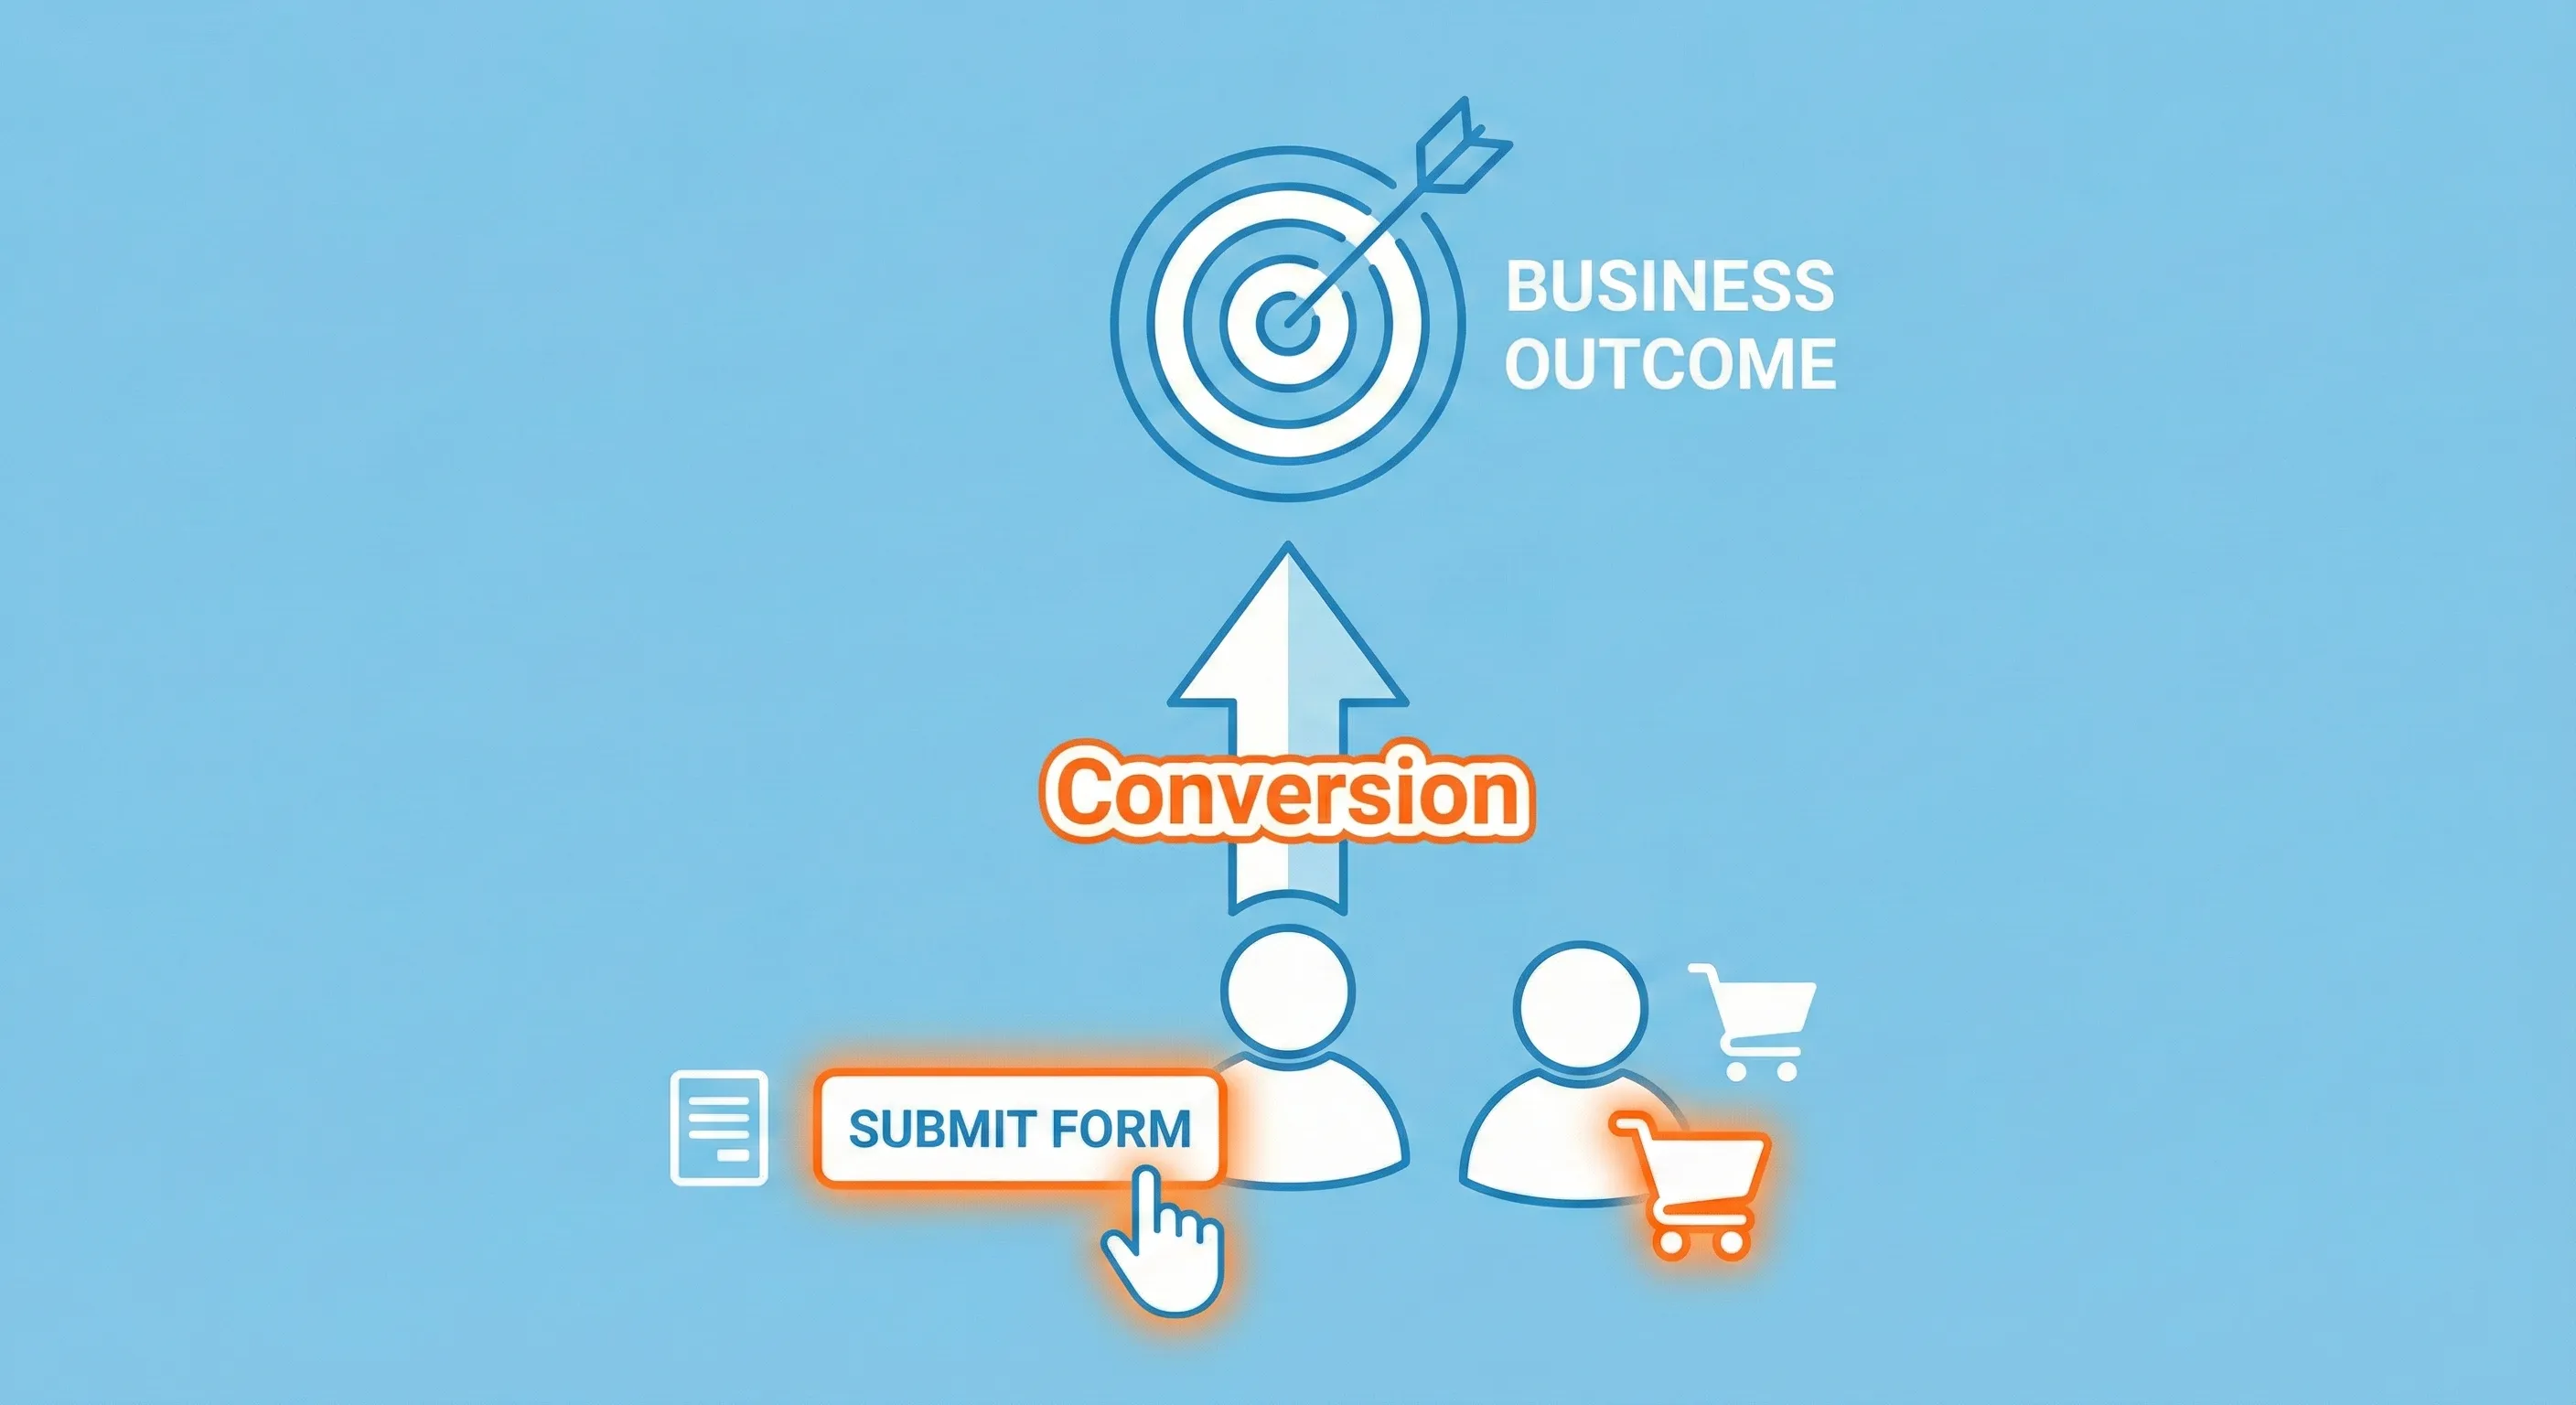
In Google Ads, a conversion isn’t a technical event like a click or page view. A conversion is a specific, valuable action that directly contributes to your desired Business Outcome. Every website exists to achieve outcomes: growing sales revenue, increasing qualified leads, or building an engaged community. The conversion is the user behaviour that makes that outcome happen. For example, if your Business Outcome is “increase qualified leads,” the conversion action is a user submitting a “Request a Quote” form. This reframes measurement from a technical task (“track form fills”) to a strategic objective (“measure behaviour that generates leads”).
Why is Tracking Conversions Crucial?
Without conversion tracking, marketers operate on intuition and vanity metrics like clicks and impressions, which say little about business impact. There are two essential reasons why robust conversion tracking is crucial for serious advertisers.
First, conversion tracking enables Google Ads optimisation. Google’s Smart Bidding strategies (Target CPA, Target ROAS, Maximise Conversions) are powerful machine learning algorithms that require accurate data. Conversion data allows these systems to learn which users, keywords, ads, and audiences drive real business results. Without it, algorithms can only optimise for clicks, which often don’t correlate with sales or leads, leading to wasted ad spend.
Second, conversion tracking provides data to answer Key Performance Questions (KPQs). Conversion data is the raw material for answering business questions that guide strategy. Examples include:
- “Which marketing channels are most effective at driving qualified leads?”
- “What is our overall sales conversion rate from paid search?”
- “What is the return on ad spend (ROAS) for our top campaigns?”
- “Which ad copy variations lead to the highest-value customers?”
Answering these questions transforms a marketer from a campaign operator into a strategic business driver.
Macro vs. Micro Conversions (The ARC Framework)
Not all conversions are created equal. To understand their relative value, it is helpful to use the ARC (Aware, Review, Convert) framework, which maps the typical user journey.
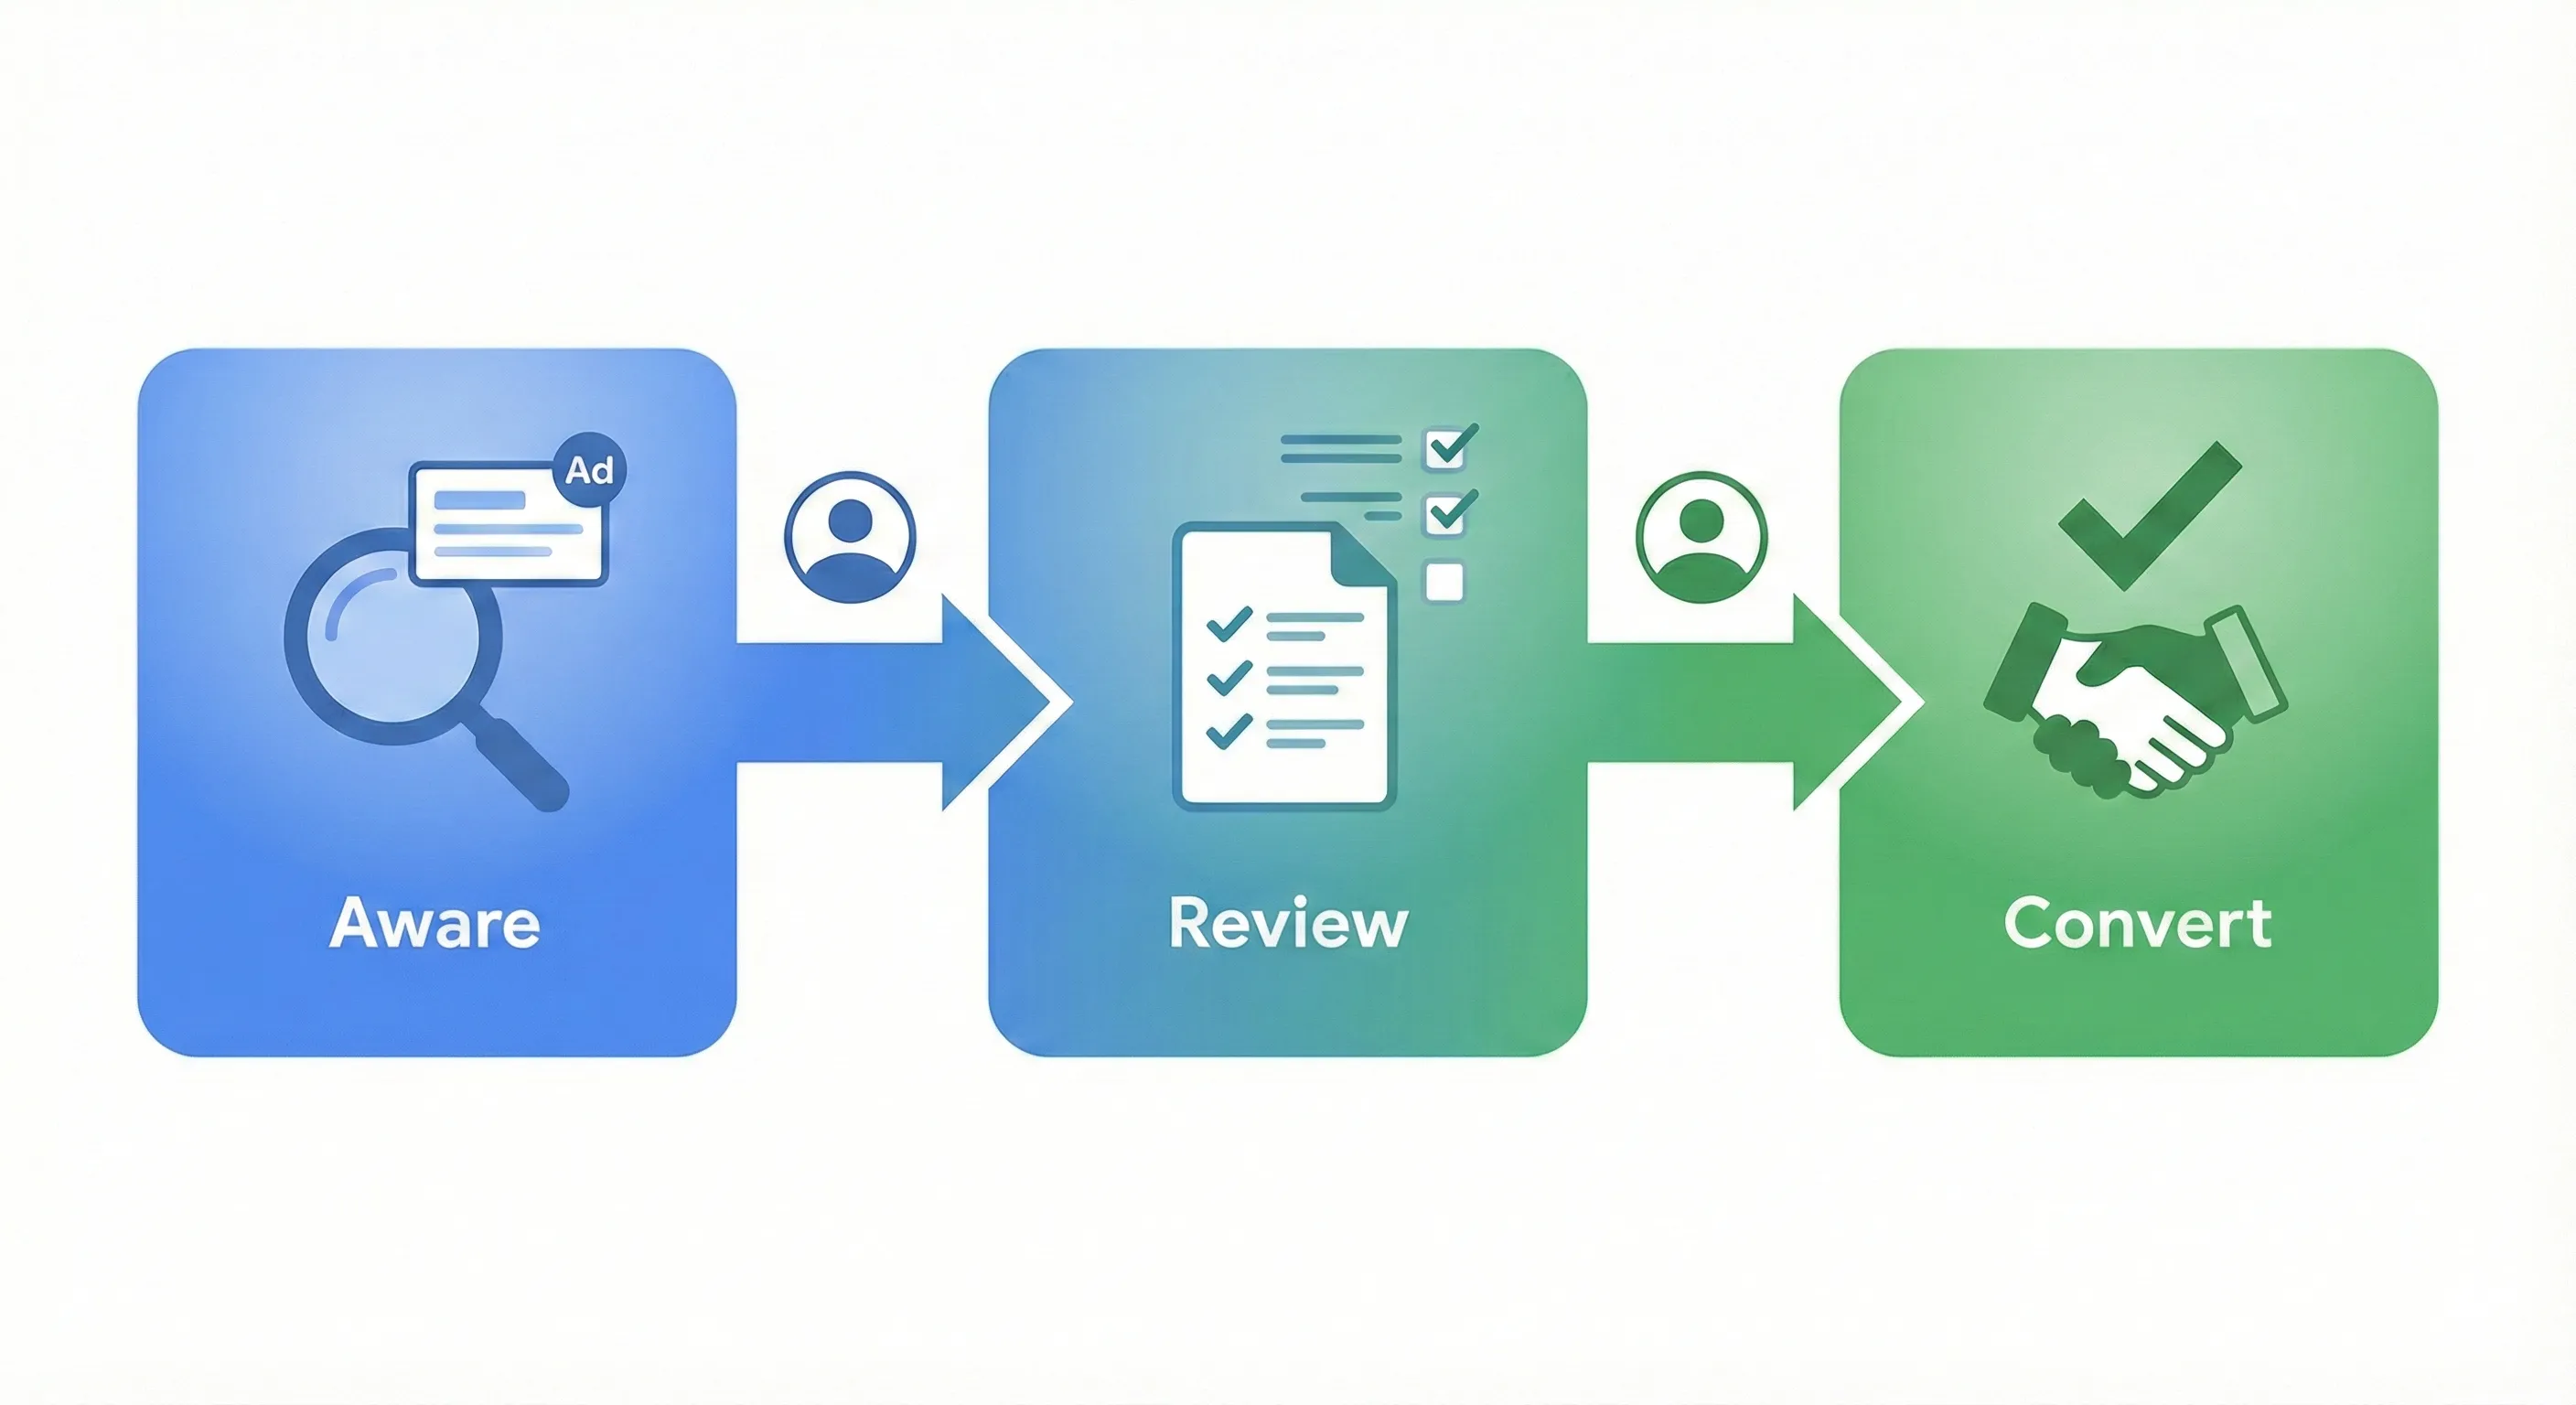
- Aware: How users discover a business (e.g., through a search ad).
- Review: How users evaluate the offer (e.g., by reading product pages, watching a demo, or downloading a whitepaper).
- Convert: When users take the final action that achieves the business outcome (e.g., making a purchase or submitting a lead form).
This framework provides a powerful mental model for categorising conversions and, critically, for telling Google Ads what to prioritise.
Macro-Conversions
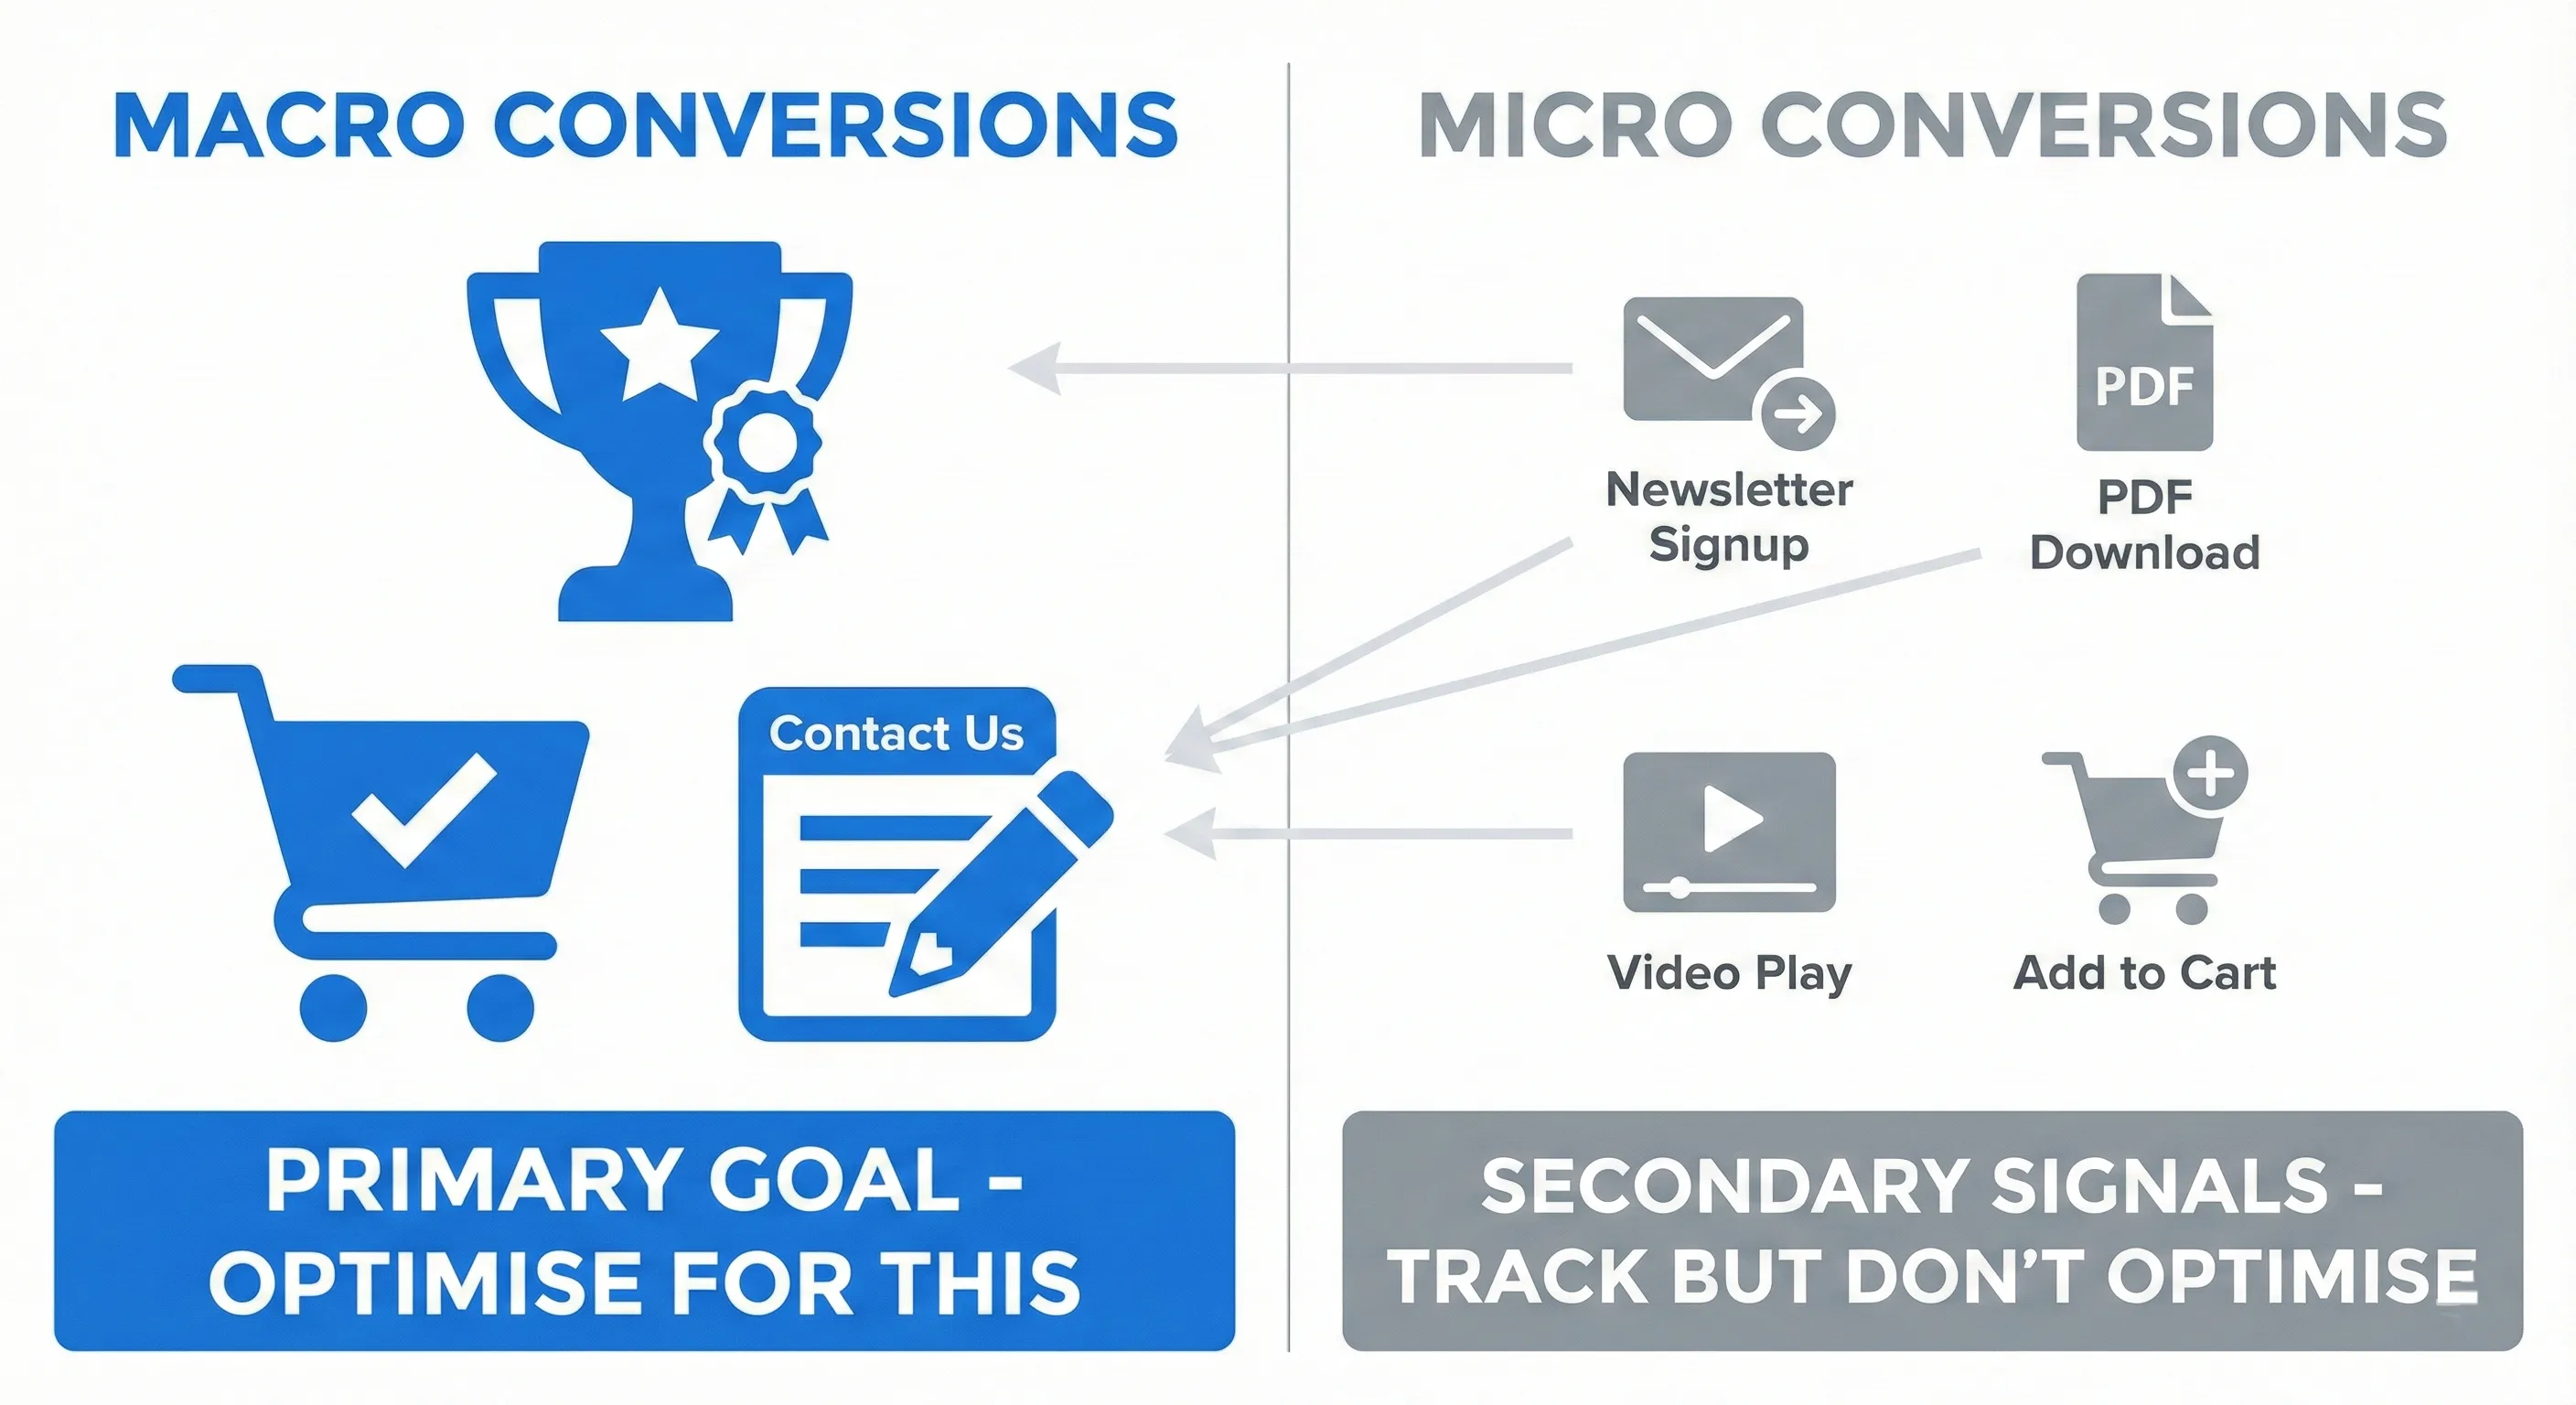
A macro-conversion is the primary goal: the most valuable action a user can take. These behaviours occur in the Convert stage, such as completed purchases or submitted “Contact Us” forms. Because these actions directly generate revenue or qualified leads, they’re what Google’s bidding algorithms should optimise for. When setting up a conversion action, macro-conversions should almost always be configured as “Primary” actions, explicitly telling Google’s Smart Bidding to find more people likely to perform this high-value action.
Micro-Conversions
A micro-conversion is a valuable secondary action indicating a user is moving through the Review stage. These engagement behaviours often precede macro-conversions: newsletter signups, case study downloads, product demo views, or adding items to cart. While valuable signals of interest, they’re not the ultimate goal. Optimising for newsletter signups could inadvertently de-prioritise actual sales. Therefore, micro-conversions should typically be set as “Secondary” actions in Google Ads. This allows you to track these engagements and answer behavioural KPQs like “Which content keeps visitors engaged longest?” without influencing primary bidding strategy.
Prerequisites: What You Need Before You Start
Before starting, ensure you have these three elements ready:
- An active Google Ads account: Your command centre for defining conversion goals and analysing campaign performance.
- An active Google Tag Manager (GTM) account: The free tool for adding tracking codes to your website without editing code directly. The main GTM container snippet must already be installed on every page of your website.
- Access to your website’s backend: Required to install the GTM container snippet initially. Have your developer available if needed.
Creating Your First Conversion Action: A Step-by-Step Walkthrough
The first critical step in the technical setup happens inside the Google Ads platform, not Google Tag Manager. This is where the “goal” or “conversion action” is defined. By following the strategic principles outlined above, each setting chosen in this section will be a deliberate, informed decision.
To begin, a new conversion action must be created within the Google Ads account.
- Sign in to your Google Ads account.
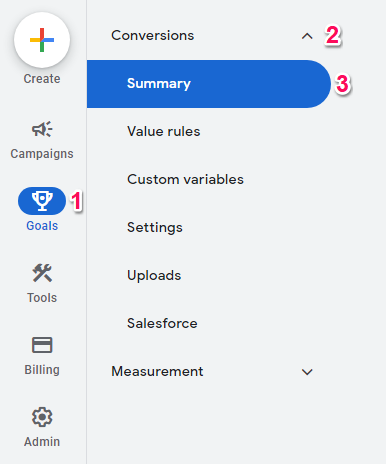
- Look to the left of the screen and click Goals > Conversions > Summary.
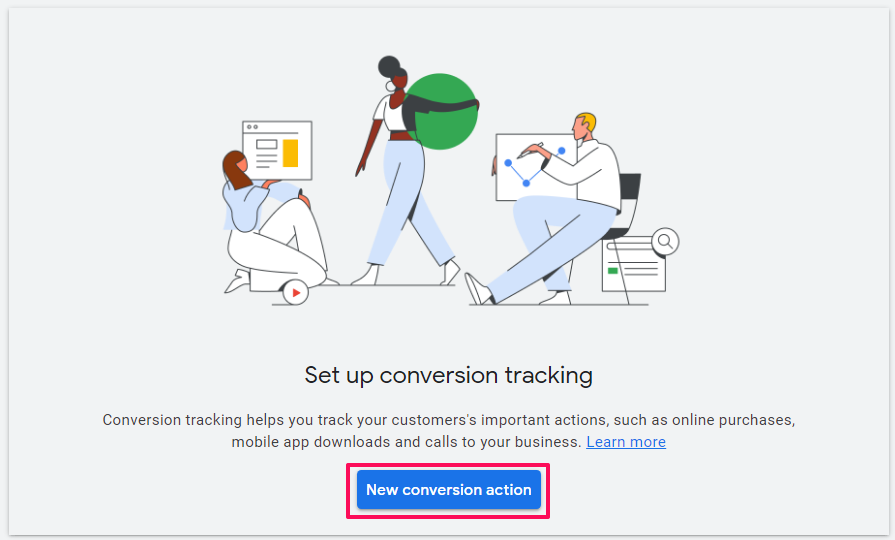
Click the New conversion action button. The location of the button varies depending on if the are existing conversion actions or not. The image below are how it looks when there are no existing conversion actions.
You’ll now see four main categories. We’re going to break down each one, explaining what it’s for and how to set it up with a special focus on using Google Tag Manager.
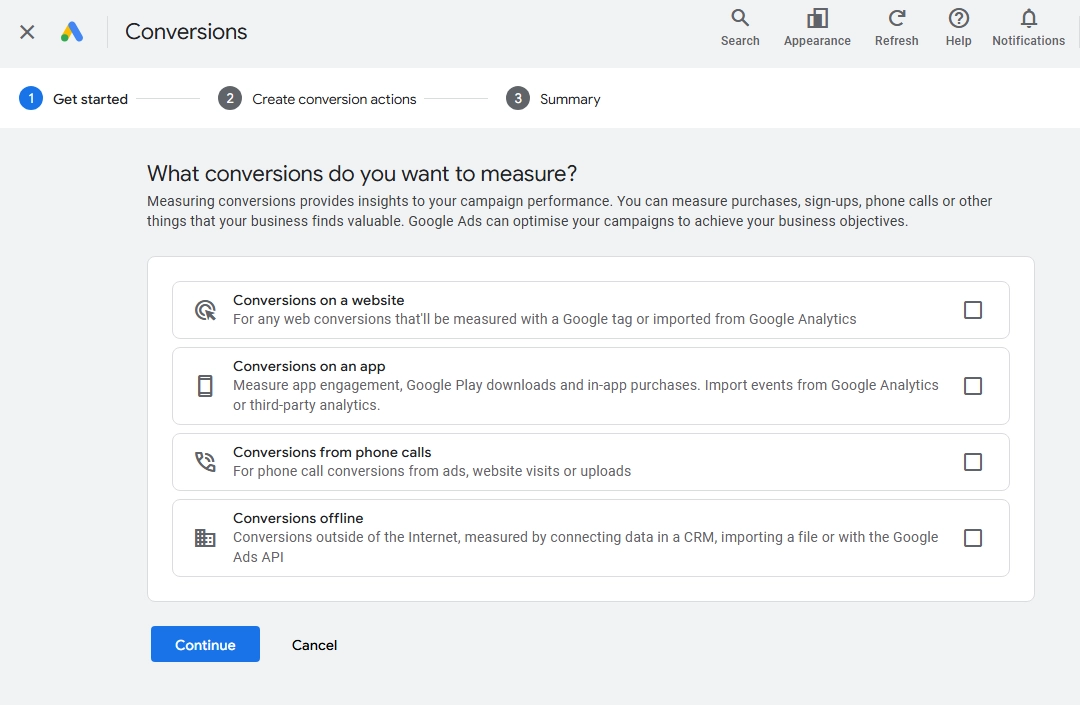
Types of Conversion Actions and Their GTM Compatibility
Google will ask to select the kind of conversions to track. Before selecting one, it is helpful to understand the main types and how they relate to Google Tag Manager (GTM), the tool this guide focuses on.
| Conversion Type | Description | Can it be tracked with GTM? |
| Conversions on a website | Measures valuable actions users take on your website, such as purchases, lead form submissions, or newsletter sign-ups. | Yes (Recommended). This is the most common use case for GTM. It allows you to deploy and manage tracking tags without editing website code. |
| Conversions on an app | Tracks app installs and in-app actions, like completing a level or making a purchase within your mobile app. | Yes (Advanced). While app tracking is primarily done via the Firebase SDK, GTM has mobile containers that integrate with Firebase to manage event tags. |
| Conversions from phone calls | Tracks calls to your business that originate from your ads, either directly from an ad or from your website after an ad click. | Yes. GTM is used to deploy the code that dynamically swaps your business number with a trackable Google Forwarding Number on your website. |
| Conversions offline | Measures conversions that start online with an ad click but are completed offline, such as a deal closed in-store or over the phone. | Yes (Indirect but Crucial). GTM is used to capture the Google Click ID (GCLID) from the URL and pass it into a hidden field in your lead forms for later use. |
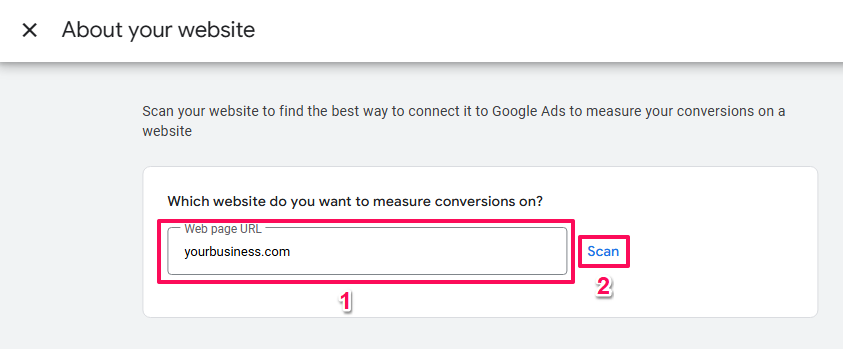
For this guide, the focus is on the most common and crucial type for most businesses: Website. Select it, enter the website domain, and click Scan.
Website Conversions
This is the most common and fundamental type of conversion you’ll track. It measures valuable actions that happen directly on your website.
Use Case: This is perfect for tracking e-commerce purchases, lead form submissions, newsletter sign-ups, or downloads of a PDF.
Walkthrough Example: Creating a “Purchase” Conversion Action
- Tick the Checkbox for the Conversions on a website options.

- Enter your website domain (e.g., yourbusiness.com) and click Scan. Google will check your site for its tracking tag.
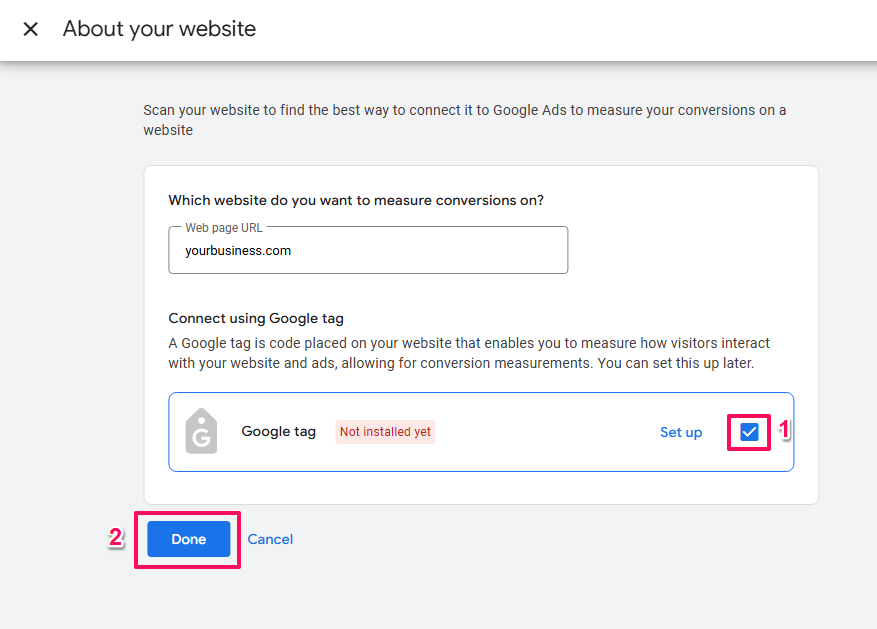
After the scan, scroll down and click + Add a conversion action manually. This gives us full control over every setting, which is exactly what we want.
Now, let’s configure the settings. This part is crucial, as these choices tell Google Ads not just what to track, but how to value it and use it for optimisation.
Choosing Your Settings (and What They Actually Mean)
After scanning the site, Google will present options to create a conversion action. It is best to set it up manually to have full control and understanding. Scroll down and click + Add a conversion action manually. This is where many marketers feel overwhelmed, but each setting has a clear purpose tied directly to business goals.
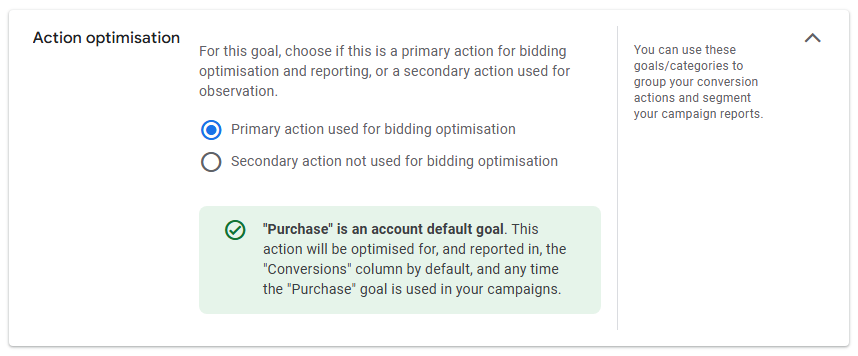
- Goal and action optimisation: This setting is how instructions are given to Google on what is most valued. As discussed in the previous section, Primary actions are used for bidding optimisation, while Secondary actions are for observation only. For a core business goal like a contact form submission or a purchase (a macro-conversion), this should be set to Primary.
- Name:

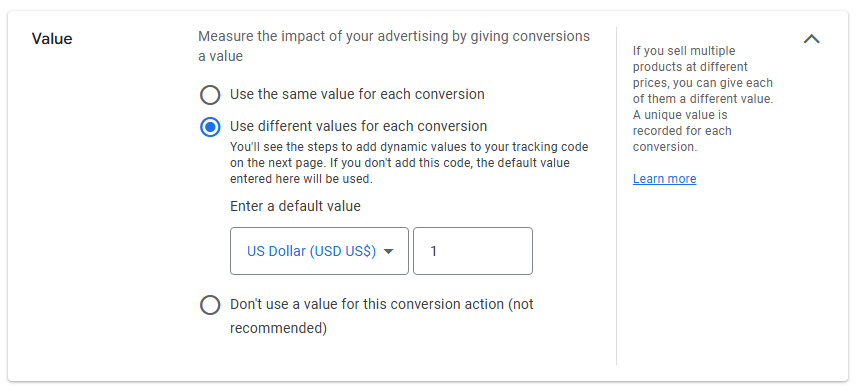
- Value: This setting is critical for calculating return on investment (ROI).
- Use the same value for each conversion: This is best for lead generation, where each lead has a similar estimated worth. Even an estimate is far better than zero. A simple way to calculate this: if it is known that 1 in every 10 leads turns into a customer worth $500, then the value per lead is $50. This single step is the foundation for proving marketing ROI.
- Use different values for each conversion: This is the standard for e-commerce, where the value of each purchase varies. This option requires a dynamic setup where the actual purchase total and currency are pulled from the website’s data layer on the confirmation page and passed into the conversion tag. This often requires developer assistance or a pre-built e-commerce integration.
- Don’t use a value: This is not recommended, as it prevents the measurement of ROI.
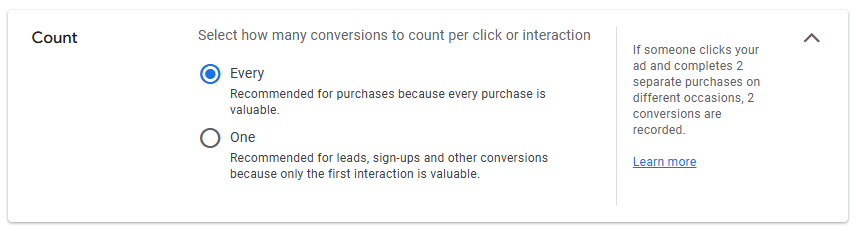
- Count: This setting determines how conversions are counted after a single ad interaction.
- Every: This should be chosen for sales or purchases. If a customer clicks an ad and buys three different items in three separate transactions, all three should be counted as valuable conversions.
- One: This should be chosen for leads. If the same person gets excited and fills out the contact form three times in one session, it is likely desirable to count that as only one new lead. This setting prevents the inflation of lead generation numbers.
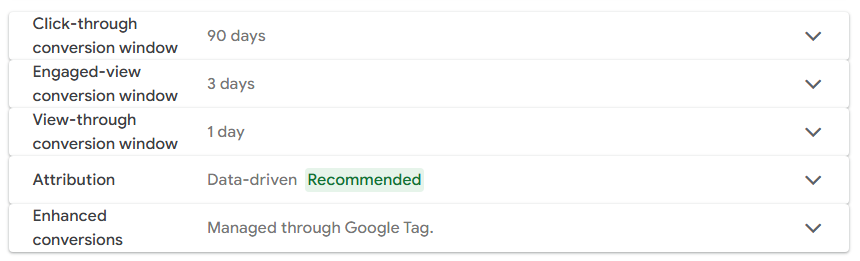
- Attribution model: In simple terms, attribution is how Google decides which ad click gets credit for a conversion when a customer interacts with multiple ads. Google’s default and recommended setting is Data-driven, which uses machine learning to assign credit based on how people engage with the various ads. For now, it is best to stick with this default. The primary goal is to get the tracking working correctly; attribution can be explored in more detail later once reliable data is flowing.
The table below provides a quick “cheat sheet” for these settings based on common business goals.
| Setting | What it Means | Recommendation for E-commerce | Recommendation for Lead Gen |
| Action optimisation | This decides if the conversion helps Google’s AI optimise your bids (Primary) or is just for your observation (Secondary). | Primary | Primary |
| Conversion name | A clear, descriptive name for your action that will appear in your reports (e.g., “Main Website Purchase”). | ||
| Value | This is how much a conversion is worth to your business. It can be a fixed amount or a dynamic amount that changes with each sale. | Use different values for each conversion (requires dynamic setup). | Use the same value for each conversion (based on an estimate). |
| Count | This setting asks if you want to count every conversion from one person (like multiple purchases) or just one (like a single lead form submission). | Every | One |
| Attribution Model | This determines how credit for a conversion is given to your ads along the customer’s journey. | Data-driven (Default) | Data-driven (Default) |
Getting the Conversion ID and Label
On the next screen, you’ll see setup instructions. Click the tab that says Use Google Tag Manager. This is our preferred, most flexible method.
You will be given two critical pieces of information: a Conversion ID and a Conversion Label. Copy these to a notepad; they are the keys that link GTM to this specific conversion action.
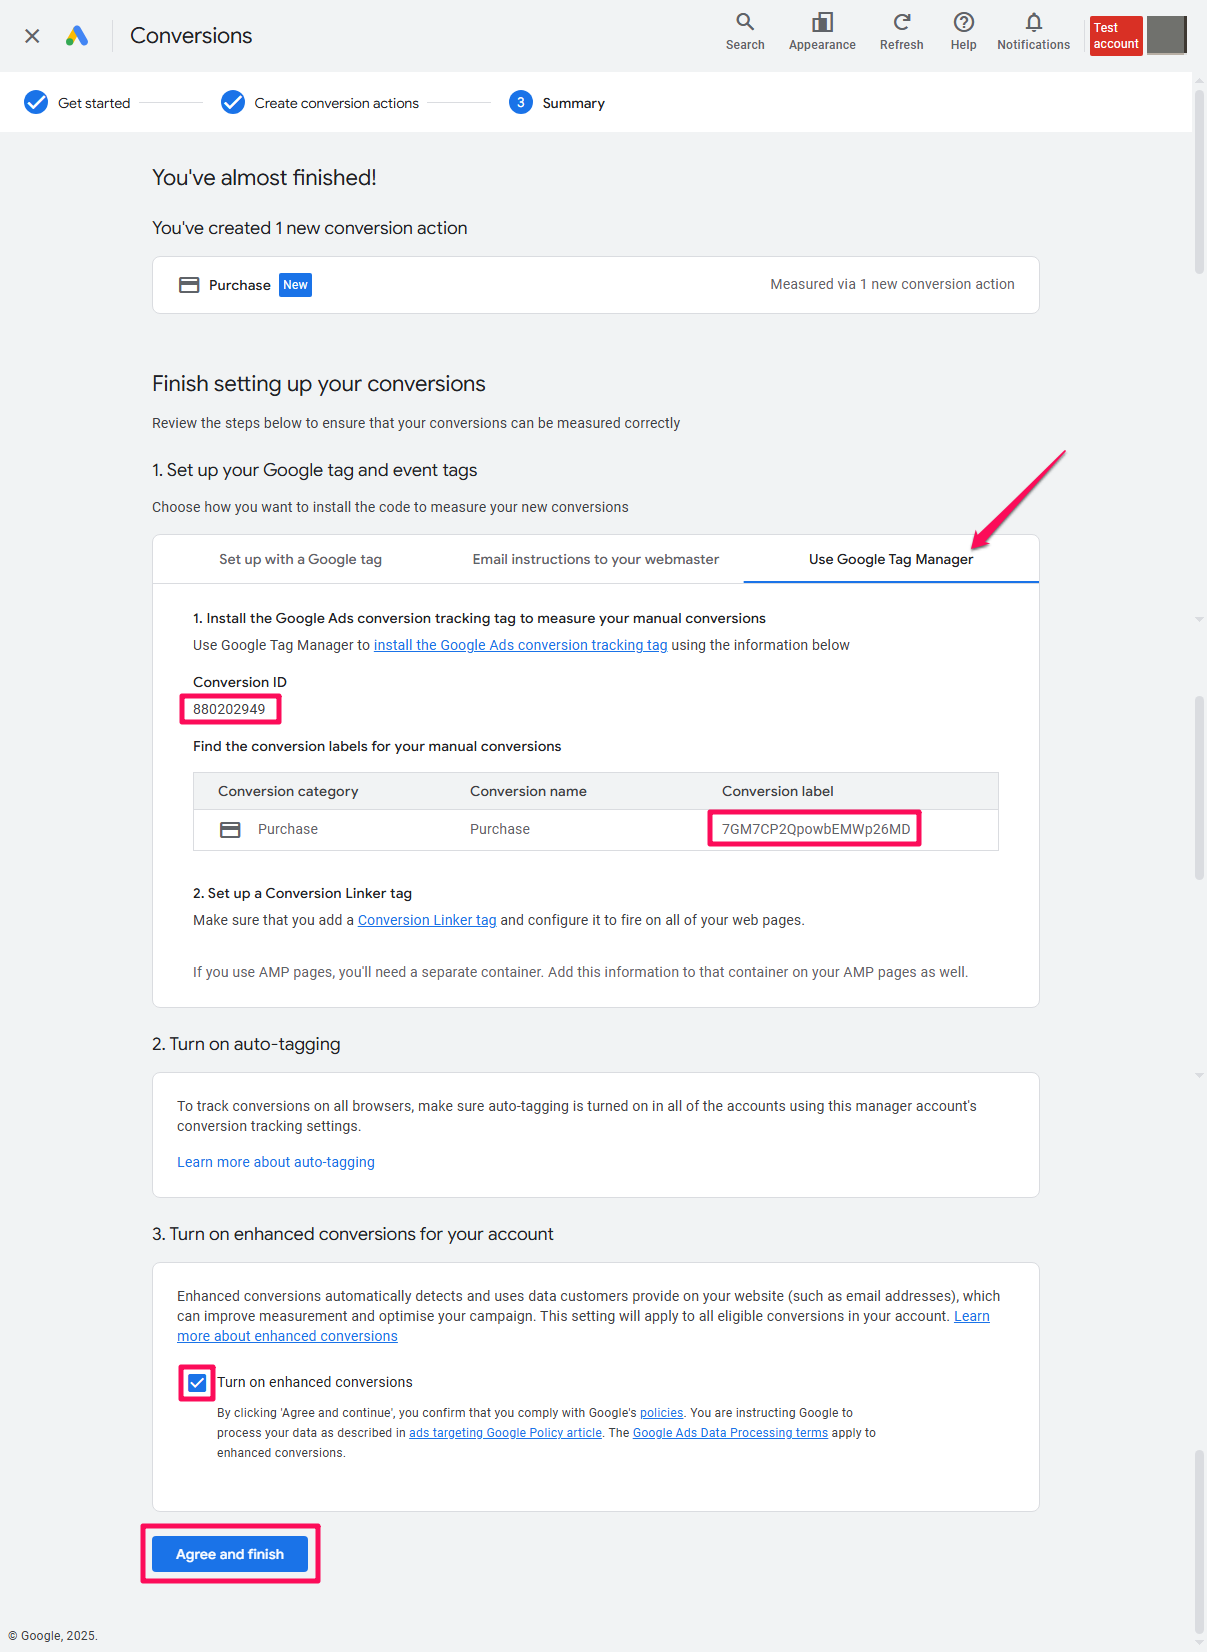
If you clicked Agree and finish and forgot to note the Conversion ID and Conversion label, fear not, you can get them from the newly created Conversion Action.
- Click on the newly created conversion action.
- Under “Tag setup,” click the Use Google Tag Manager tab.
- The Conversion ID and the Conversion Label. will now be visible.
Think of these as the unique address for the conversion. The Conversion ID is like a building’s street address; it’s the same for all conversions in the account. The Conversion Label is like the specific apartment number; it’s unique to this specific conversion action just created. Both of these are needed to tell Google Tag Manager exactly where to send the “success” signal. Keep this browser tab open or copy these values somewhere safe. They will be needed in the next part.
A Primer on Enhanced Conversions
Before moving to tag setup, understand Enhanced Conversions, a crucial feature for modern tracking. With increasing privacy regulations and the phasing out of third-party cookies, traditional tracking methods are becoming less reliable. Enhanced Conversions is Google’s solution.
It improves tracking accuracy by securely sending hashed, first-party data (email addresses, phone numbers, or home addresses) from your website to Google after a conversion occurs. The data is anonymised before leaving the user’s browser, then used to match conversions back to ad clicks when traditional identifiers like cookies aren’t available. This “recovers” conversions that would otherwise be lost, leading to more complete data and smarter bidding.
Whilst detailed implementation often requires data layer modifications, enabling the feature in Google Ads UI is the first step toward this more robust tracking method.
Setting Up the Google Tag in GTM (Your Foundation Tag)
The Google Tag is the single foundational tag that powers all Google Ads tracking. This one tag handles multiple critical functions some of which were previously handled by the separate Conversion Linker and Remarketing Tags:
- First-party cookie management (replaces the legacy Conversion Linker functionality)
- Remarketing audience building (tracks visitors for retargeting campaigns)
- Conversion foundation (required for conversion tracking tags to work properly)
- Cross-domain tracking (preserves the Google Click ID across domains)
Why just one tag now? In 2023, Google consolidated the separate Conversion Linker tag functionality directly into the Google Tag, simplifying your tracking setup and improving reliability. If you see older guides mentioning both tags separately, that’s outdated – you only need the Google Tag.
How to Set It Up
- First, get your Google Tag ID from Google Ads:
In Google Ads, go to Tools > Data Manager
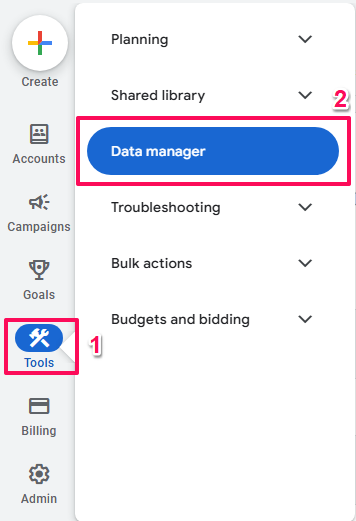
Under the Google tag section, click Manage
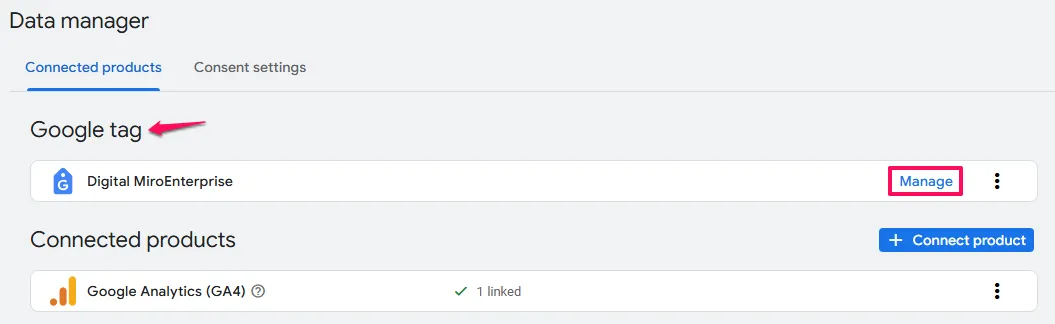
You’ll see your Tag ID (format: AW-XXXXXXXXXX). Copy this ID.

- In Google Tag Manager:
- Go to
Tagsand clickNew. - Name the tag to make it easy to identify eg
GAds - Google Tag. - Click on
Tag Configurationand selectGoogle Ads. - From the options that appear, choose
Google Tag. - A field for
Tag IDwill appear. Here, paste theConversion IDfrom Google Ads (the one starting withAW) that was saved in Part 1. - Click on
Triggeringand select theAll Pagestrigger. - Click
Save.

Important: This tag must fire on ALL pages of your website, not just conversion pages. It needs to capture the Google Click ID (GCLID) when visitors arrive from your ads, which is essential for accurate conversion attribution.
What Happened to the Conversion Linker and Remarketing Tags?
If you’ve worked with Google Ads tracking before, you might remember needing multiple tags:
Conversion Linker Tag:
- Purpose: Stored first-party cookies to preserve the Google Click ID (GCLID)
- Status: Functionality merged into Google Tag in 2023
- If you have it installed: Safe to leave in place, but no longer needed for new setups
Google Ads Remarketing Tag:
- Purpose: Built remarketing audiences by tracking visitor behavior
- Status: Functionality merged into Google Tag in 2023
- If you have it installed: Safe to leave in place, but the Google Tag now handles this
The Consolidation: Google recognized that having separate tags for related functions created unnecessary complexity. The modern Google Tag performs all three functions (attribution, remarketing, and conversion foundation) in a single, streamlined implementation.
Migration note: If you have existing Conversion Linker and/or Remarketing tags that are working, there’s no urgent need to remove them – Google’s system handles redundancy gracefully. However, for new implementations or when you next audit your tags, simplifying to just the Google Tag is recommended.
Old Method vs. Current Method (2025)
| Setup Element | Old Method (Pre-2023) | Current Method (2025) |
|---|---|---|
| Foundation Tags Required | Conversion Linker + Google Ads Remarketing Tag (2 separate tags) | Google Tag only (1 tag does both) |
| First-Party Cookie Management | Conversion Linker tag | Built into Google Tag |
| Remarketing Audiences | Separate Remarketing tag required | Built into Google Tag |
| Conversion Attribution | Conversion Linker handles this | Google Tag handles this |
| Setup Complexity | Install 2+ tags, manage multiple triggers | Install 1 tag, one trigger (All Pages) |
| Troubleshooting | More tags = more potential failure points | Single tag = easier to debug |
| Current Status | Legacy (still works, but outdated) | Current best practice (2023+) |
Bottom line: The modern Google Tag consolidates what used to require two separate tags (Conversion Linker for attribution + Remarketing Tag for audiences) into a single, more efficient implementation. If you’re setting up tracking today, you only need the Google Tag.
Tracking Specific Conversions
Method 1: The Data Layer
The most robust, accurate, and scalable method for tracking conversions is to use a data layer. This approach involves a developer pushing a small snippet of JavaScript to the data layer when a conversion occurs, which GTM then uses as a trigger.
The “Why”: A Deeper Dive into Data Layer Superiority
Choosing to implement a data layer is a shift from a tactical “tag-on-page” mindset to a strategic approach to data architecture. The benefits are substantial and address the core weaknesses of older methods.
- Reliability: Tracking is decoupled from the website’s presentation layer (HTML/CSS) and URL structure. If your marketing team decides to change the thank you page URL from /thank-you to /order-confirmation, a URL-based trigger will silently break. A data layer event, however, will continue to fire correctly as long as the developer pushes the same event name, making your tracking resilient to website redesigns and content updates.
- Data Richness: This is the most significant advantage. A URL alone cannot convey dynamic, transaction-specific information. The data layer can carry a wealth of contextual data, such as unique transaction IDs to prevent duplicate conversions, precise revenue values for ROAS calculations, currency codes, and even detailed product information. This rich data unlocks more sophisticated reporting, audience building, and optimisation capabilities within Google Ads.
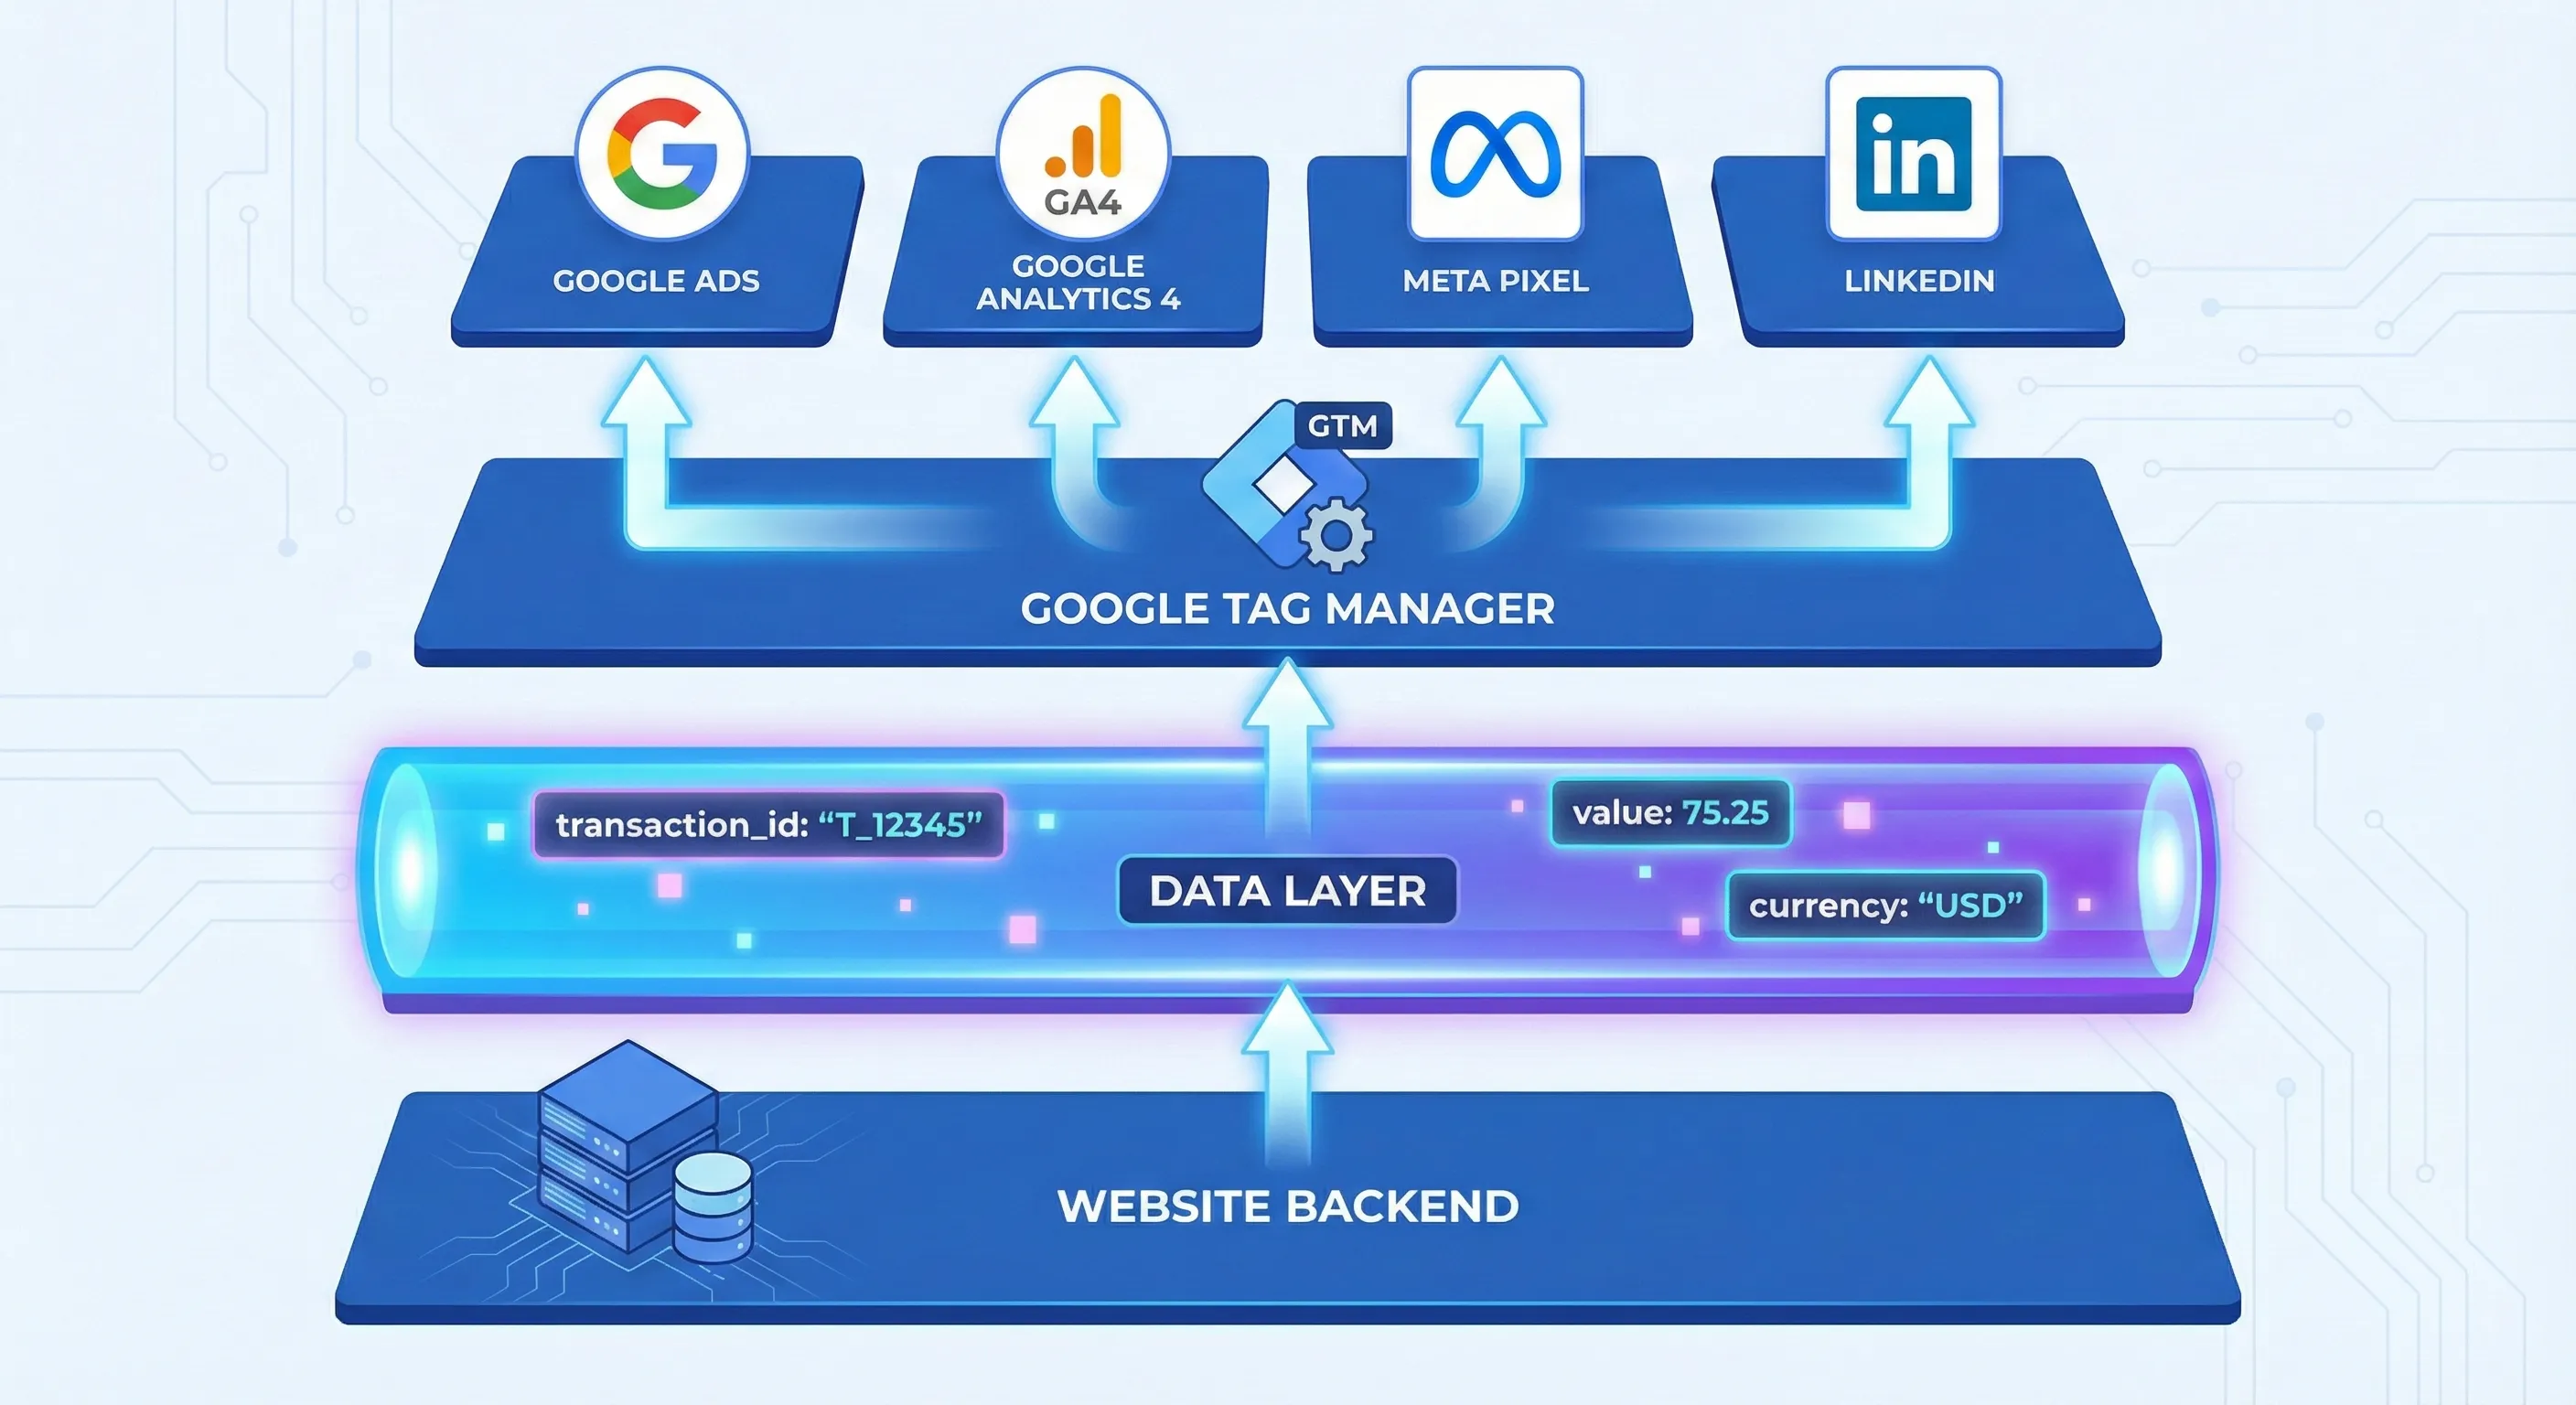
- Scalability & The Single Source of Truth: A well-structured, GA4-compatible data layer becomes a universal data bus for your website. The same purchase event can be used as a trigger for the Google Ads conversion tag, a GA4 ecommerce tag, a Meta Pixel purchase event, and any other marketing or analytics platform. This practice eliminates redundant tracking code, reduces the risk of data discrepancies between platforms, and ensures all systems are reporting based on the same foundational event, creating a scalable and maintainable tracking architecture.
The following table provides an at-a-glance comparison to help illustrate these points when discussing implementation with stakeholders.
| Feature | Data Layer Method (Recommended) | Thank You Page Method (Fallback) |
| Reliability | High. Independent of URL changes and website redesigns. | Low. Brittle; breaks if the “Thank You” page URL is changed. |
| Data Richness | High. Can pass dynamic transaction IDs, values, currency, etc. | Very Low. Cannot easily pass dynamic values. Static values only. |
| Accuracy | High. Captures the event at the moment of conversion. | Moderate. Can misfire on page reloads or accidental visits. |
| Scalability | High. Creates a single event to trigger multiple marketing tags. | Low. Requires separate logic for each marketing platform. |
| Future-Proofing | High. Aligns with modern, event-driven analytics (GA4). | Low. A legacy approach that is incompatible with modern web apps. |
Purchase Event Setup: Tracking Ecommerce Success
For an ecommerce transaction, the goal is to capture the purchase event along with its unique ID, value, and currency.
The Developer Handoff: The Data Layer Snippet
Provide the following JavaScript snippet to your developer. It should be executed on the confirmation page immediately after a successful transaction is processed. The values for transaction_id, value, and currency must be populated dynamically from your backend system. This structure is compatible with the official Google Analytics 4 purchase event schema, ensuring forward compatibility.
<script>
  window.dataLayer = window.dataLayer || [];
  window.dataLayer.push({
    event: 'purchase',
    ecommerce: {
        transaction_id: 'T_12345', // E.g.: Unique ID for the transaction
        value: 75.25,             // E.g.: Total transaction value, including tax and shipping
        currency: 'USD',          // E.g.: The currency of the transaction
        items: [
          {
            item_id: 'SKU_001',   // E.g.: Product SKU or ID
            item_name: 'Cool T-Shirt', // E.g.: Product Name
            price: 25.00,         // E.g.: Price per unit
            quantity: 2           // E.g.: Quantity of this item
          },
          {
            item_id: 'SKU_002',
            item_name: 'Awesome Hat',
            price: 25.25,
            quantity: 1
          }
        ]
    }
  });
</script>
GTM Configuration: Step-by-Step
Once the data layer is in place, configure GTM to read this information and send it to Google Ads.
1. Create Variables
First, create variables in GTM to capture the dynamic values from the data layer.
- Navigate to Variables > User-Defined Variables > New.
- Variable 1: Transaction ID
- Variable Type: Data Layer Variable
- Variable Name: dlv – ecommerce.transaction_id
- Data Layer Variable Name: ecommerce.transaction_id
- Save the variable.
- Variable 2: Transaction Value
- Variable Type: Data Layer Variable
- Variable Name: dlv – ecommerce.value
- Data Layer Variable Name: ecommerce.value
- Save the variable.
- Variable 3: Transaction Currency
- Variable Type: Data Layer Variable
- Variable Name: dlv – ecommerce.currency
- Data Layer Variable Name: ecommerce.currency
- Save the variable.

2. Create the Trigger
Next, create a trigger that listens for the custom purchase event.
- Navigate to Triggers > New.
- Trigger Type: Custom Event
- Trigger Name: custom – purchase
- Event Name: purchase
- Leave the trigger to fire on “All Custom Events”.
- Save the trigger.

3. Create the Tag
Finally, create the Google Ads tag that will send the conversion data.
- Navigate to Tags > New.
- Tag Type: Google Ads Conversion Tracking
- Tag Name: Google Ads – Conversion – Purchase
- Conversion ID: Enter your Google Ads Conversion ID.
- Conversion Label: Enter the Conversion Label for your purchase action.
- Conversion Value: Click the variable icon and select {{dlv – ecommerce.value}}.
- Transaction ID: Click the variable icon and select {{dlv – ecommerce.transaction_id}}.
- Currency Code: Click the variable icon and select {{dlv – ecommerce.currency}}.
- Triggering: Click the triggering section and select the custom – purchase trigger you created.
- Save the tag.

Lead Event Setup: Capturing High-Value Interest
For lead generation, the process is similar but simpler, as you may not always have a dynamic value.
The Developer Handoff: The Data Layer Snippet
Provide this snippet to your developer to be executed upon a successful form submission (e.g., within the form’s “on-success” JavaScript callback). This uses the GA4-recommended generate_lead event name.
<script>
  window.dataLayer = window.dataLayer || [];
  window.dataLayer.push({
    event: 'generate_lead',
    value: 50.00,     // E.g.: The monetary value of the lead
    currency: 'USD'   // E.g.: The currency for the value
  });
</script>
GTM Configuration: Step-by-Step
1. Create Variable (Optional)
If you are assigning a value to your leads, create a variable to capture it.
- Navigate to Variables > User-Defined Variables > New.
- Variable Type: Data Layer Variable
- Variable Name: dlv – lead_value
- Data Layer Variable Name: value
- Save the variable.
2. Create the Trigger
- Navigate to Triggers > New.
- Trigger Type: Custom Event
- Trigger Name: Custom Event – generate_lead
- Event Name: generate_lead
- Save the trigger.
3. Create the Tag
- Navigate to Tags > New.
- Tag Type: Google Ads Conversion Tracking
- Tag Name: Google Ads – Conversion – Generate Lead
- Conversion ID: Enter your Google Ads Conversion ID.
- Conversion Label: Enter the Conversion Label for your lead action.
- Conversion Value: If you created the variable, select {{dlv – lead_value}}. Otherwise, you can leave this blank or enter a static average value.
- Currency Code: If you are sending a value, enter the appropriate currency code (e.g., USD).
- Triggering: Select the Custom Event – generate_lead trigger.
- Save the tag.
Method 2: The Thank You Page
This method should only be used as a last resort when implementing a data layer is technically infeasible or not possible within project constraints. It relies on a user visiting a specific confirmation or “thank you” page after completing an action.
Explaining the Inherent Limitations
While simple to set up, this method comes with significant drawbacks that compromise data quality:
- Brittle and Unreliable: The tracking is entirely dependent on the URL. If a developer or content manager changes the URL from /thank-you to /form-success, your tracking will instantly and silently break.
- Inaccurate Firing: A user who bookmarks the thank you page and revisits it later, or simply refreshes the page, can trigger a duplicate conversion. This pollutes your data with false positives and makes it difficult to trust your conversion counts.
- No Dynamic Data: This is the most critical limitation. You cannot easily pass dynamic, transaction-specific data like the exact purchase value or a unique transaction ID. This makes accurate ROAS calculation impossible and removes the ability to deduplicate conversions on the Google Ads side.
GTM Configuration: Step-by-Step
If you must use this method, follow these steps.
1. Create the Trigger
- Navigate to Triggers > New.
- Trigger Type: Page View
- Trigger Name: Page View – Thank You Page
- Set the trigger to fire on Some Page Views.
- Configure the firing condition as follows:
- Page URL | contains | /thank-you
- Note: Be as specific as possible with the URL string to minimise the risk of the trigger firing on other pages that might contain the same word (e.g., a blog post about thank you pages).
- Save the trigger.
2. Create the Tag
- Navigate to Tags > New.
- Tag Type: Google Ads Conversion Tracking
- Tag Name: Google Ads – Conversion – Thank You Page
- Conversion ID: Enter your Google Ads Conversion ID.
- Conversion Label: Enter the appropriate Conversion Label.
- Conversion Value / Transaction ID: Leave these fields blank or enter a static average value for your conversions. Acknowledge that this sacrifices data precision.
- Triggering: Select the Page View – Thank You Page trigger you created.
- Save the tag.
Testing & Verification
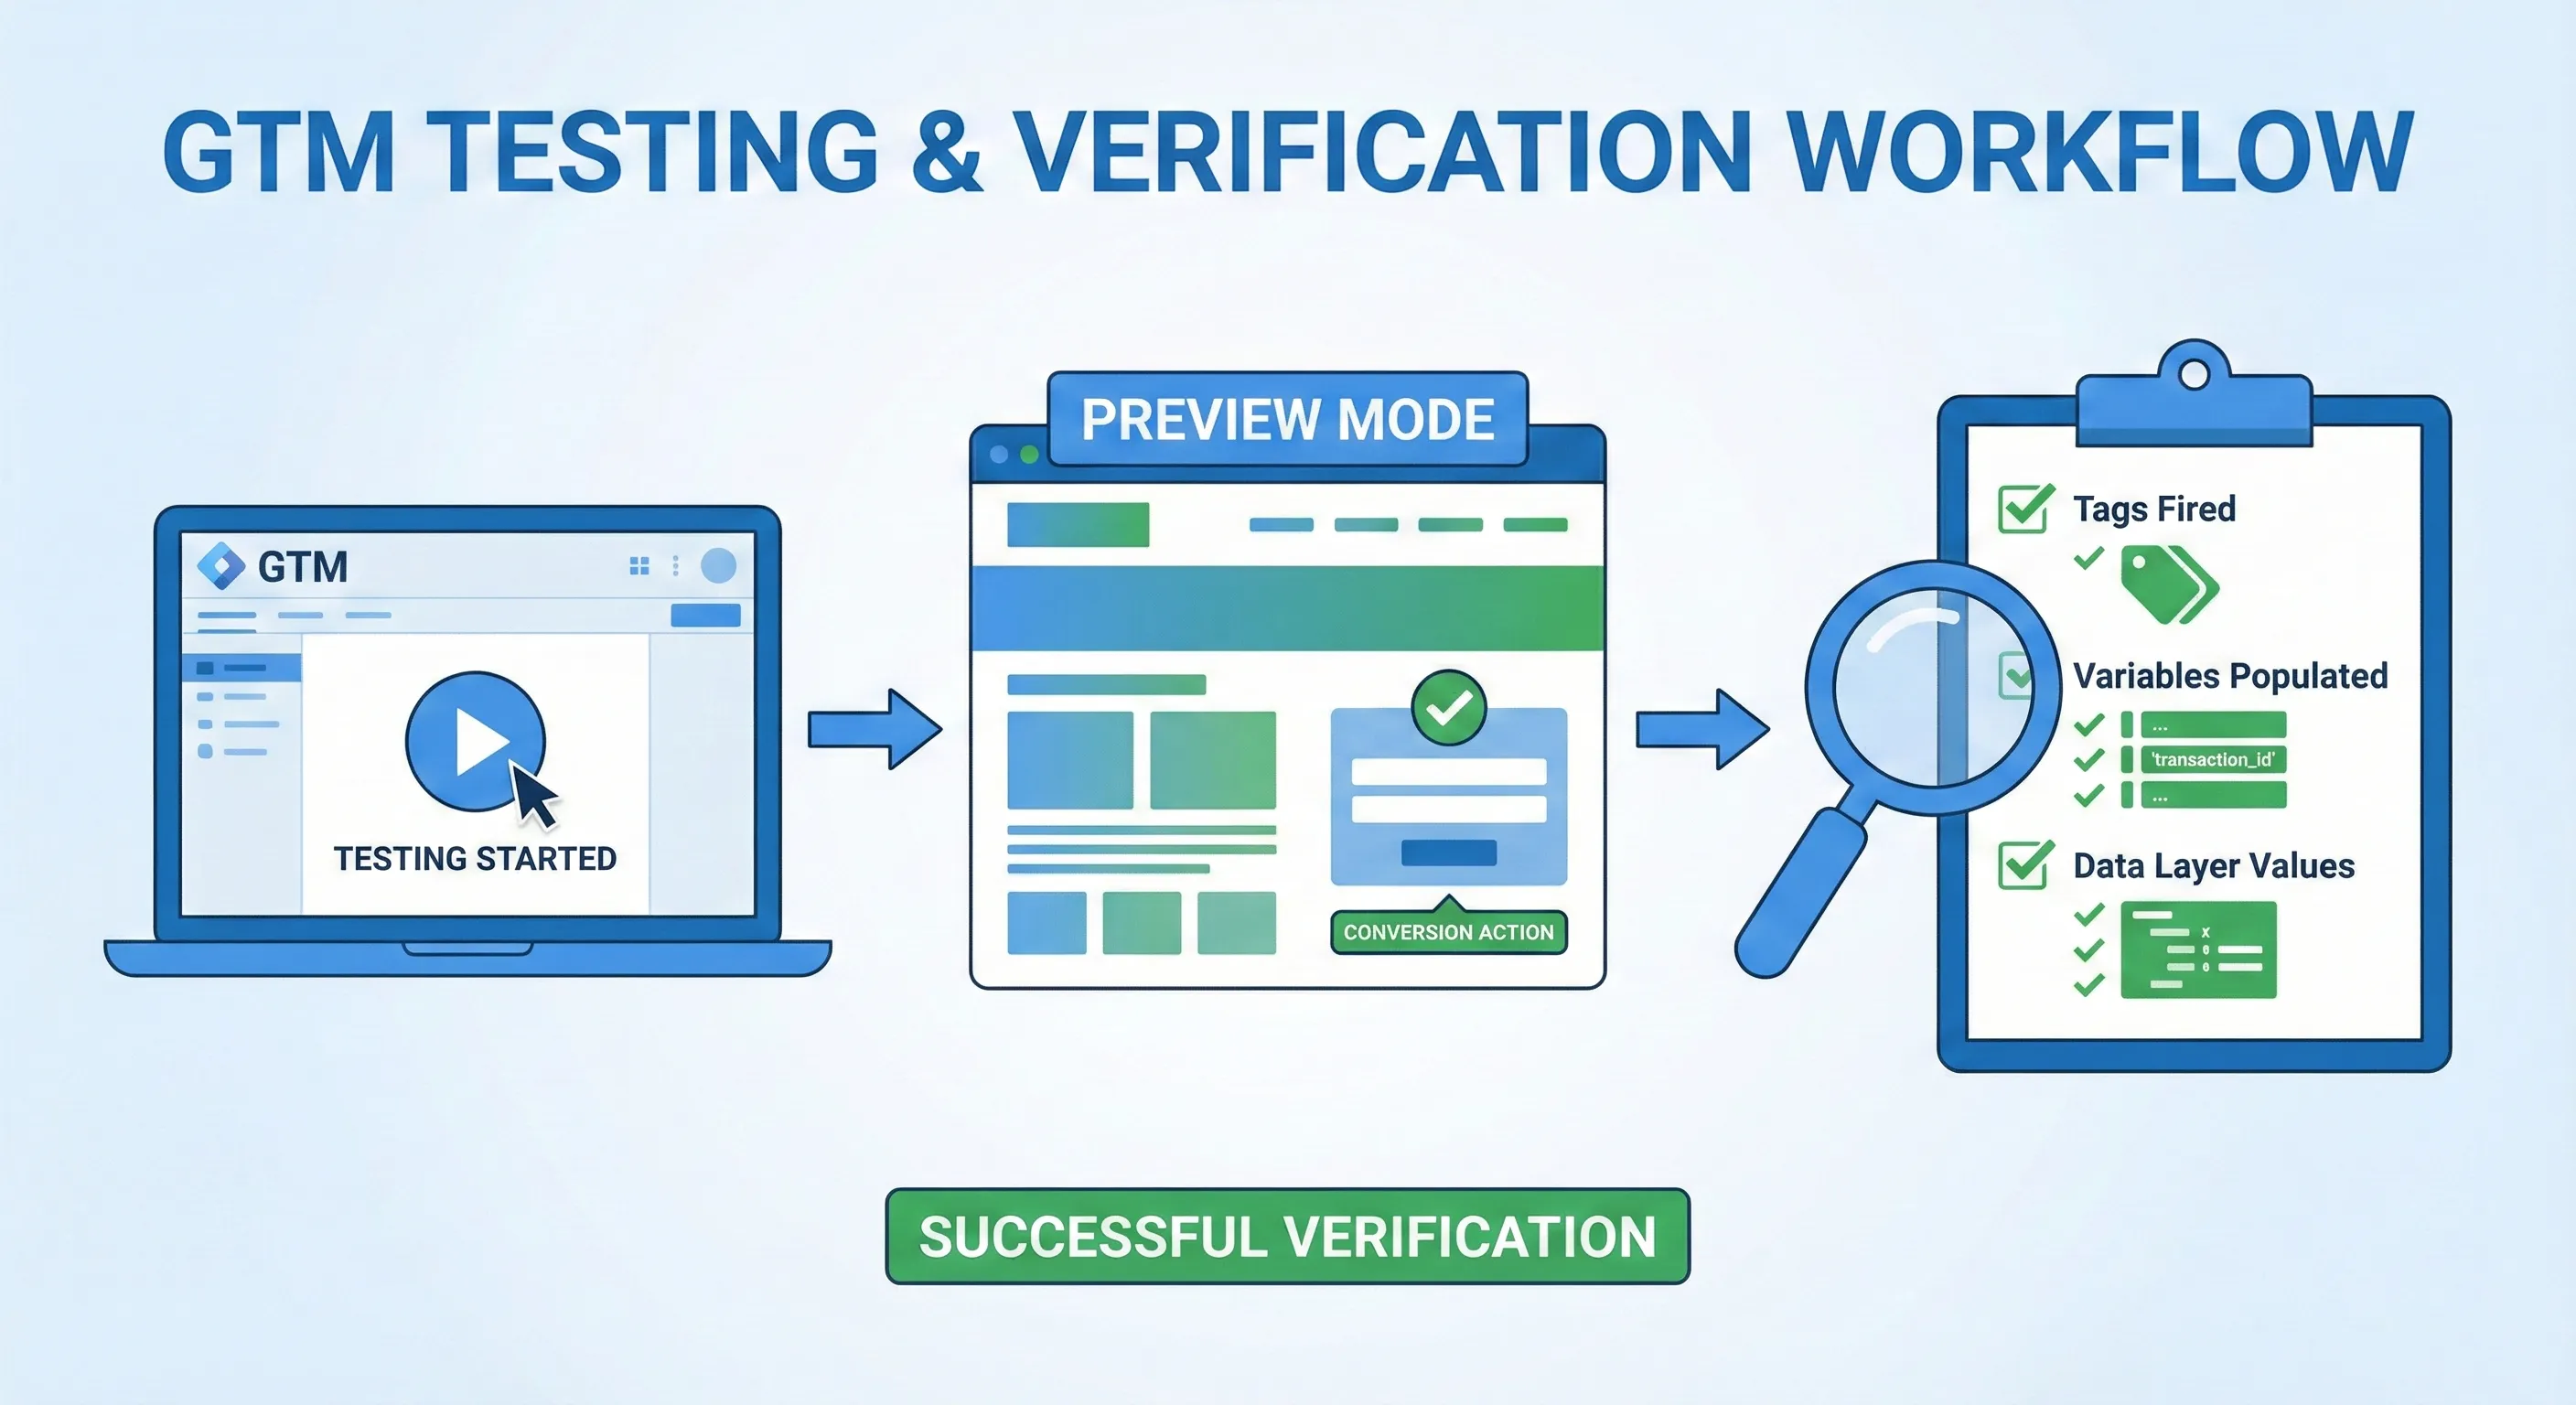
The golden rule of tag management is to never publish blindly. Testing is a mandatory step to ensure your implementation is working as expected before it goes live and begins influencing your ad spend.
Using GTM’s Preview Mode (Tag Assistant)
Google Tag Manager’s built-in Preview Mode is an indispensable tool for debugging your setup.
- In the top-right corner of your GTM workspace, click Preview.
- A new browser tab will open for the Tag Assistant. Enter your website’s URL and click Connect.
- Your website will open in a new tab with the Tag Assistant debug pane connected.
- On your website, perform the action required to trigger the conversion (e.g., complete a test purchase or submit a lead form).
- Return to the Tag Assistant tab to analyse the results.
What to Look For (Data Layer Method)
- In the left-hand event summary, click on your custom event name (e.g., purchase or generate_lead).
- Under the “Tags Fired” section, verify that your Google Ads Conversion Tracking tag is listed.
- Click on the tag to inspect its details. Select the Variables tab in the tag details view.
- Confirm that your data layer variables (dlv – ecommerce.value, etc.) are populated with the correct, dynamic data from your test transaction.
This ability to inspect the data layer directly is a powerful feature. It transforms tracking from a “black box” into a transparent process. If a developer has missed a key in the dataLayer.push(), a marketer can now provide a precise, actionable bug report (“The transaction_id key is missing from the purchase event”) instead of a vague “tracking is broken” message. This fosters better collaboration and accountability.
What to Look For (Thank You Page Method)
- In the left-hand event summary, navigate to the Container Loaded event that corresponds to your thank you page URL.
- Verify that your Google Ads Conversion Tracking tag is listed under “Tags Fired” for this event. There will be no dynamic data to inspect.
Now for the rewarding part: tracking a specific, valuable action that a user takes on the website. This is where measurement moves beyond basic page views and starts quantifying what truly drives the business forward.
Checking the Status in Google Ads
After verifying everything with Preview Mode and clicking the “Submit” button in GTM to publish the changes, the final check is back in Google Ads. It is important to be patient; it can take a few hours, or sometimes up to 24 hours, for Google Ads to process the data and update the status of the conversion action.
The status can be found by navigating to Goals > Conversions > Summary and looking at the “Tracking status” column for the conversion action created. The following is a guide to interpreting these statuses to avoid unnecessary panic.
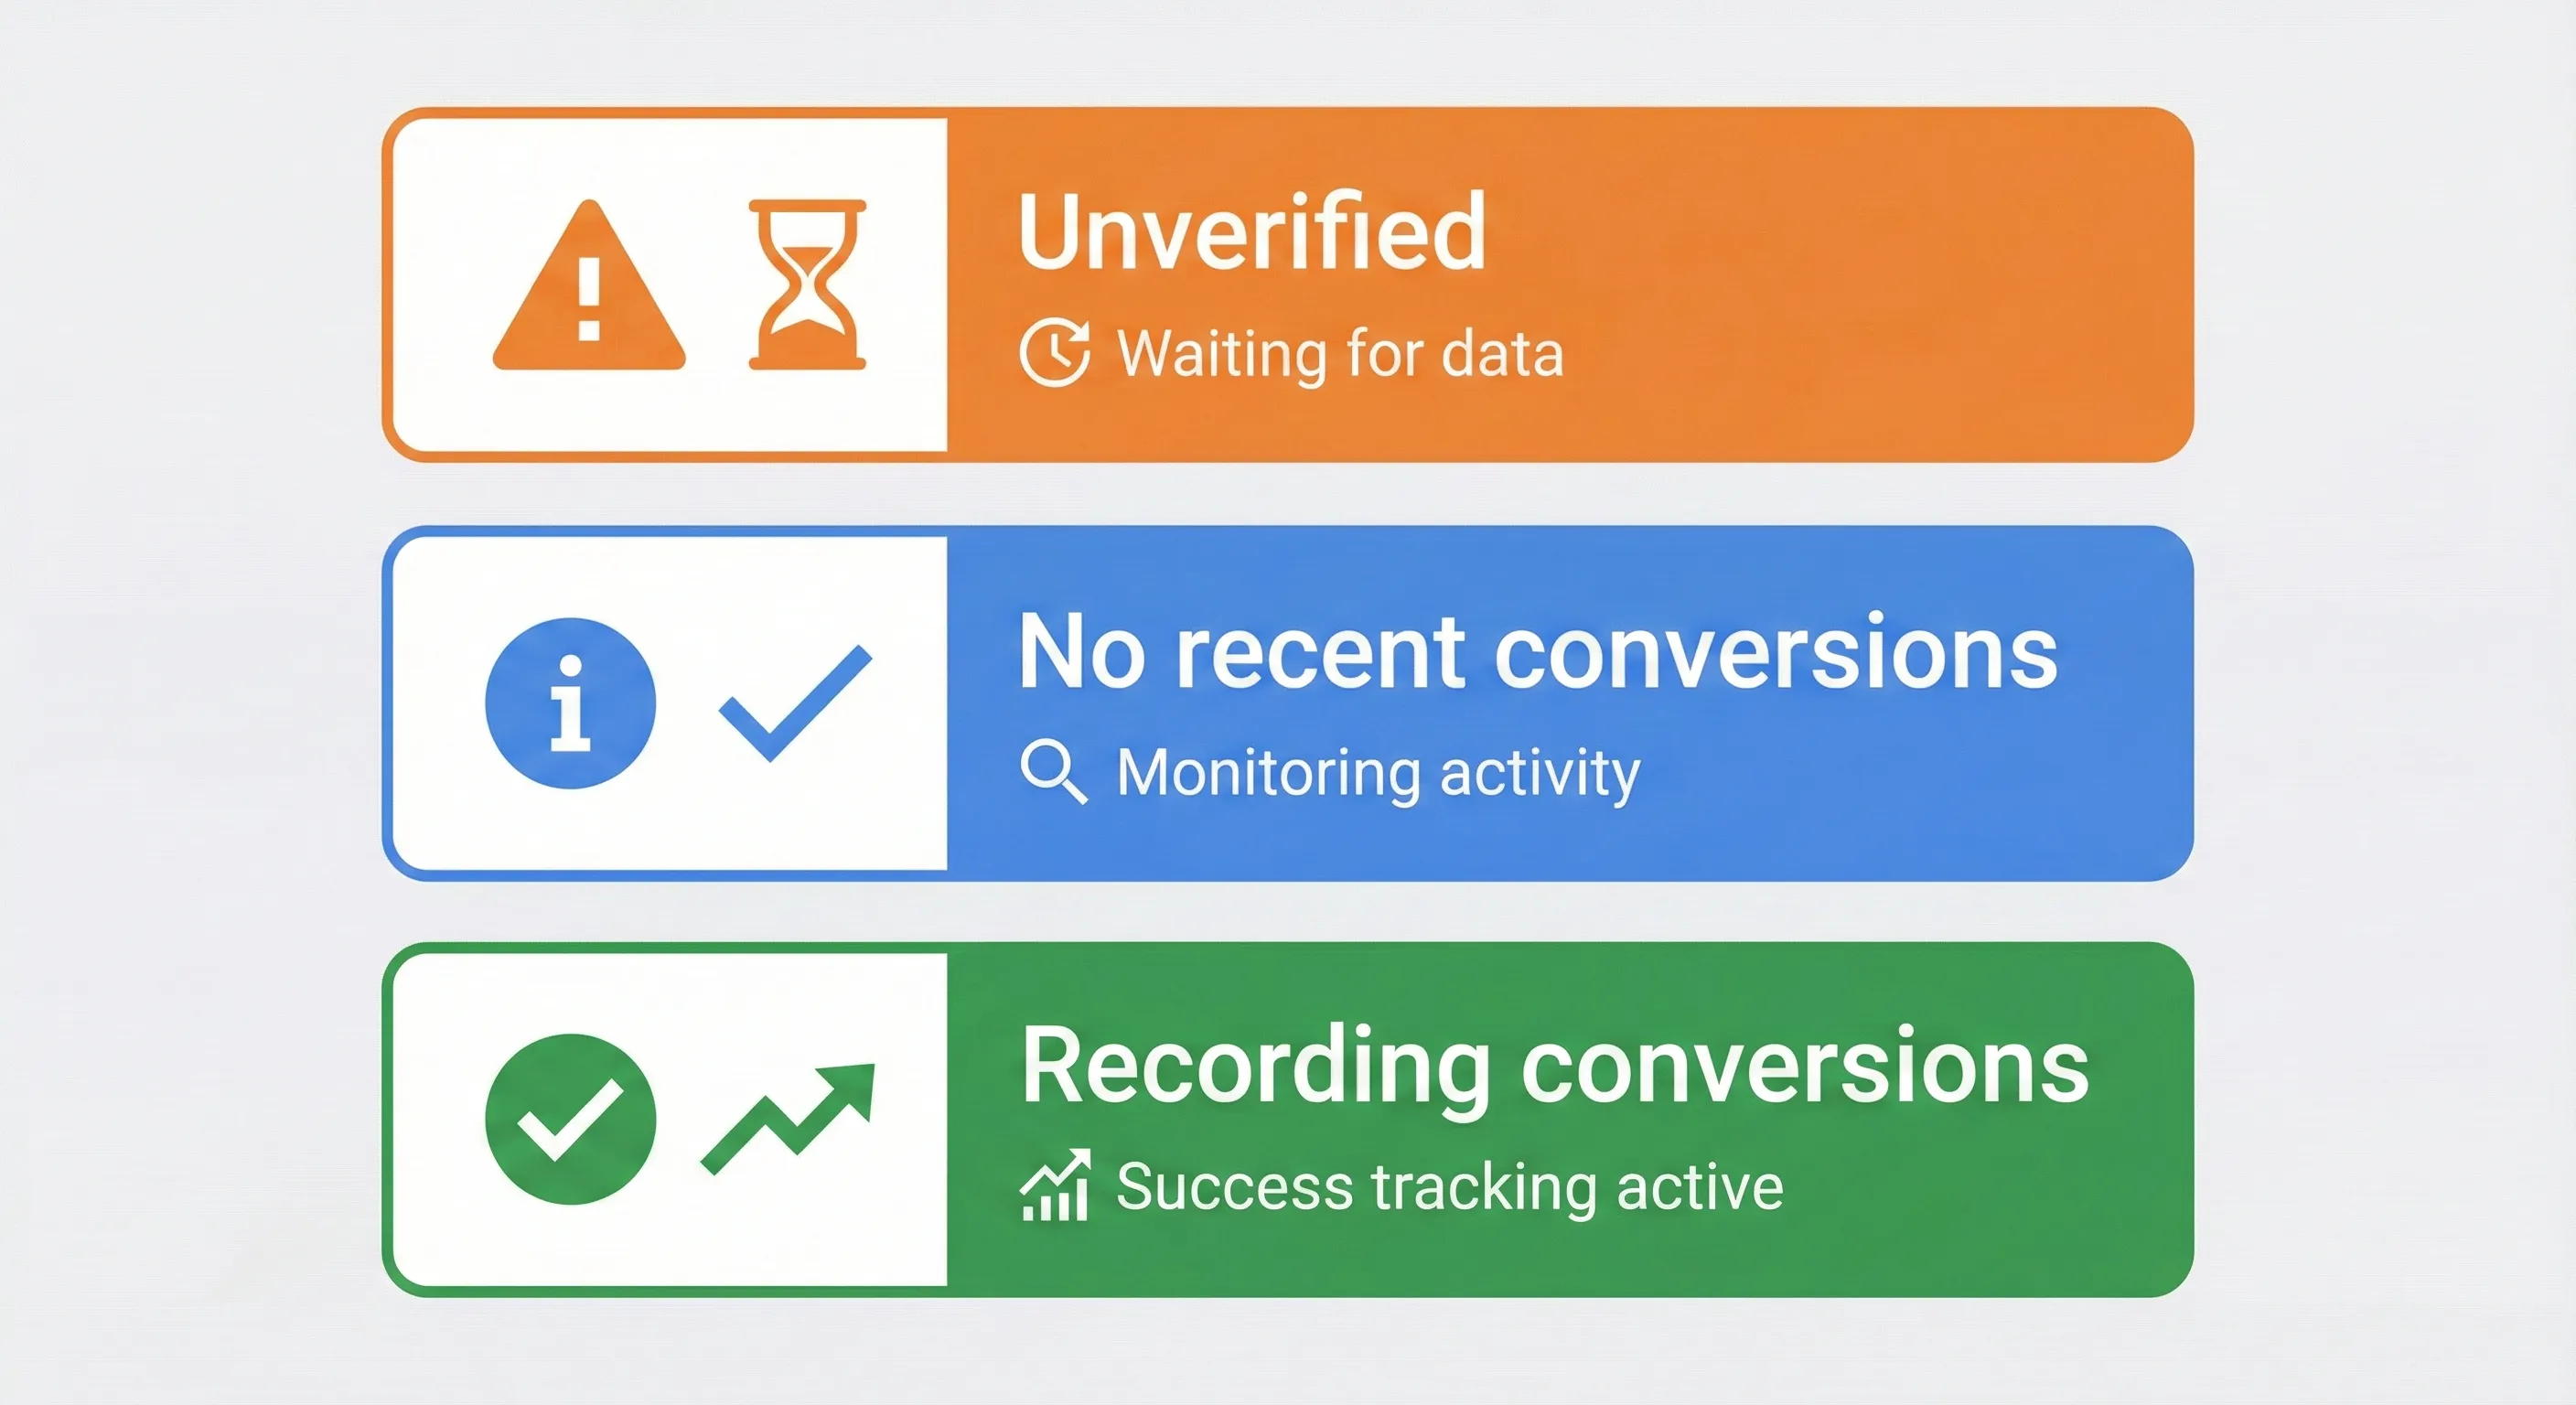
- Unverified: This means Google has not seen the tag fire yet. This is completely normal right after setup. If it stays this way for more than 24 hours after a known conversion has occurred (one can be triggered by clicking an ad and converting), it is a sign to go back and re-check the setup in GTM Preview Mode.
- No recent conversions: This status is a common source of anxiety, but it is actually good news regarding the technical setup. It means Google has successfully detected and verified the conversion tag, but there have been no conversions attributed to a Google Ad click in the last 7 days. The tracking is working correctly. This status is a signal to look at campaign performance (e.g., ad copy, landing pages, targeting), not a sign of a technical problem with the tracking implementation. Mistaking this for a technical error is a frequent pitfall that leads to unnecessary troubleshooting.
- Recording conversions: This is the goal! This status means the tag is working, and Google has successfully tracked conversions from ads within the last 7 days. Valuable data is now being collected to optimise campaigns.
Next Steps: Expanding Your Conversion Tracking System
Verify and Monitor Your Implementation
Before moving forward, establish a baseline verification routine:
Immediate Actions (First 24-48 Hours):
- Check conversion status in Google Ads (Goals > Conversions > Summary) to confirm “Recording conversions” status
- Run a test conversion yourself by clicking your ad and completing the action
- Document your GTM setup (tag names, trigger conditions, variable configurations) for future reference
Ongoing Maintenance:
- Schedule monthly GTM Preview Mode tests to catch tracking degradation early
- Review conversion data weekly during the first month to identify anomalies
- Set up automated alerts in Google Ads for zero-conversion days (potential tracking failure indicator)
Understanding Conversion Tracking Within Your Marketing Foundation
Google Ads conversion tracking tells you which ads drive valuable actions, but it’s one component of a complete measurement infrastructure. Understanding how it connects with Google Analytics 4 (which tracks the full user journey), UTM parameters (which classify all traffic sources, not just ads), and Looker Studio (which synthesises ad performance alongside organic and social channels) creates a system that answers both “Are our ads profitable?” and “How do paid campaigns compare to our other marketing investments?”
How to Build Your Marketing Measurement Foundation shows you how Google Ads conversion tracking integrates with your complete measurement infrastructure, connecting ad performance to broader marketing efficiency metrics, and enabling true cross-channel ROI analysis rather than isolated platform reporting.
Continue Building Your Measurement Capabilities
Next Recommended Components: Enhanced Conversions and Cross-Platform Tracking
With basic conversion tracking operational, two capabilities significantly improve data quality. Enhanced Conversions uses first-party data to recover conversions lost to privacy restrictions, typically increasing tracked conversions by 15-25%. Cross-platform conversion tracking (Facebook Pixel, LinkedIn Insight Tag) deployed through the same GTM infrastructure allows unified ROI analysis across all paid channels.
Both implementations use the same data layer events you’ve already created, making expansion straightforward once the foundation exists.
If You Need Help
Google Ads conversion tracking setup is straightforward when using GTM’s interface, but implementing Enhanced Conversions with proper data layer configuration, establishing cross-platform conversion tracking across multiple ad networks, and building unified reporting that synthesises conversion data from all sources requires understanding how these tracking systems interact and share data.
Our Marketing Measurement Foundation service provides complete implementation with conversion tracking properly configured across all platforms if you prefer expert setup.
Conclusion: You’ve Built a Foundation for Growth
You’ve successfully navigated one of digital marketing’s most challenging and valuable tasks. The days of “flying blind” are over. You now have a trustworthy system that provides data to stop wasting money, optimise campaigns with confidence, and prove ROI to any team, boss, or client.
This is a powerful foundation. However, the digital world constantly changes. Website updates and platform evolution can lead to “tracking degradation,” where perfectly working setups silently break over time. Check your conversion status in Google Ads monthly to prevent weeks of lost data and ensure your system continues serving as a reliable guide for growth.
Frequently Asked Questions
What if I don’t have a dedicated “Thank You” page for my forms?
You have several options:
1) Ask your developer to create a simple thank-you page (recommended)
2) Track form submissions using GTM’s Form Submission trigger (more complex but doable)
3) Track clicks on the form submit button (less reliable).
The dedicated page method is most reliable for beginners.
Can I set this up without a developer?
Yes, if you have admin access to Google Tag Manager and Google Ads. The steps in this guide are designed for marketers to implement independently. However, for e-commerce value tracking or Enhanced Conversions, you may need developer help to modify your site’s data layer.
Why are my Google Ads conversions different from my Google Analytics conversions?
This is completely normal. Different platforms use different attribution models, tracking methods, and data processing. Google Ads uses last-click attribution by default, while GA4 uses data-driven attribution. Focus on trends rather than exact numbers matching.
How long before I see conversion data in Google Ads?
Conversion data typically appears within 3-24 hours. However, it can take up to 7 days for Google’s algorithms to have enough data to optimise effectively. Don’t panic if you don’t see immediate results.
Should I delete my old conversion tracking and start fresh?
Generally, no. If you have existing conversion data, keep those actions running while you set up new, improved tracking. This prevents data loss during the transition. You can pause old actions once you’ve verified the new setup is working correctly.
How do I know if my conversion values are accurate?
Start with your best estimate and refine over time. For lead generation, calculate: (Average customer value × Close rate) = Lead value. For e-commerce, use actual transaction values. It’s better to have an estimated value than no value at all.
What if my conversion action shows “No recent conversions” but I know people are converting?
This status means your tracking is working technically, but Google hasn’t attributed any conversions to ad clicks in the last 7 days. Check:
1) Are your ads actually running and getting clicks?
2) Are people clicking ads before converting, or finding you through other channels?
3) Is your attribution window set correctly?
Should I track every possible action as a conversion?
No. Focus on actions that truly matter to your business. Too many conversion actions can confuse Google’s algorithms. Start with 1-2 primary conversions (your most valuable actions) and add secondary tracking for micro-conversions only after your primary tracking is stable.
What tag allows you to tell google ads which specific customer actions should be tracked as a conversion?
The tag that allows you to tell Google Ads which specific customer actions should be tracked as conversions is the Google Ads Conversion Tracking tag. This tag is created in Google Tag Manager and configured with your Google Ads Conversion ID and Conversion Label. It is triggered to fire on the specific customer action (such as purchase, form submission, or button click) that you want to track as a conversion.
This tag works alongside a conversion action you create in your Google Ads account, where you define the type of conversion (e.g., purchase, lead), assign a value, and set triggers for when the conversion happens. The Google Ads Conversion Tracking tag sends the conversion data back to Google Ads when the specified action occurs.
Additionally, a Conversion Linker tag is commonly used to ensure conversion tracking accuracy by handling cross-domain tracking and preserving the Google Click Identifier (GCLID) data across pages.