If you’re running an online business in 2025, accurate tracking isn’t optional anymore. The difference between knowing exactly which marketing channels drive your revenue and guessing blindly can make or break your growth. Yet most small businesses install Google Analytics 4 once and never verify it’s working correctly, leading to months of broken data and wasted ad spend.
This guide walks you through installing GA4 properly using three different methods: the professional standard using Google Tag Manager, native integrations for platforms like Shopify and WordPress, and manual code installation for custom websites. You’ll learn not just how to install the tracking code, but how to verify it’s capturing data accurately and set it up for long-term success.
Table of Contents
Why GA4 Exists (And Why Installation Quality Determines Everything)
Here’s the question that matters most: which of your marketing efforts actually drive revenue? Not clicks, not impressions, not vanity metrics—which channels and campaigns turn into paying customers?
The only way to answer this is to track what users actually do. Revenue doesn’t appear because someone visits your website. It appears because they take specific actions: they browse your products, they add items to their cart, they complete checkout. These behaviours are the bridge between your marketing spend and your business results.
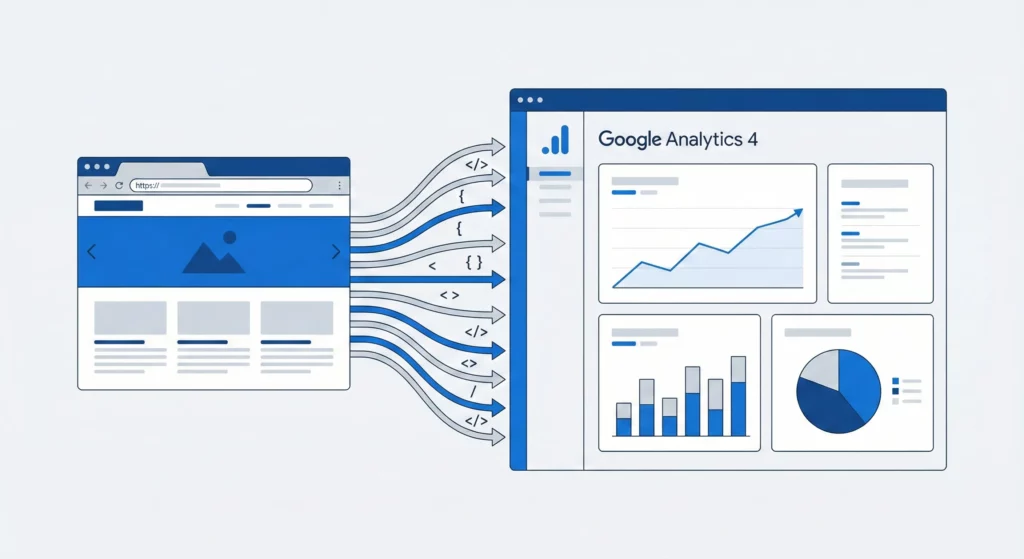
Google Analytics 4 exists to make these behaviours visible. It works by tracking every meaningful interaction on your site as an individual event. When someone views a product page, that’s an event. When they add something to their cart, that’s an event. When they complete a purchase, that’s an event.
This event-based approach gives you granular visibility into the customer journey. You can see not just how many people visited your site, but exactly what they did while they were there. You can trace the path from initial discovery through evaluation to final purchase.
This visibility is what lets you answer your critical business questions. Which traffic sources bring visitors who actually buy? Where do potential customers get stuck or confused? Which product pages generate the most engagement? Which marketing campaigns deliver the best return on ad spend?
Without proper tracking, these questions have no answers. You’re forced to guess based on gut instinct or surface-level metrics that don’t connect to revenue. With GA4 installed correctly, you can see exactly what’s working and what isn’t.
But here’s what most small businesses get wrong: they install GA4 once, assume it’s working, and never verify the data. Six months later, they discover their purchase tracking never fired, or their traffic sources are all labelled as unknown, or their conversion rates are inflated because they’re counting internal testing traffic.
A broken installation is worse than no installation at all. Bad data leads to bad decisions, which leads to wasted budget on channels that don’t work and cutting spend on channels that do. The installation process isn’t just about placing code on your site—it’s about establishing a data pipeline that accurately captures the behaviours that drive your business outcomes.

That’s why the installation method you choose matters. Some approaches prioritise speed and simplicity. Others prioritise flexibility and long-term scalability. Your choice depends on where your business is today and where you’re trying to go.
Choosing Your Installation Method: Which Path Is Right for You?
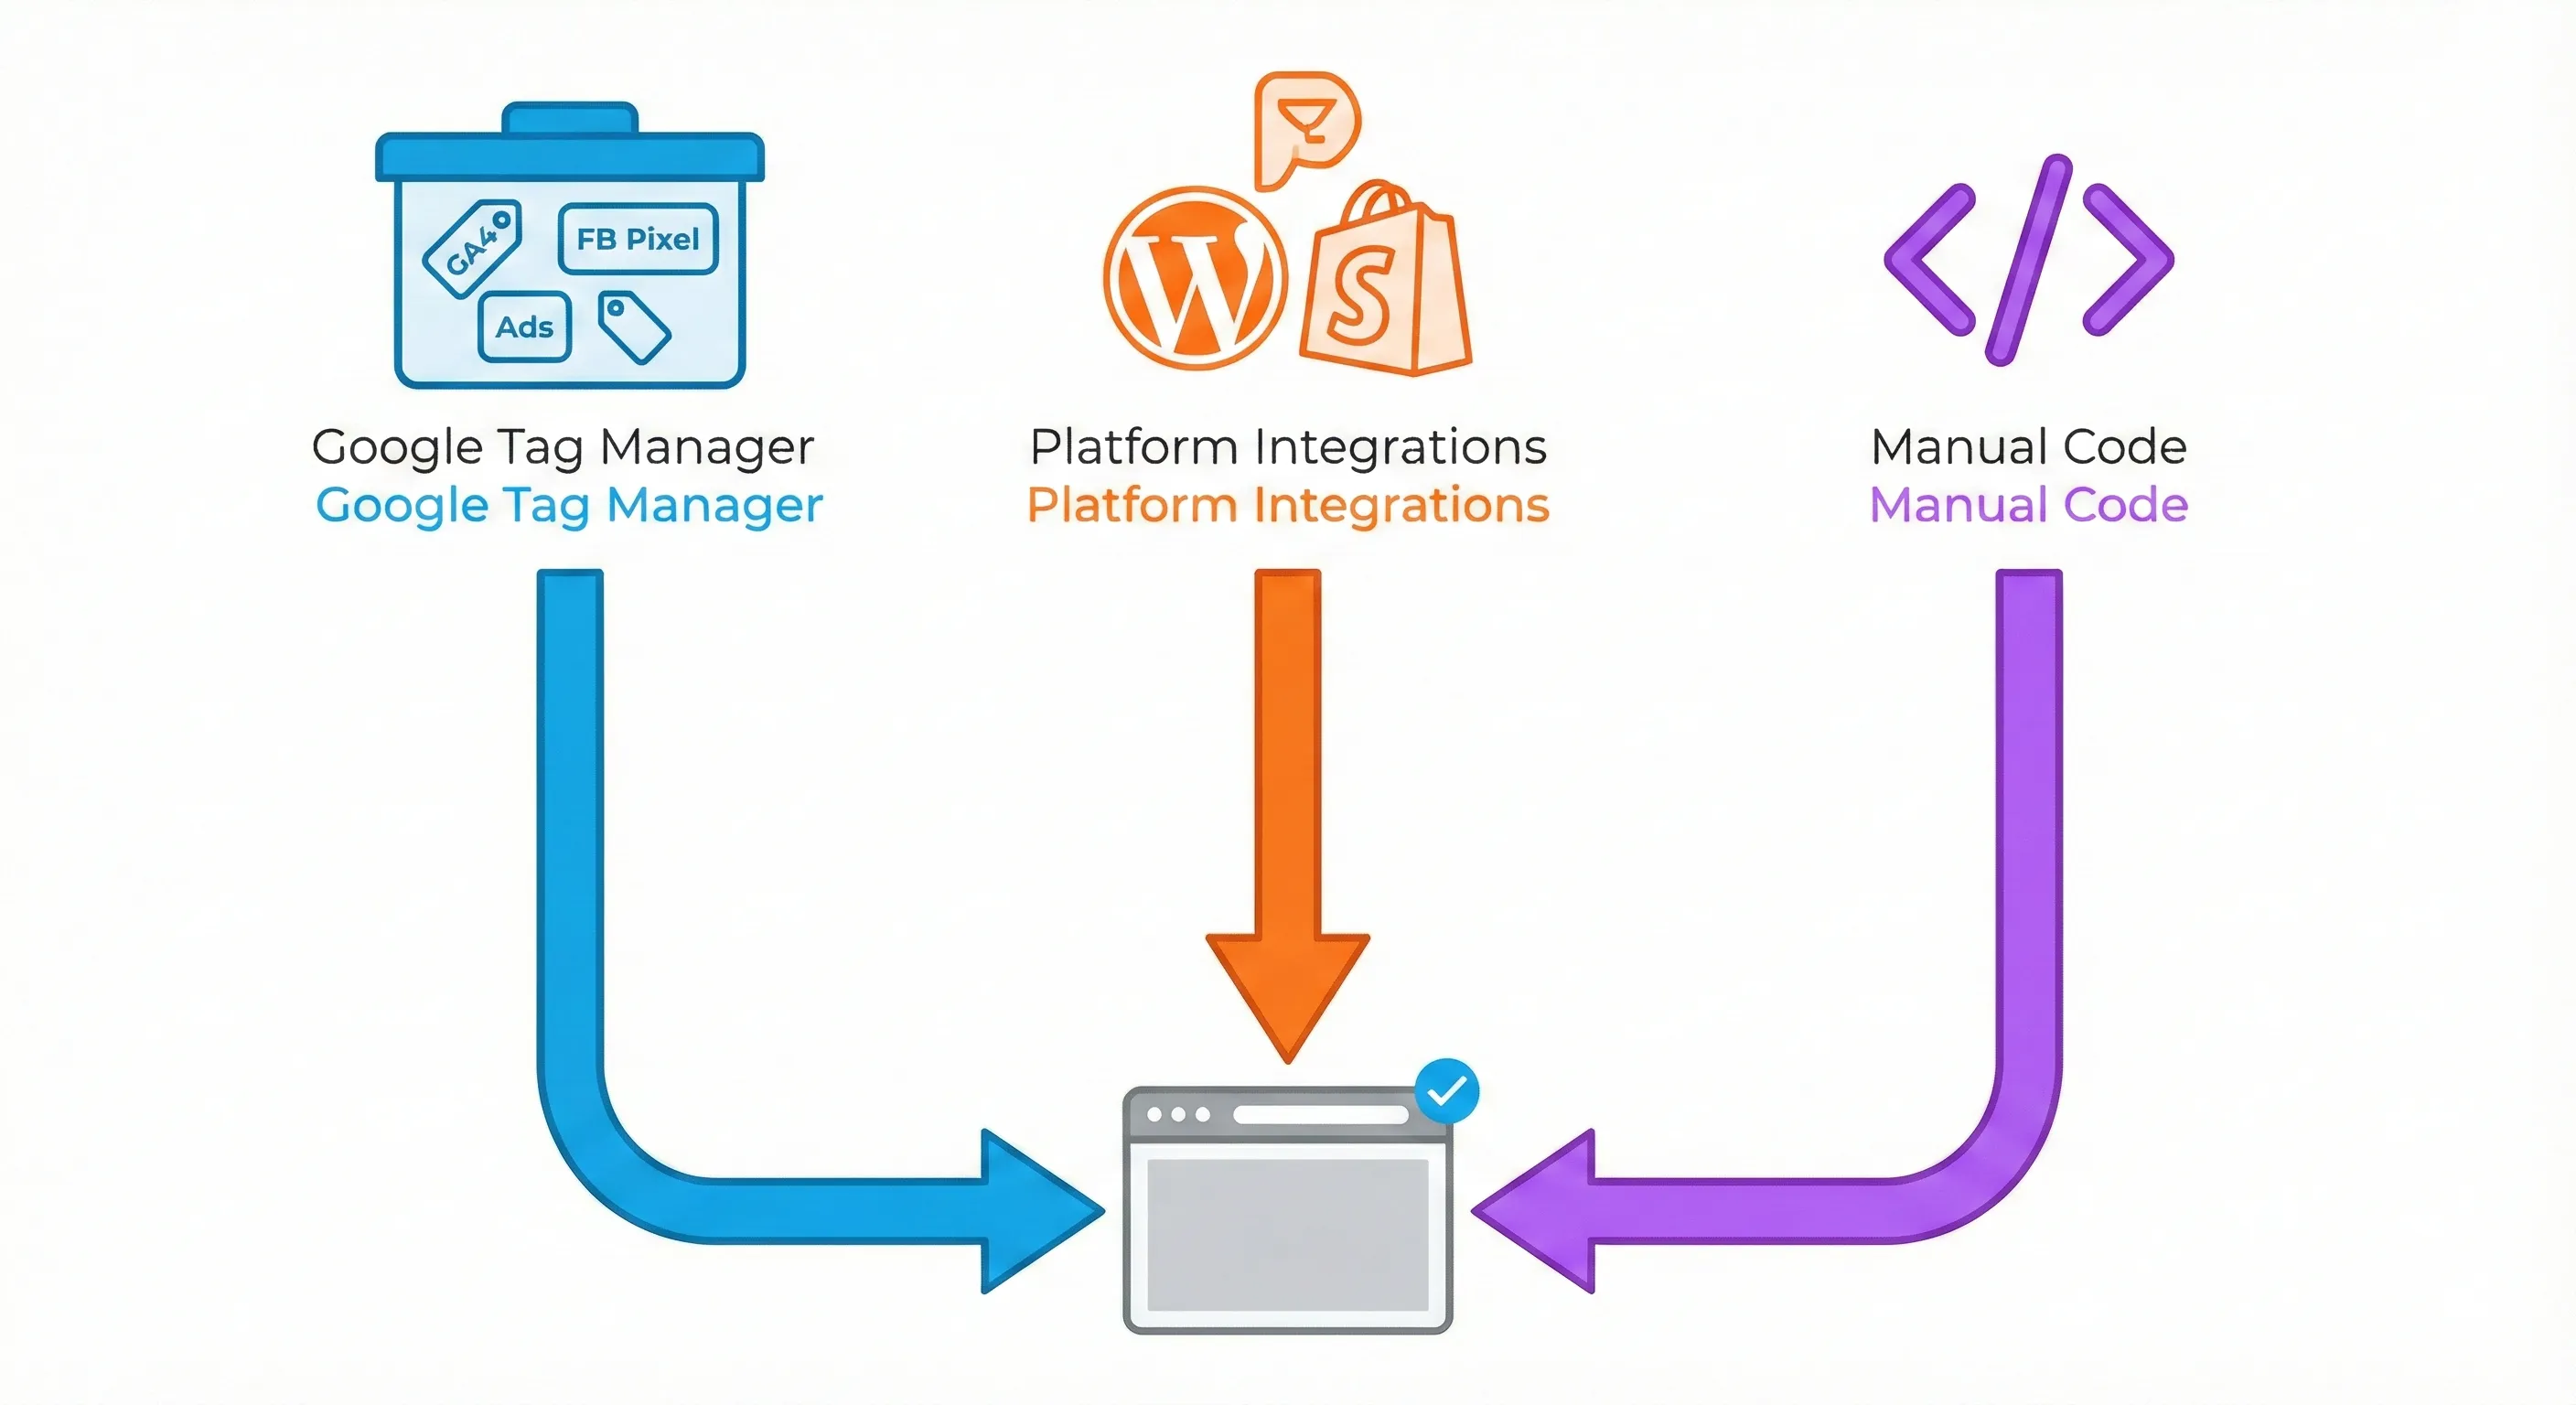
There are three primary ways to install GA4. Your choice depends on your technical comfort level, your platform, and how much control you need over your tracking infrastructure.
Method 1: Google Tag Manager (The Professional Standard)
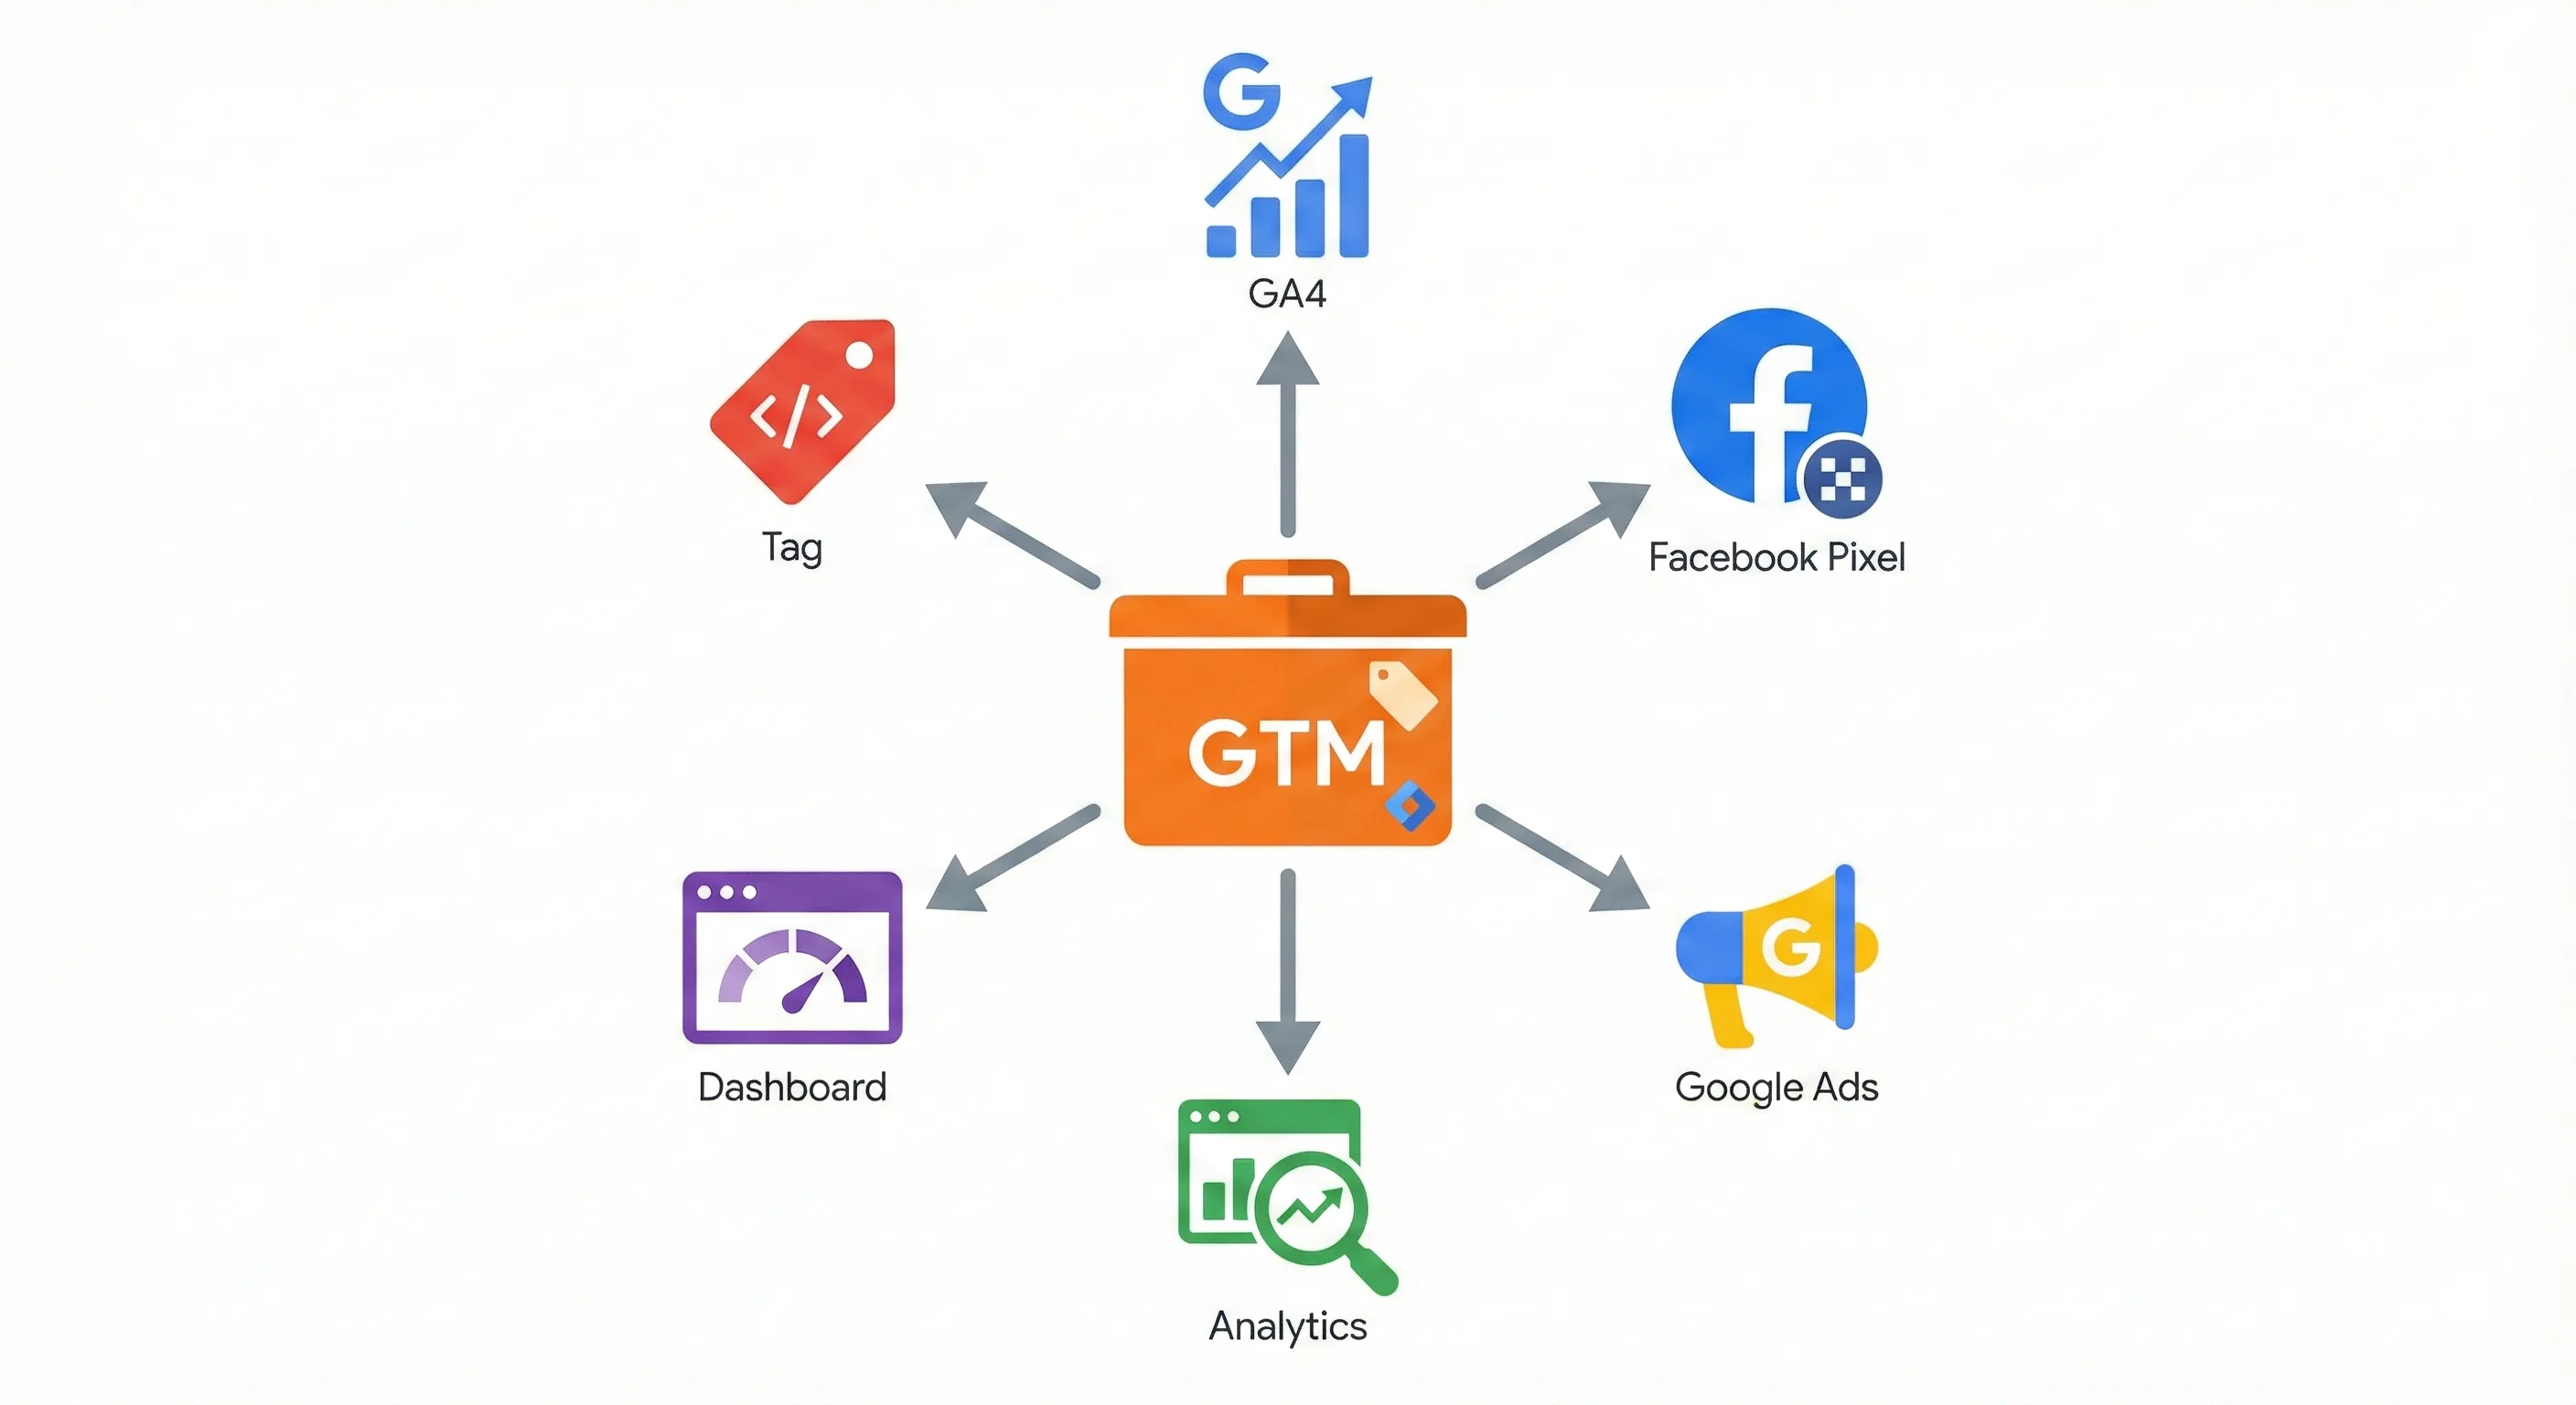
This is the method agencies use and the one we recommend if you plan to scale your marketing. Google Tag Manager acts as a central hub for all your tracking scripts. You install the GTM container once, and from then on, you can add or modify tracking without touching your website’s code.
The advantage here is agility. Want to add Facebook Pixel tracking next month? You can deploy it through GTM in 10 minutes without asking a developer for help. Need to track specific button clicks? You can set that up yourself.
The tradeoff is initial complexity. You need to set up both GTM and GA4, which means two accounts and a few more configuration steps. But once it’s done, you have a scalable foundation that will serve you for years.
Method 2: Platform Integrations (The Simplest Path)
If you run your business on Shopify, WordPress, or another major platform, native apps and plugins can handle the installation automatically. These integrations are built and maintained by the platforms themselves (or Google directly), which means they’re designed to work correctly without manual configuration.
The advantage is simplicity: you’re not copying code or configuring triggers. The tradeoff is less flexibility. You can’t easily customise tracking beyond what the integration provides, and you’re dependent on the plugin maintainers to keep it updated.
Platform-specific installations have their own quirks and best practices worth understanding before you begin. This guide focuses on the universal methods that work regardless of your platform.
Method 3: Manual Code (The Developer Approach)
This involves placing the gtag.js JavaScript library directly into your website’s HTML. It’s the most straightforward method if you’re comfortable editing code, and it has zero dependencies on third-party tools.
This works well for custom-built websites, static HTML sites, or situations where you want absolute control over when and how scripts load. The tradeoff is maintenance: if you need to add tracking for other platforms (like Google Ads or Facebook), you’ll need to manually inject each script.
This guide covers Method 1 (Google Tag Manager) and Method 3 (manual code) in depth. Both methods work on any platform, including Shopify and WordPress, though platform-specific integrations may be simpler for basic tracking needs.
Method 1: Installing GA4 Through Google Tag Manager (The Gold Standard)
Google Tag Manager is the professional standard for tracking infrastructure. It acts as a central hub for all your marketing and analytics scripts. You install the GTM container once, and from then on, you can add or modify tracking without touching your website’s code.
The power of this approach becomes clear when you need to track specific user behaviours beyond basic page views. Want to see which blog posts keep readers engaged longest? Track scroll depth. Want to know which call-to-action buttons get the most clicks? Set up click tracking. Want to measure video engagement? Configure video event tracking.
With GTM, you can deploy these tracking enhancements yourself in minutes without asking a developer for help. You’re decoupling your analytics agility from your development cycles.
Here’s how to connect GA4 to an existing GTM installation.
Important: This section assumes you’ve already installed the Google Tag Manager container code on your website (the snippets that go in the <head> and <body> sections). If you haven’t done that yet, you’ll need to complete that step first before connecting GA4.
Understanding the 2025 Interface Change
If you’ve worked with GTM and GA4 before, there’s a critical terminology change you need to know about. The tag template that used to be called the GA4 Configuration Tag no longer exists. It’s been replaced by the Google Tag.
This isn’t just a name change. The Google Tag is a consolidation that handles initialisation for both Google Analytics 4 and Google Ads from a single tag. It automatically manages parameter inheritance and improves the accuracy of conversion tracking across platforms.
When you search for a tag type in GTM in 2025, don’t look for “GA4 Configuration” or “GA4 Config.” You need to select Google Tag from the tag type list.
Step 1: Get Your Measurement ID from GA4
Every GA4 property has a unique identifier called the Measurement ID. This tells the tracking code where to send your data. Here’s how to find it.
Log in to your Google Analytics account and click the gear icon in the bottom left corner to access the Admin section.
In the middle column under Property settings, look for Data Streams (you might also see it under a grouping called Data Collection and Modification).
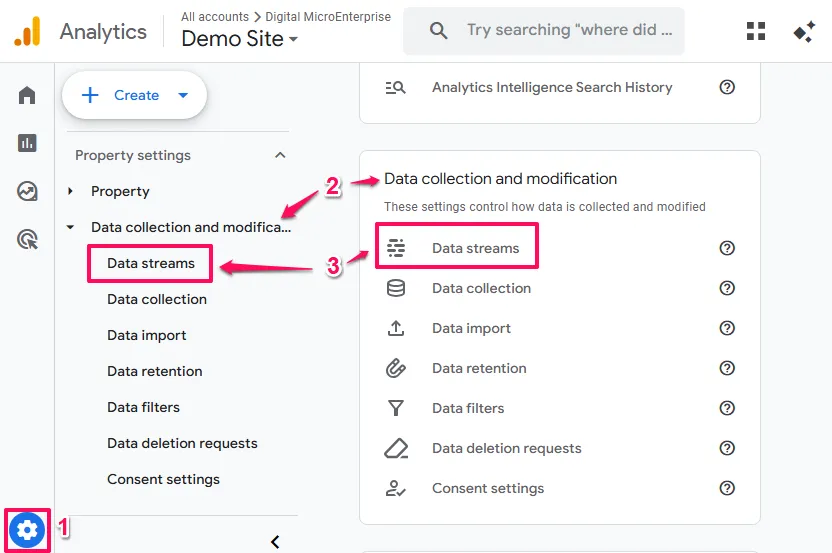
Click on Data Streams, then click on the web data stream that represents your website. If you haven’t created one yet, click Add stream, select Web, and enter your website URL and a descriptive name.
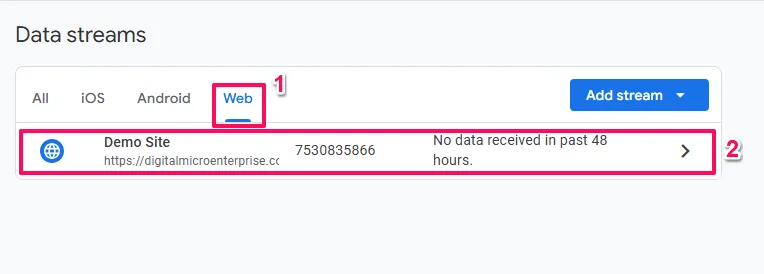
On the stream details page that slides out, you’ll see the Measurement ID in the top right corner. It’s a string of characters starting with G- followed by numbers and letters (something like G-1A2B3C4D5E). Click the copy icon next to it.

Critical note: Don’t confuse the Measurement ID with the Property ID or Stream ID. The Property ID identifies your entire analytics database. The Stream ID is used in API calls. But the Measurement ID is specifically what you use for web tracking. Using the wrong ID will result in zero data collection.
Step 2: Create a Variable in GTM to Store Your Measurement ID
You could paste your Measurement ID directly into your tag, but there’s a better way. By storing it in a variable, you can reference it in multiple tags without risking typos, and you can update it in one place if you ever need to change it.
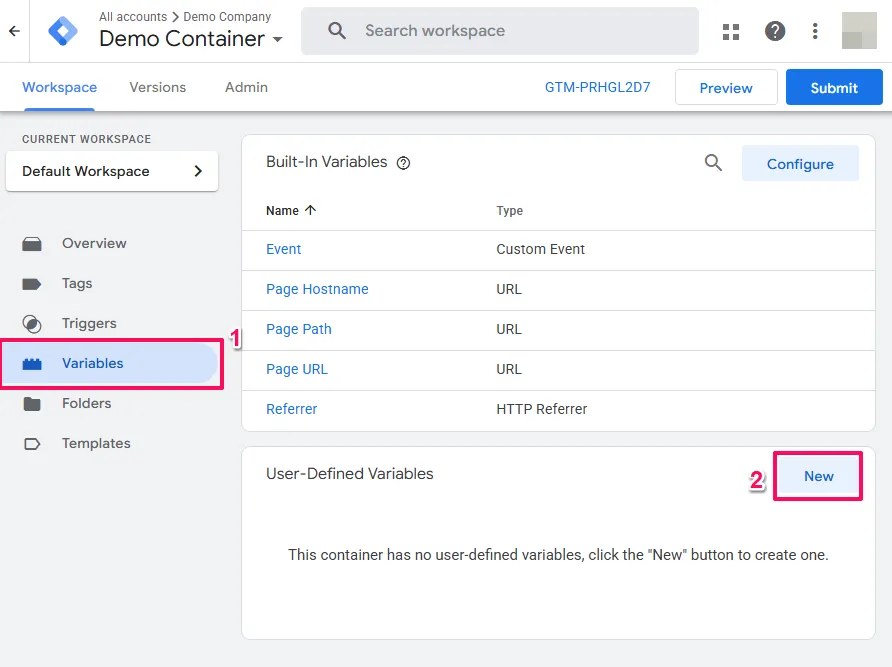
Open your Google Tag Manager workspace and click Variables in the left navigation menu.
Scroll down to the User-Defined Variables section and click New.
Click the Variable Configuration area and select Constant from the utilities category.
In the Value field, paste the Measurement ID you copied from GA4 (for example, G-1A2B3C4D5E).
Name the variable something clear like Constant - GA4 Measurement ID so you’ll recognise it later.
Click Save.
This variable now acts as a reusable reference you can plug into any tag that needs your Measurement ID.
Step 3: Configure the Google Tag
Now you’ll create the primary tag that initialises the GA4 tracking library on your website.
Navigate to Tags in the left sidebar and click New.
Click the tag configuration area and select Google Tag from the gallery. Remember: don’t look for “GA4 Configuration” because it doesn’t exist anymore.
In the field labelled Tag ID, you’ll assign your measurement identifier. Click the small “Lego block” icon (the variable selector) next to the input field and select the Constant - GA4 Measurement ID variable you just created.
This tells the generic Google Tag to behave specifically as a tracker for your GA4 property. The tag knows to send data to that particular analytics account.
You might see an advanced option called Configuration Settings Variables. This allows you to set global parameters (like user_id or custom dimensions) that apply to every event. For a standard installation, you can leave this section at its default settings. The Google Tag automatically handles basic page view tracking and session management.
Step 4: Set the Trigger (And Why “Initialization” Matters)
The trigger determines when your tag fires. This is where many people make a subtle mistake that causes data problems down the line.
Click the Triggering box below the tag configuration.
You’ll see various trigger options. In the past, most people used the All Pages trigger. But the modern best practice in 2025 is to use the Initialization - All Pages trigger instead.
Here’s why this matters: the Initialization trigger fires earlier in the page load sequence than standard triggers. By loading the Google Tag at initialisation, you ensure the GA4 library is fully loaded and listening before any other event tags try to fire.
This prevents a technical problem called a “race condition.” Imagine you have a tag that tracks when someone clicks your “Request Demo” button. If that click happens before the Google Tag has finished loading, the event gets sent into the void and you lose the data. By using Initialization, you guarantee the foundation is ready before any other tracking attempts to happen.

Select Initialization - All Pages from the trigger list.
Name your tag something descriptive like Google Tag - GA4 Base and click Save.
Step 5: Test Before Publishing (The Preview Phase)

Never publish a tag without testing it first. GTM has a built-in debugging tool called Preview mode that lets you verify everything works before it goes live.
Click the blue Preview button in the top right corner of the GTM interface.
A window called Tag Assistant will appear. Enter your website’s URL and click Connect.
Your website will open in a new tab. Don’t close the Tag Assistant tab. Navigate back to it.
On the left side of Tag Assistant, you’ll see a summary of events. Click on Initialization.
Look at the Tags Fired section. You should see your Google Tag - GA4 Base listed there.
If the tag appears under Tags Not Fired, something is misconfigured. Double-check that you selected the Initialization - All Pages trigger and that you’re viewing a page that should trigger it (which should be any page on your site).
Browse around your website in the connected tab. Every page you visit should show the tag firing on the Initialization event.
Step 6: Publish the Container
Once you’ve confirmed the tag fires correctly in preview mode, it’s time to make it live.
Click Submit in the top right corner of the GTM interface.
You’ll be prompted to add a version name and description. This is important for version control. Name it something like “Installed GA4 Google Tag” and add a brief description of what changed.
Click Publish.
Your GA4 installation is now live. Within a few minutes, you should start seeing data flow into your GA4 property.
Method 2: Installing GA4 Using Platform Integrations
If you’re running your business on a major platform like Shopify, WordPress, Wix, or Squarespace, native integrations can handle the installation automatically. These platform-specific methods are designed to work within each platform’s architecture and often provide automatic ecommerce tracking without any code configuration.
The advantage of platform integrations is simplicity. You typically install an app or plugin, connect your Google account, and the tracking code is injected automatically. You don’t need to understand GTM or copy JavaScript snippets.
The tradeoff is less flexibility. You’re limited to what the integration provides, and you’re dependent on the platform maintainer to keep it updated as Google releases changes.
Each major platform has its own installation process:
Shopify uses the Google & YouTube sales channel app, which has privileged access to track checkout events that manual code installations can’t reach.
WordPress offers multiple options, from the official Site Kit by Google plugin (which adds dashboard stats) to lightweight code injection plugins like WPCode.
Wix and Squarespace have built-in analytics connections in their settings panels.
Platform-specific installations have unique quirks, common mistakes, and best practices worth understanding before you begin.
For this guide, we’ll focus on the two universal methods that work on any platform: Google Tag Manager (the professional standard) and manual code installation (the developer approach). Both of these methods give you more control and work regardless of what platform your site runs on.
Method 3: Installing GA4 with Manual Code (Direct Injection)
If you have a custom-built website, a static HTML site, or you’re a developer who wants complete control over script loading, the manual method gives you a straightforward, dependency-free installation.
This approach is robust and lightweight. The tracking code lives directly in your HTML with zero dependencies on third-party containers like GTM. For simple sites or specialized landing pages where you don’t need complex event tracking beyond basic page views and purchases, this method works perfectly well.
Understanding What the Code Does
The Global Site Tag (gtag.js) is a JavaScript library that Google hosts on their servers. When you place it in your HTML, it performs two critical functions.
First, it downloads the analytics library asynchronously. The async attribute in the script tag means the library loads in the background without blocking your page from rendering. Your site stays fast even while tracking initializes.
Second, it creates a data layer (window.dataLayer) and sends a configuration command that routes tracking data to your specific Measurement ID. This establishes the connection between user behaviours on your site and your GA4 property where that data gets processed and stored.
This code is lightweight and robust. It doesn’t depend on any third-party container like GTM, which makes it reliable for specialized use cases.
Step 1: Find the Tracking Code in GA4
Navigate to Admin > Data Streams in your GA4 property.
Click on your web data stream.
Scroll to the bottom section labelled Google Tag.
Click View tag instructions.
A panel will slide out. Click the tab that says Install manually.
You’ll see a block of code that looks like this:
html
<script async src="https://www.googletagmanager.com/gtag/js?id=G-XXXXXXXXXX"></script>
<script>
  window.dataLayer = window.dataLayer || [];
  function gtag(){dataLayer.push(arguments);}
  gtag('js', new Date());

  gtag('config', 'G-XXXXXXXXXX');
</script>
Copy this entire block to your clipboard. The G-XXXXXXXXXX part will be your actual Measurement ID.
Step 2: Place the Code in Your Website’s Head Section
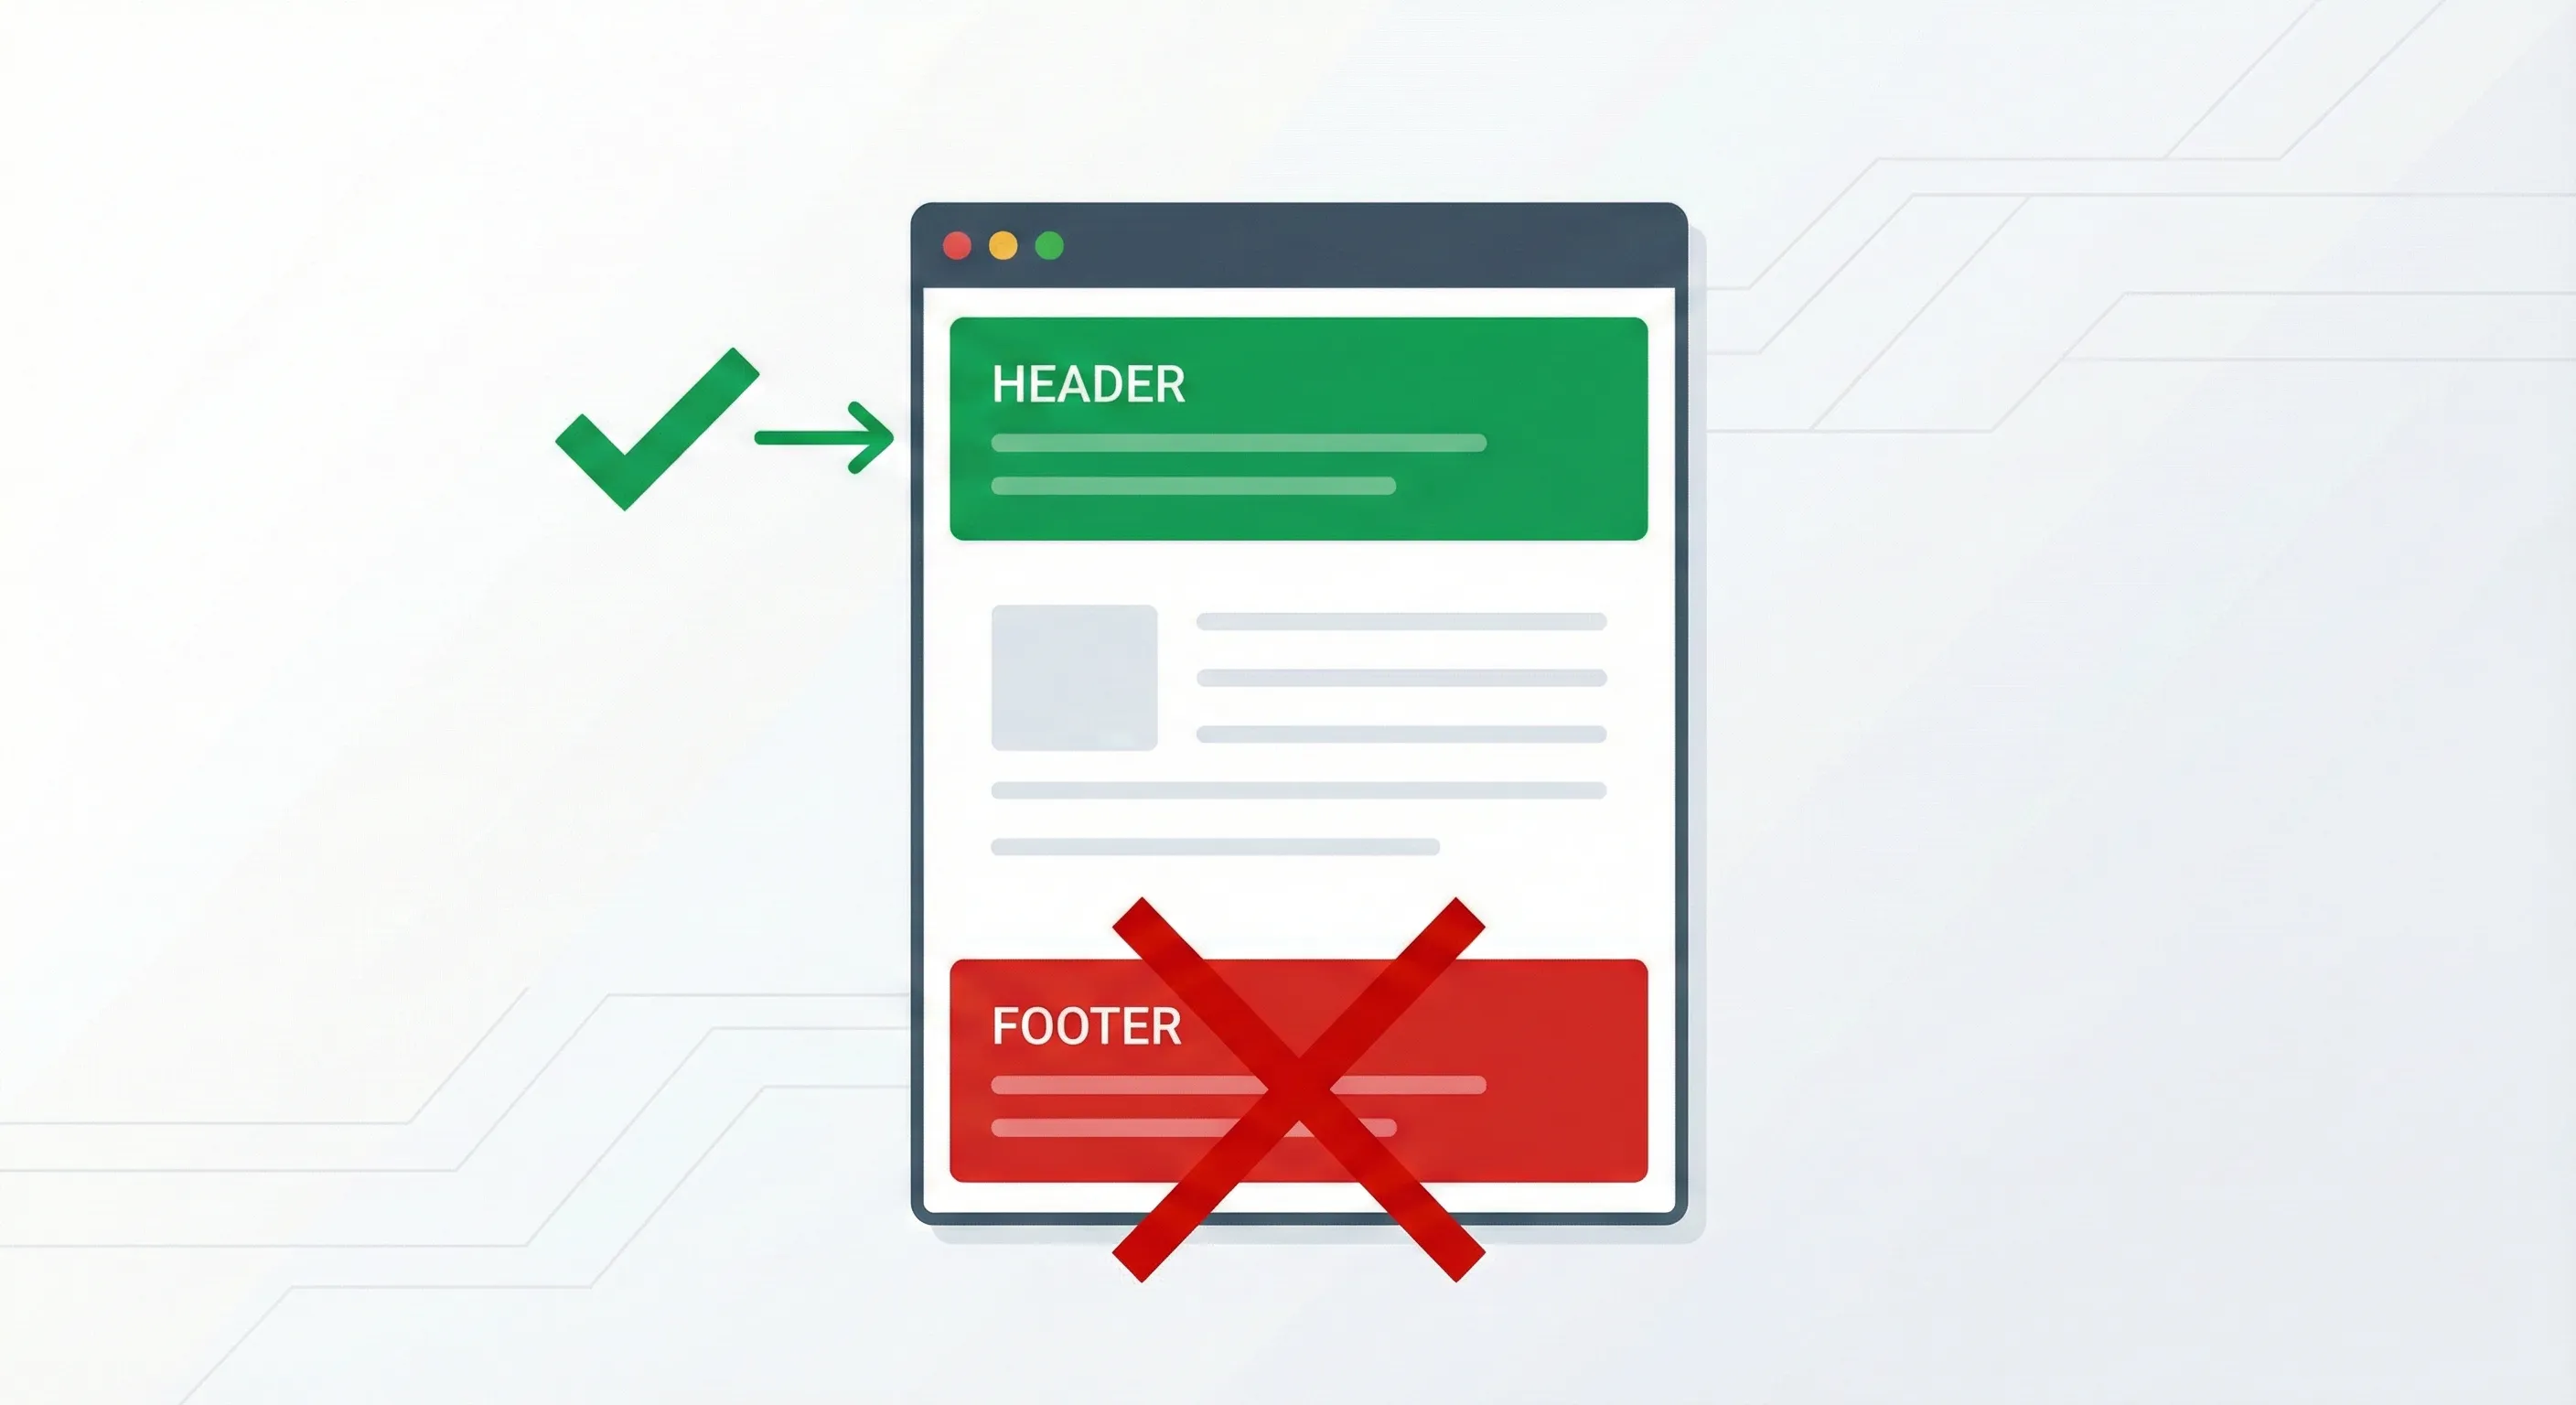
You need to paste this code immediately after the opening <head> tag on every page of your website.
Here’s why placement matters: web browsers parse HTML documents from top to bottom. If you place the tracking code high in the <head> section, the analytics library starts downloading immediately, even before the visual content appears.
If you placed it in the footer instead, a user might visit your page, find what they need in three seconds, and leave before the footer script ever loads. That visit would be completely invisible to your analytics, leading to under-reported traffic and artificially inflated engagement metrics (since only users who stick around long enough for the footer to load would be counted).
For static HTML sites: You’ll need to paste this code into every .html file. Yes, this is tedious. This is one reason why GTM is preferred for anything beyond a simple brochure site.
For PHP or templated sites: Locate your central header file (often called header.php, head.blade.php, _layout.cshtml, or similar depending on your framework). Paste the code there once, and it will automatically appear on all pages that use that template.
Critical check: Before you publish, search your codebase to make sure no other GA4 tags exist. If you have both a manual installation and a GTM installation running simultaneously, you’ll get duplicate data.
Verifying Your Installation: Confirming Data Flows Correctly
Installing the code is only half the process. You must verify that data is flowing correctly and accurately capturing user behaviours. Never assume your analytics are working just because you clicked save.
Verification ensures the pipeline you’ve built actually works. It’s the difference between having a tracking system and having a tracking system you can trust to make business decisions.
Verification Method 1: The Realtime Report (Immediate Connectivity Check)
The Realtime report in GA4 shows activity on your site from the last 30 minutes. It’s the fastest way to confirm your tracking is connected.
Open your website in a new browser tab or on your mobile device. Browse 2-3 different pages on the site.
In your GA4 interface, click Reports in the left sidebar, then select Realtime.
Look at the data:
The “Users in last 30 minutes” card should show at least “1” (you).
The map should display a dot at your geographic location.
The “Event count by Event name” card should show events like page_view, session_start, and possibly first_visit.
Realtime data typically appears within 15-30 seconds of the interaction. If you’re still seeing zeros after two minutes, go back and check your Measurement ID or your GTM trigger configuration.
Verification Method 2: DebugView (Detailed Event Inspection)
While the Realtime report tells you if data is flowing, DebugView tells you what data is flowing. It lets you see every single event and its parameters in detail.
Enable Debug Mode:
If you used Google Tag Manager, simply entering Preview mode automatically enables debug mode for your browser.
If you used manual code or a platform integration, install the Google Analytics Debugger Chrome extension and toggle it to “ON.”
Access DebugView:
In GA4, navigate to Admin > DebugView (you might find it under Property settings or Data Display).
Inspect Events:
As you browse your site, you’ll see a vertical timeline of events appear in DebugView.
Click on a page_view event to expand it.
You’ll see parameters like page_location (the full URL), page_title, and page_referrer.
This level of detail is essential when you’re setting up custom events or ecommerce tracking. You can verify that events like purchase or generate_lead are firing with the correct values before you rely on the data for business decisions.
Verification Method 3: GTM Preview Mode (For Method 1 Only)
If you installed GA4 through Google Tag Manager, you have access to the most powerful debugging tool available.
Click the Preview button in GTM and connect to your website.
In the Tag Assistant tab, select the Initialization event from the left sidebar.
Check the Tags Fired section. Your Google Tag - GA4 Base should be listed.
If it appears under Tags Not Fired, verify your trigger is set to Initialization - All Pages.
Navigate through your site in the connected browser tab. Every page should show the tag firing successfully.
Essential Configuration Steps After Installation
Your tracking is now live, but there are a few configuration adjustments you should make immediately to maximise data quality and usefulness. These settings affect what data gets retained, what gets filtered out, and what behaviours get tracked automatically.
Extend Your Data Retention Period
By default, GA4 might retain user-level and event-level data for only two months. This is far too short if you want to do year-over-year analysis or build audiences for remarketing.
Navigate to Admin > Data Settings > Data Retention.
Change the retention period from 2 months to 14 months (the maximum available for the standard properties).
This doesn’t affect your aggregated reports (which are retained indefinitely), but it does affect your ability to create custom audiences and segments based on historical behaviour.
Filter Out Internal Traffic
Your own visits to your site shouldn’t count in your analytics. If you’re browsing your site for testing or content updates, you’ll skew your metrics.
Go to Admin > Data Streams, select your web stream, and click Configure tag settings.
Click Show all to expand all options, then find Define internal traffic.
Click Create and add a rule to exclude your office or home IP address. You can find your current IP address by searching “what is my IP” in Google.
Name the rule something like “Office IP” and save it.
Then navigate to Admin > Data Filters and make sure the Internal Traffic filter is set to Active (not Testing).
Enable Enhanced Measurement
Enhanced Measurement is a feature that automatically tracks certain interactions without requiring any additional code or configuration.
In your data stream settings, look for the Enhanced Measurement toggle.
Make sure it’s set to On.
Click the settings icon next to it to see what’s being tracked automatically. By default, it includes: scrolls (when a user scrolls 90% down a page), outbound clicks (clicks on links that leave your domain), site search (if you have a search function), video engagement (for embedded YouTube videos), and file downloads (PDFs, Excel files, etc.).
You can toggle individual features on or off depending on what’s relevant to your business.
Next Steps: Getting Value from Your Data
You’ve installed GA4 correctly and verified it’s working. Here’s how to move forward depending on where you are in your analytics journey.
If You’re Just Starting Out
Focus on understanding your baseline metrics: how much traffic you’re getting, where it’s coming from (organic search, social, direct), and which pages get the most attention.
Navigate to Reports > Life cycle > Acquisition > Traffic acquisition to see which channels drive your visits.
Look at Reports > Life cycle > Engagement > Pages and screens to understand which content resonates.
Don’t get overwhelmed by every metric available. Start with traffic sources and top pages, then expand as you get comfortable.
If You’re Running Paid Ads
Your next priority is conversion tracking. You need to tell GA4 what actions matter to your business (purchases, form submissions, phone calls, etc.) so you can measure return on ad spend.
Navigate to Admin > Events to see what events are being tracked automatically.
Find events that represent valuable actions (like purchase or generate_lead) and mark them as conversions by toggling the Mark as conversion switch.
These conversions will then flow into your Google Ads account (if linked) so you can optimise campaigns based on actual business outcomes.
If You’re Scaling Your Marketing
Invest time in Google Tag Manager if you haven’t already. Even if you installed GA4 using a platform integration, adding GTM gives you the flexibility to track custom events (like “Clicked CTA Button” or “Watched Demo Video”) without developer help.
Set up custom events for micro-conversions: actions that indicate purchase intent even if they don’t result in an immediate sale. Examples include “Added to Cart,” “Started Checkout,” or “Viewed Pricing Page.”
Create audiences based on behaviour. Navigate to Admin > Audiences and build segments like “Users who viewed a product but didn’t purchase” for remarketing campaigns.
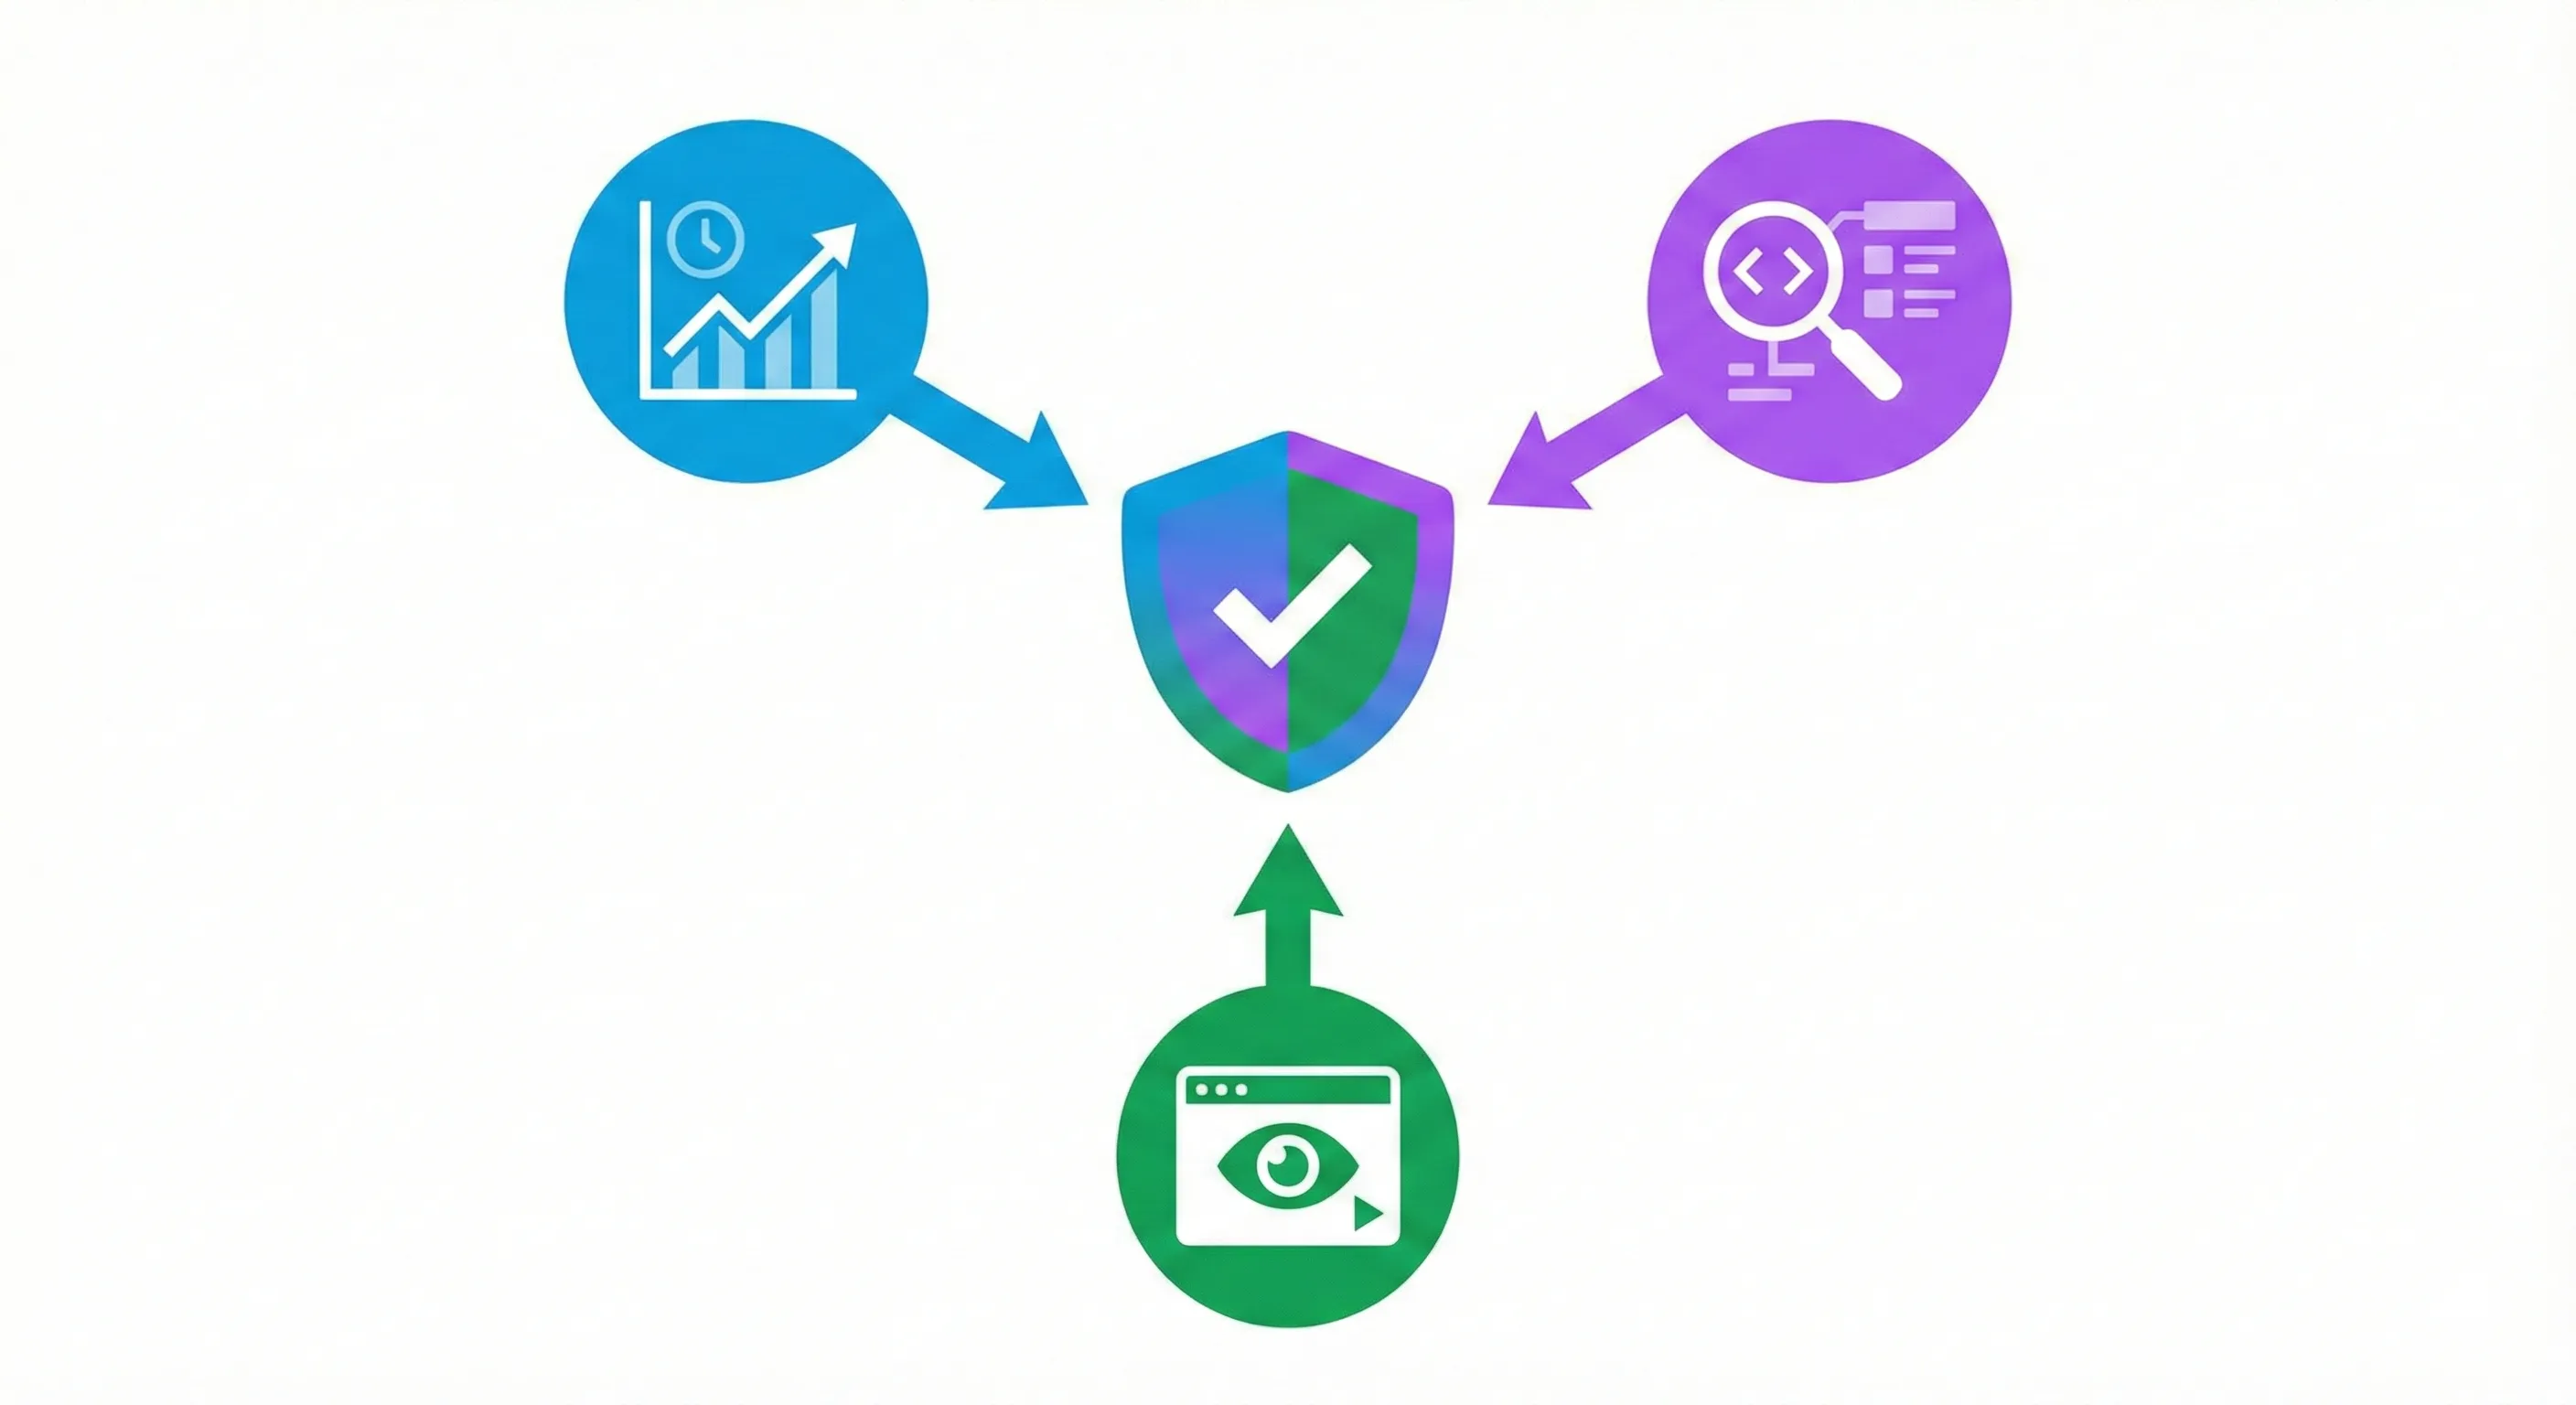
Understanding the Complete System
GA4 shows you what’s happening on your site, but it’s one component of a complete measurement infrastructure. Understanding how it connects with GTM for flexible deployment, the Data Layer for reliable data capture, conversion tracking for optimization, and attribution for channel performance creates a system that answers your critical business questions.
How to Build Your Marketing Measurement Foundation shows you how GA4 integrates with your complete measurement infrastructure, which business questions this foundation helps you answer, and how these components work together to transform analytics data into strategic intelligence.
If You Need Help
GA4 installation is straightforward, but proper event architecture—custom event implementations following Google’s recommended naming conventions, ecommerce tracking with correct parameter structures, cross-domain configurations, and Data Layer integration—requires understanding GA4’s schema requirements. Our Marketing Measurement Foundation service provides complete implementation with proper event architecture and testing if you prefer expert setup.
Continue Building Your Foundation
Next Recommended Component: Event Tracking Strategy
With GA4 collecting basic pageviews, the next step is implementing event tracking for the specific actions that drive your business outcomes—form submissions, purchases, engagement behaviours.
[Link to GA4 event tracking cluster post when published]
Conclusion: You’ve Built a Foundation, Not a Finished Product
Installing GA4 correctly is the foundation of data-driven marketing, but it’s not the end of the journey. The tracking infrastructure you’ve set up today is designed to evolve as your business grows.
The key difference between a working installation and a broken one is verification. You’ve learned not just how to install the code, but how to confirm data is flowing, how to debug issues with DebugView and Preview mode, and how to configure retention and filtering settings that protect data quality.
Whether you chose the scalability of Google Tag Manager, the simplicity of native platform integrations, or the control of manual code, you now have a professional-grade analytics foundation. The insights you gain from this data will compound over time, helping you make smarter decisions about where to invest your marketing budget, which products to promote, and how to improve your customer experience.
The businesses that win in 2025 aren’t the ones with the most data. They’re the ones with accurate data they actually use to make decisions. You’ve taken the first step.