If you’re running a website, you’re likely tracking what visitors do once they arrive. But do you know what’s happening before they get there? Specifically, do you know how people find you through Google Search (the single largest source of traffic for most websites)?
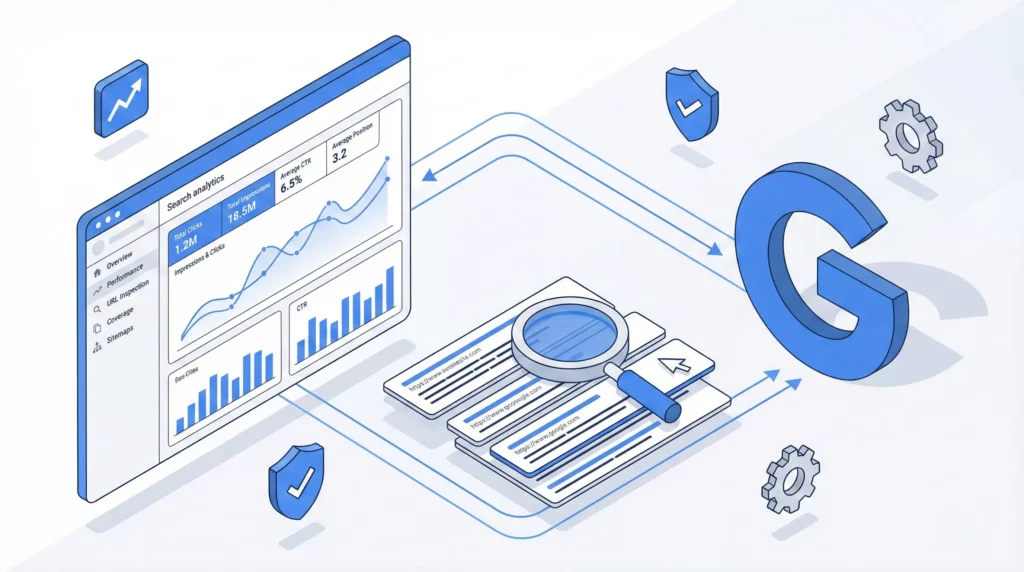
Google Search Console is Google’s free tool that shows you exactly how your site appears in search results, which queries trigger your pages, and whether technical issues are blocking potential customers from finding you. While other analytics tools measure what happens on your site, GSC measures your visibility in the world’s most-used search engine.
Table of Contents
Why Google Search Console Matters
Most website owners eventually install some form of analytics—perhaps Google Analytics 4 (Google’s free tool for tracking on-site behaviour) or similar platforms. These tools are powerful for understanding user behaviour: session duration, conversion rates, engagement paths. But they only track what happens after someone successfully loads your website.
What about the journey before arrival? What about the search results page where potential customers decide whether to click your link or a competitor’s? What about the technical errors that might prevent your best content from appearing in search results at all?
This is where Google Search Console becomes essential. It provides visibility into your Google Search presence specifically—how Google’s search engine perceives, crawls, ranks, and displays your site.
The Library Analogy: Understanding GSC’s Role
Think of your website as a library in a city. Most visitors arrive via the main highway—Google Search. This highway has millions of on-ramps (search queries) and countless navigation signs (search results pages).
If you have analytics installed (like Google Analytics 4), it functions as your internal librarian and security camera system. The librarian knows exactly how many patrons walked through the front doors, which aisles they visited, which books they checked out, and how long they stayed.
But here’s the limitation: if Google accidentally directs the highway traffic to the wrong exit, your librarian only sees fewer visitors arriving. They can’t see the misdirection happening on the highway itself. If construction blocks one of the main on-ramps to your library, the librarian sees reduced traffic but doesn’t know why.
Google Search Console acts as your traffic helicopter monitoring the highway system. It doesn’t show you every possible route to your library (email newsletters, social media, direct visits, paid advertisements), but it monitors the biggest, most important route: Google Search.

GSC tracks how many drivers saw your library’s sign on the highway (Impressions). It counts how many took the exit toward your location (Clicks). It calculates how effective your signage is (Click-Through Rate).
Most importantly, GSC reports on infrastructure problems. Are there potholes on the Google Search route (Crawl Errors)? Is a bridge out preventing anyone from reaching you via search (Indexing Issues)? Has Google placed warning signs that discourage visitors (Manual Actions)?
What About Other Traffic Sources?
You might be wondering: if Google Search Console only shows Google Search traffic, how do I monitor visitors from social media, email campaigns, direct visits, or paid advertising?
That’s where on-site analytics tools come in. If you have Google Analytics 4 or similar platforms installed, they track visitors regardless of how they arrived. The combination is powerful: GSC tells you about your search visibility specifically, while on-site analytics shows you the complete picture of all traffic sources.
However, even if you don’t have any analytics installed yet, Google Search Console remains valuable. For most websites, Google Search represents the largest single traffic source (often 40-60% of all visitors). Understanding how you appear in search results is fundamental to online visibility, regardless of what other measurement tools you use.
The Data You Can’t Get Anywhere Else
Google Search Console provides direct feedback from Google’s own database about how its search engine perceives, crawls, and ranks your site. This isn’t third-party estimation or inference. This is primary source data about your search presence.
Without GSC, you cannot distinguish between these two very different problems:
Lack of demand: People simply aren’t searching for what you offer.
Infrastructure failure: People are searching, but technical errors prevent your pages from appearing in results.
You might think nobody wants what you’re selling when the reality is simpler: Google can’t properly crawl your site, your pages aren’t indexed, or your titles aren’t compelling enough to earn clicks from searchers who do see you.
The tool evolved from the old “Google Webmaster Tools” and was rebranded to signal a shift from purely technical developers to marketers, business owners, and SEO specialists. Despite interface improvements, including the 2024-2025 UI updates that added clearer “Insights” features, the verification process still requires interaction with fundamental web technologies. That’s where most people get stuck.
What You Need Before Starting
The most common cause of setup failure isn’t technical incompetence. It’s lack of preparation. Trying to verify your site without the right credentials leads to frustration and abandoned attempts.
Before you begin, get clear on what you’re trying to accomplish. You want to establish visibility into how Google Search sees your site so you can identify problems and opportunities. This clarity about your goal—understanding your search presence—will help you push through the technical steps ahead.
A Google Account (The Right One)
You need a valid Google Account. This seems obvious, but which account you use has long-term implications.
Use the same Google Account that manages your other Google business assets: Google Analytics 4, Google Ads, Google Business Profile. This unified approach simplifies future data linking, allowing GSC data to flow into GA4 reports if you’re using that platform.
If you’re running a business, avoid using a personal Gmail address as the primary owner. Use a dedicated business Google account or Google Workspace account instead (admin@yourbusiness.com rather than surferdude88@gmail.com). This ensures that if personnel changes occur, access to the data remains with the company, not an individual who might leave.
Access to Your Digital Infrastructure
Verification requires proving you hold the “keys” to your website. Depending on which verification method you choose, you’ll need login credentials for one of these systems:
Domain Registrar or DNS Provider: This is where you purchased your domain name (GoDaddy, Namecheap, Bluehost, Squarespace, Wix). You need access to the area where “DNS Records” are managed. This is required for the most robust setup method.
Website Backend or CMS: If DNS access is impossible, you need administrator access to your Content Management System (WordPress Dashboard, Shopify Admin, Wix Editor). This allows installation of plugins or injection of code into your site’s header.
Hosting Control Panel: In rare cases, you need access to cPanel or a File Manager to upload verification files directly to the server’s root directory.
Your Exact Canonical URL
Precision matters in analytics. You must identify the exact canonical URL of your website. Google Search Console treats variations as completely distinct entities.
Is your site http:// or https://? Modern sites should exclusively use https://.
Does it use the www subdomain (https://www.example.com) or is it a “naked” domain (https://example.com)?
If you verify https://www.example.com as a URL Prefix property, GSC will only track traffic to that specific address. It ignores traffic hitting https://example.com (no www) or http://www.example.com. This data fragmentation can cause significant underreporting of your search performance.
Preparation Checklist:
- Active Google Account logged in (preferably business-tier)
- Login credentials for Domain Registrar verified and accessible
- Login credentials for Website CMS verified
- Clear identification of primary domain name and protocol
Getting Started: Creating Your Property
Setting up Google Search Console is fundamentally about identity verification. Google’s systems ask a single critical question: “You claim this digital property belongs to you; prove it.”
Because GSC exposes sensitive data about search visibility, indexing errors, and security issues, Google demands strict proof of ownership. This prevents unauthorized surveillance of competitors’ sites.
Accessing the Interface
Navigate to the official portal: https://search.google.com/search-console
You’ll see a landing page outlining the tool’s capabilities. Look for the prominent blue Start now button, typically in the centre of the viewport or top-right corner.
If you’re not already authenticated, you’ll be prompted to sign in with your Google Account.
The Welcome Screen Decision
After login, you’ll encounter a modal window titled “Welcome to Google Search Console”. If you already have access to other properties, you may need to open the property dropdown menu in the top-left corner and select + Add property.
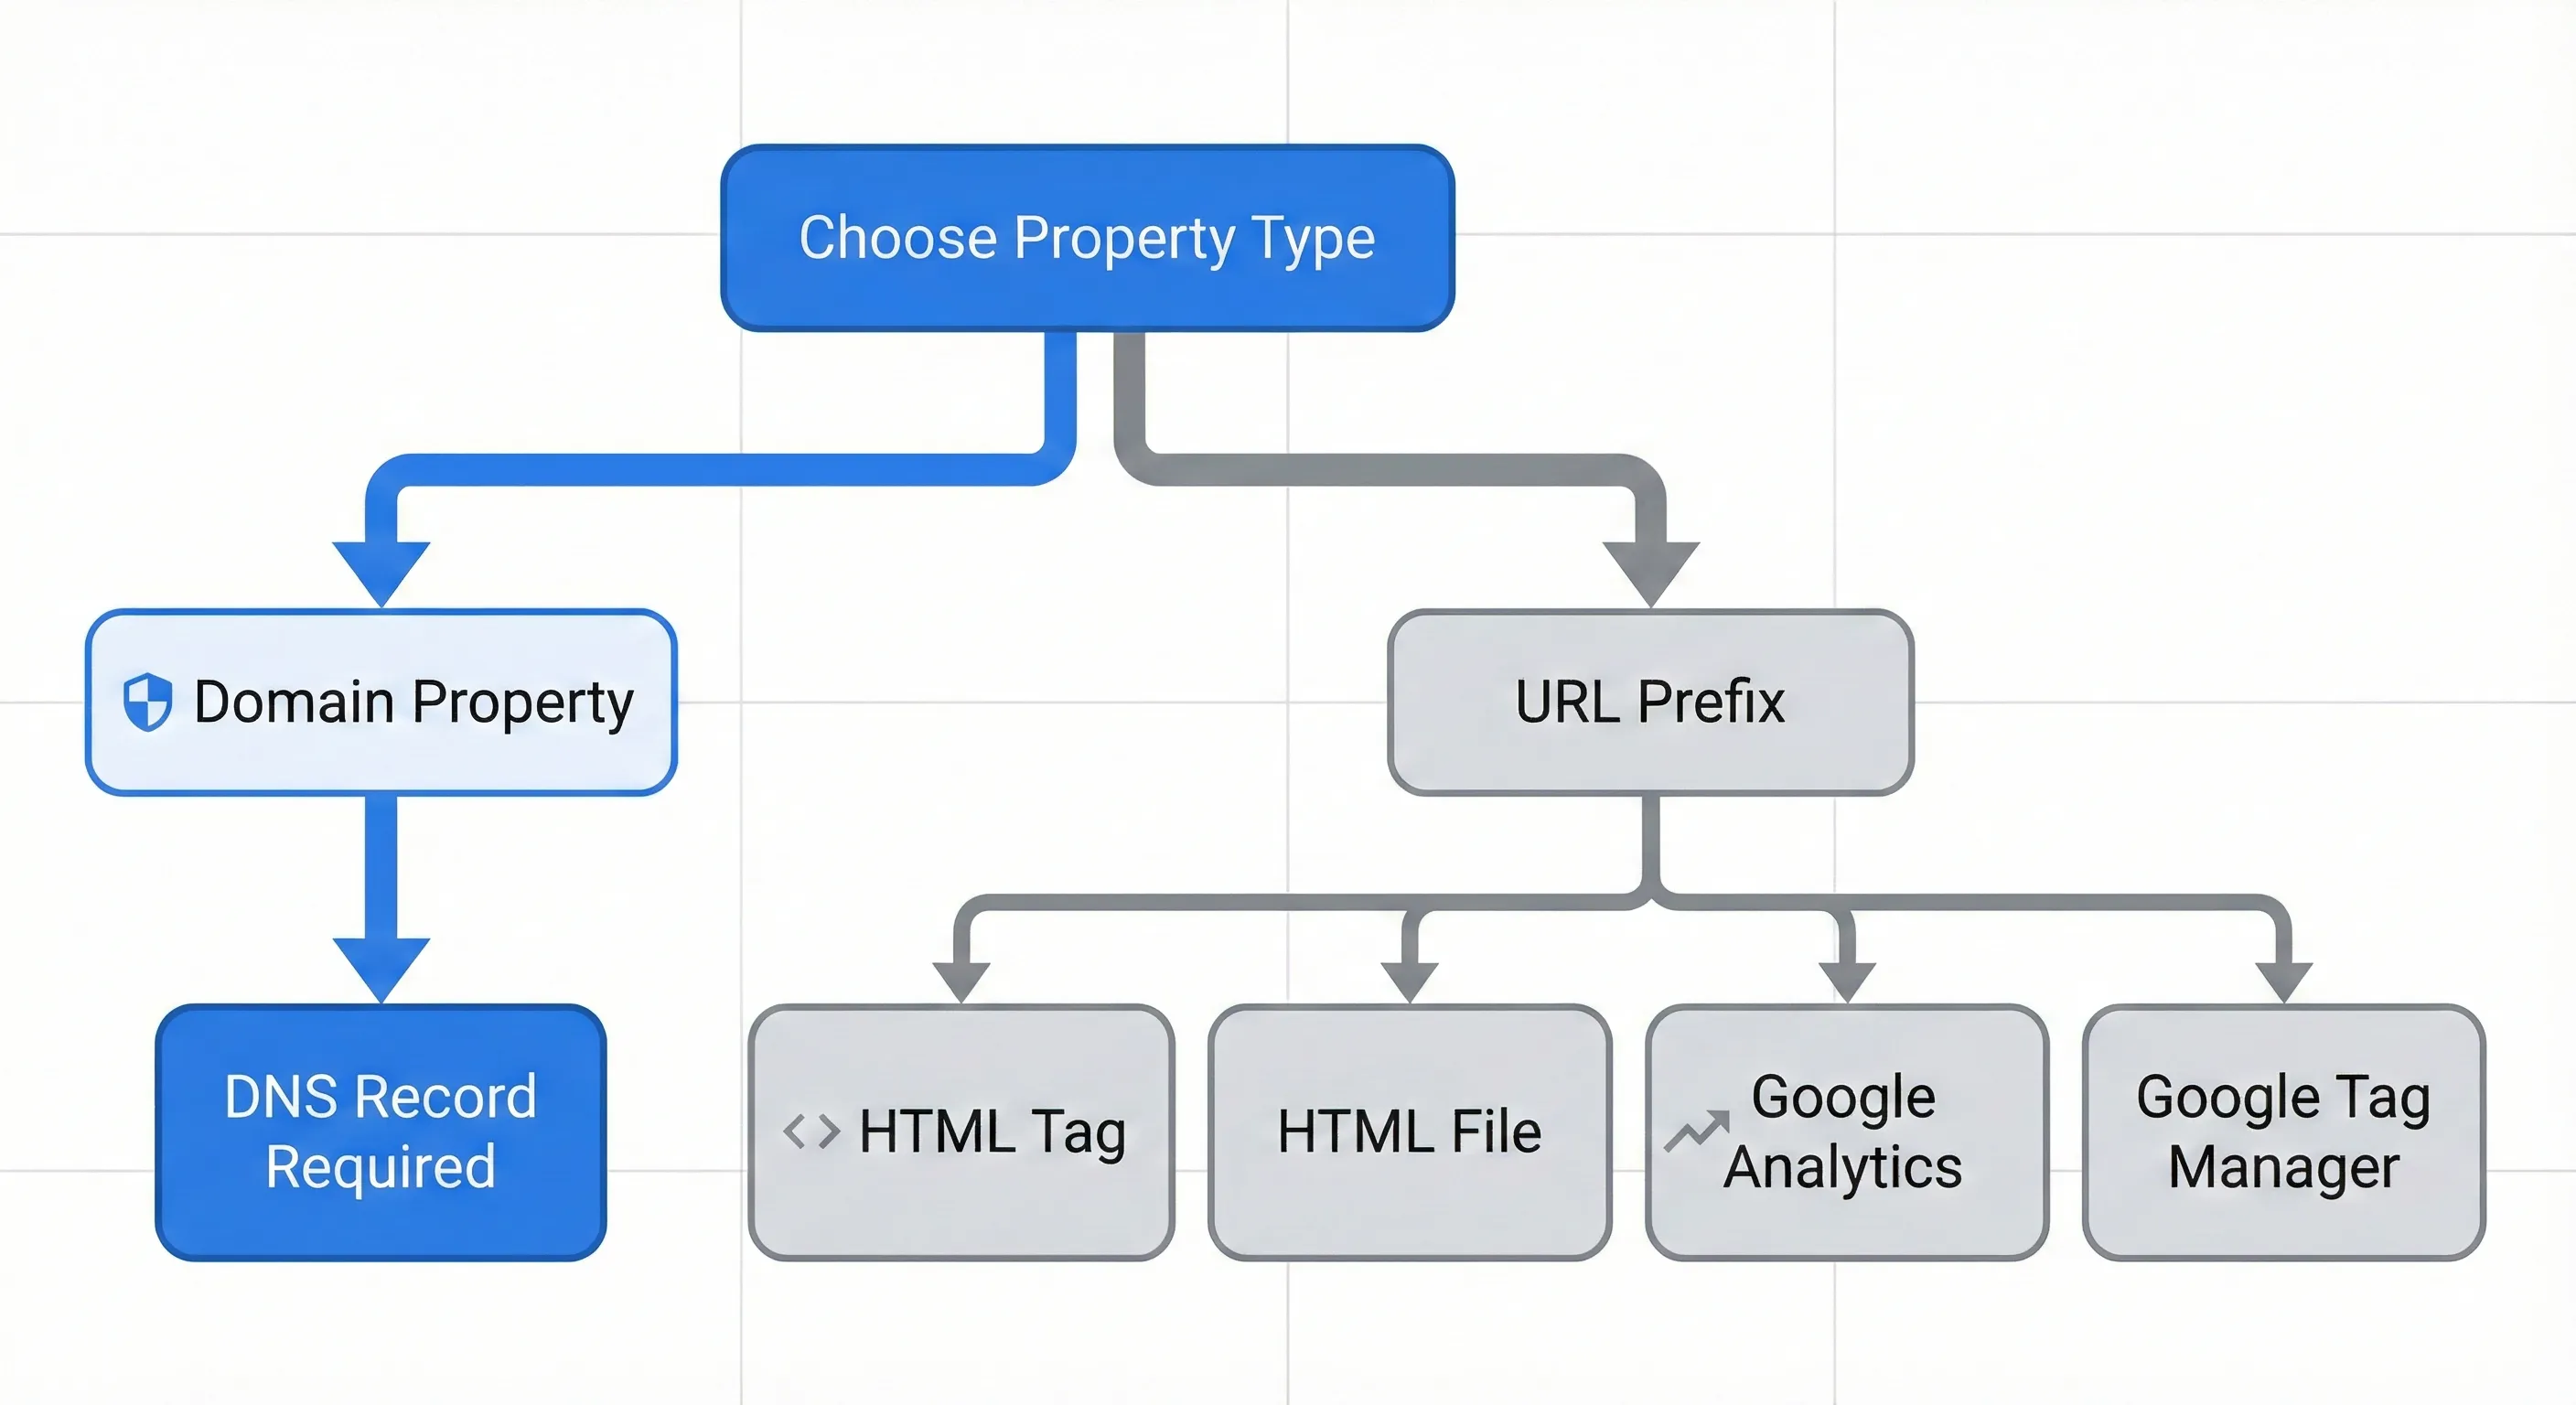
This screen presents two distinct options side-by-side: Domain on the left and URL Prefix on the right. This is the first and most critical decision point, as your choice dictates both setup difficulty and data quality.
Domain vs URL Prefix: Choosing the Right Property Type
Understanding the distinction between these property types is essential for long-term data integrity. This choice affects what questions you’ll be able to answer about your search presence.
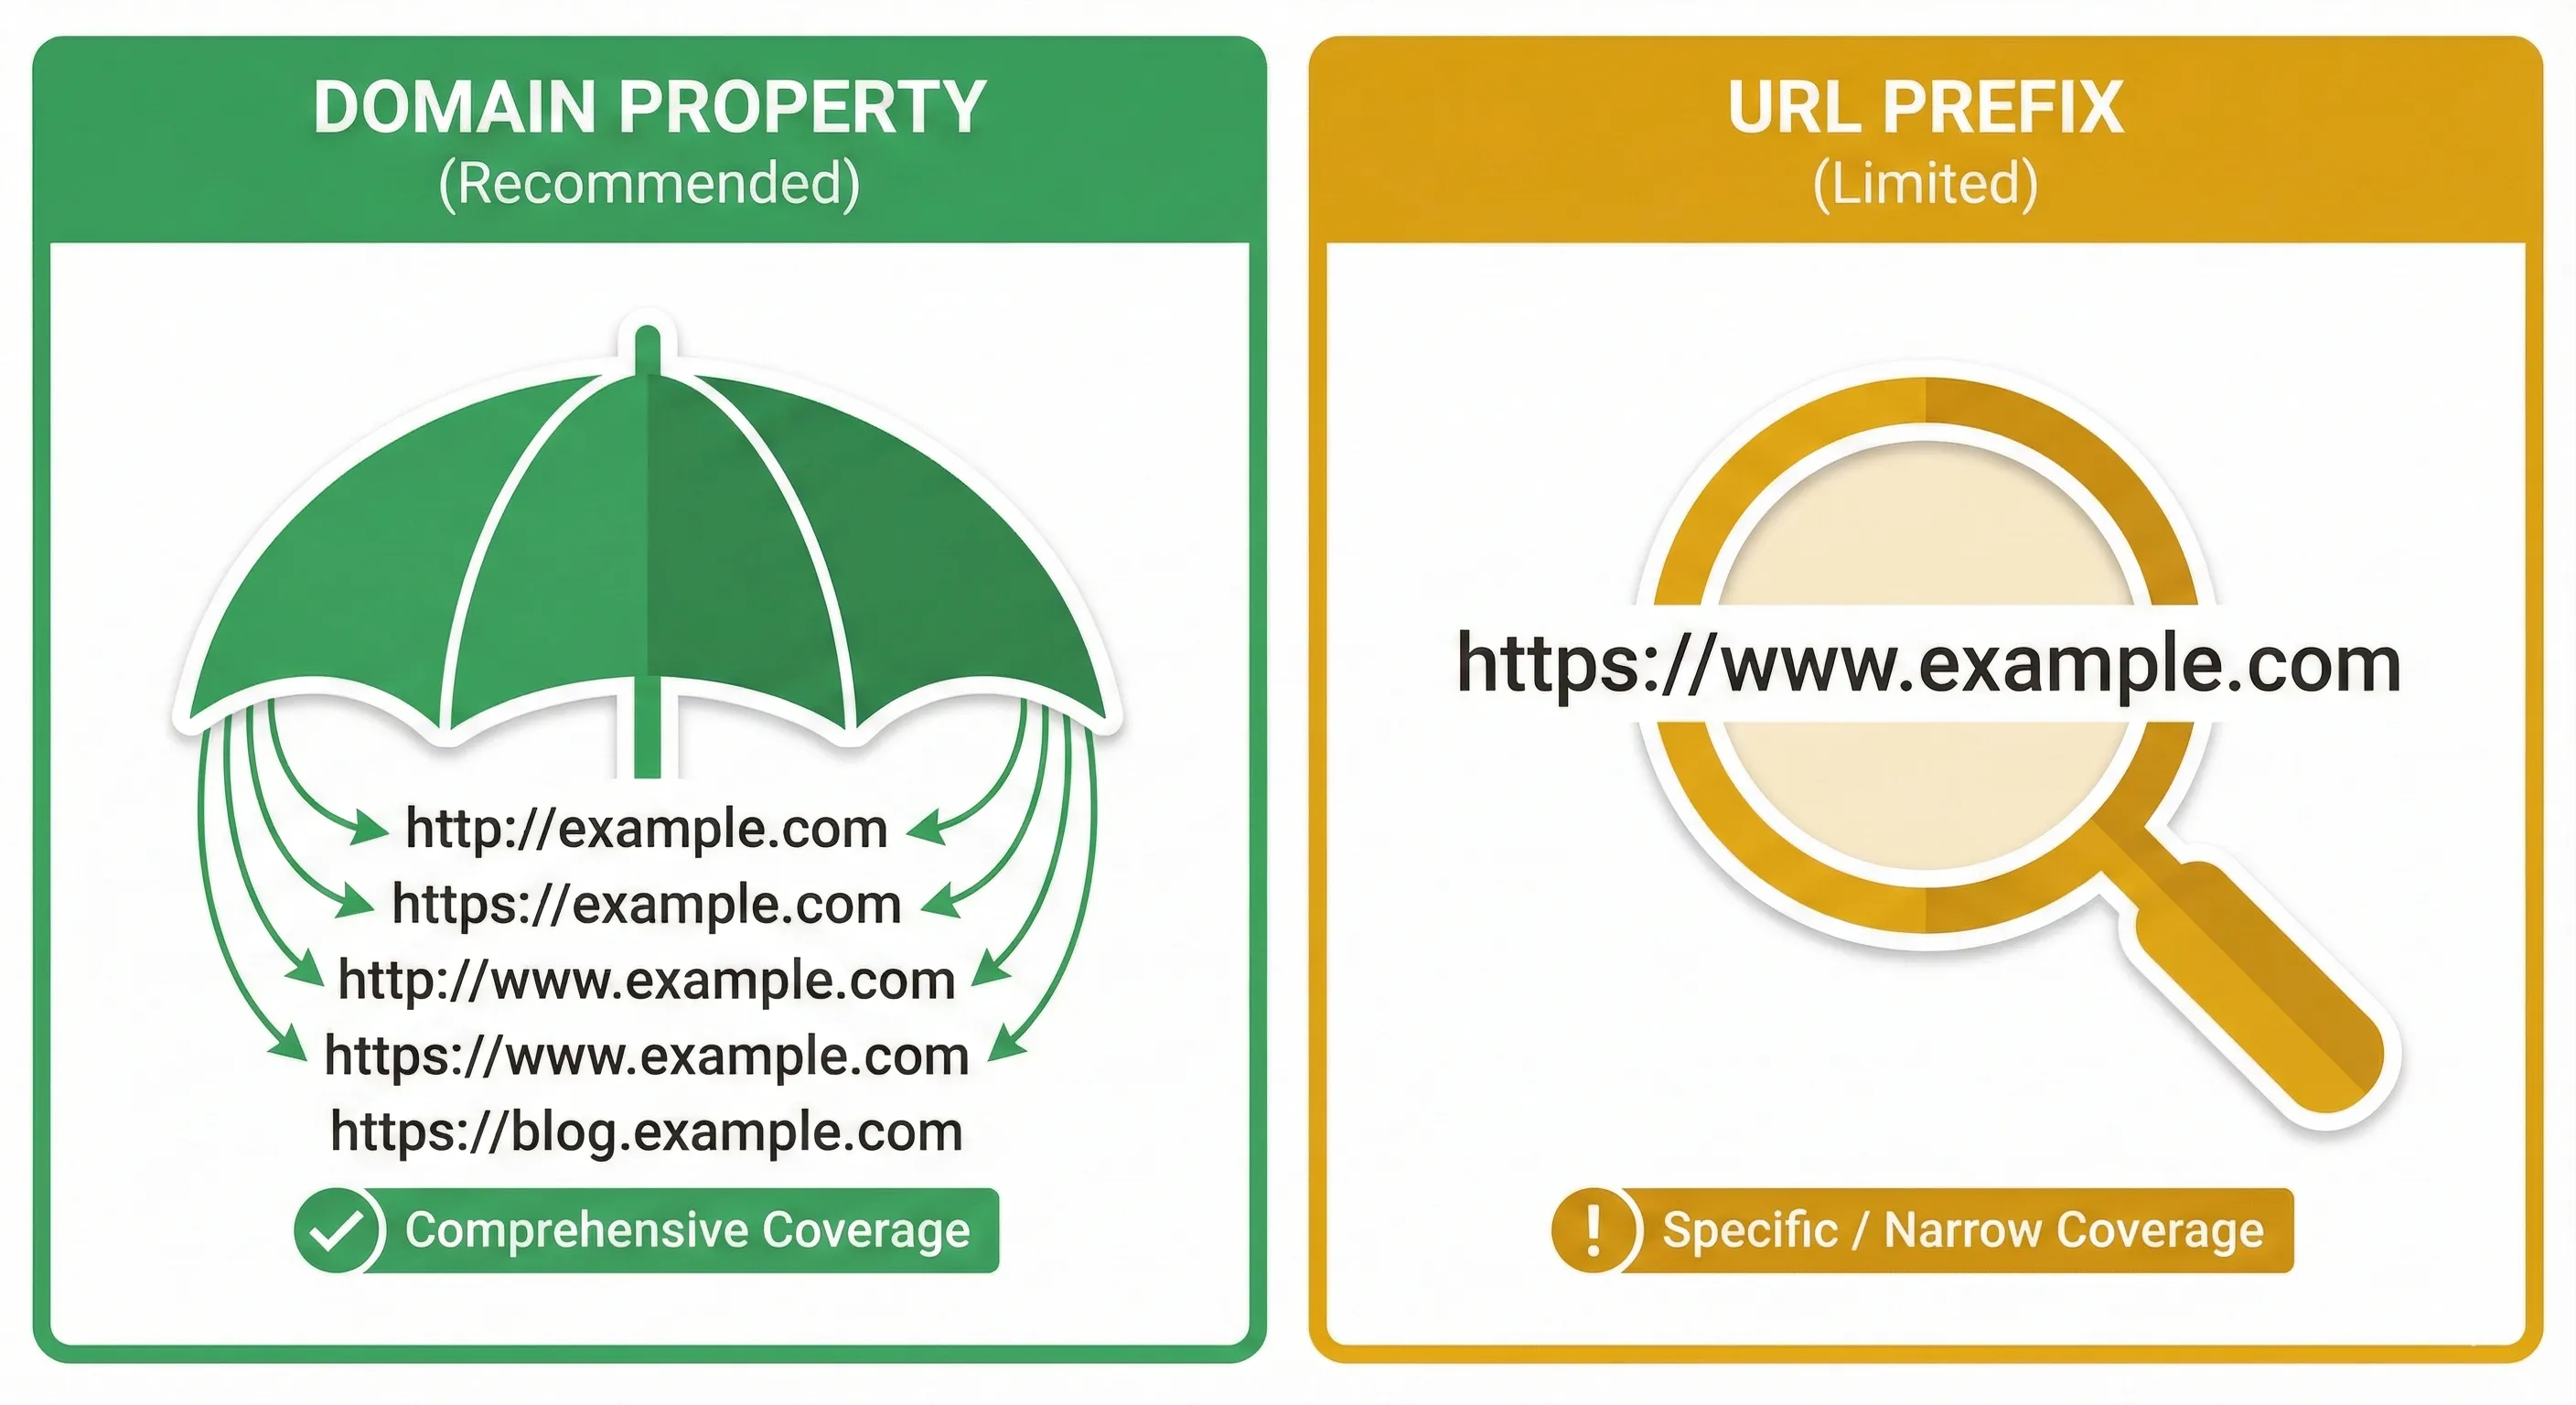
Domain Property: The Wide-Angle Lens
The Domain property represents the modern, holistic standard for search measurement.
It tracks everything attached to the domain name. If you enter example.com, it automatically aggregates data for http://example.com, https://example.com, http://www.example.com, https://www.example.com, and any subdomains like blog.example.com or shop.example.com.
This provides a unified view of your search presence. It prevents data fragmentation. If you migrate your site from HTTP to HTTPS, data continuity remains unbroken. If users accidentally link to the www version while your site is non-www, you still capture that link equity data.
The challenge: it requires DNS verification. This is the barrier to entry for many beginners, as it necessitates interacting with domain registrar settings. However, it’s the only way to prove ownership of the entire domain ecosystem.
URL Prefix Property: The Magnifying Glass
The URL Prefix property is the legacy method. It’s highly specific and granular.
It tracks only the exact URL string entered. If you verify https://www.example.com, GSC essentially ignores traffic to http://example.com or https://example.com.
The advantage: it allows multiple verification methods. If you cannot access DNS records (perhaps you lost the registrar password but have admin access to your WordPress dashboard), you can still verify using an HTML tag or file upload. It’s also useful for complex organisations where different teams manage different subdomains (the Support team needs access only to support.example.com data).
The limitation: it offers a fragmented view. To get a complete picture of your search performance, you’d need to verify four separate properties (HTTP, HTTPS, WWW, non-WWW) and mentally aggregate the data.
The Expert Recommendation
For most small business owners and marketers, the Domain property is the superior choice. It future-proofs your data and ensures you’re not missing critical insights due to protocol variations.
The slight increase in setup difficulty is worth the long-term benefit of accurate, aggregated reporting. Think about what you’re trying to achieve: complete visibility into your search presence. The Domain property answers that need most effectively.
The only real exceptions are if you genuinely cannot access DNS records or if you work in a large organisation where different departments need isolated access to specific subdomains.
Decision Framework:
Domain Property (Recommended):
- Aggregates all protocols (
HTTP/HTTPS) and subdomains - Requires DNS verification only
- Maintains data history across protocol changes
- Ideal for business owners, founders, SEO specialists
URL Prefix Property (Fallback):
- Restricted to exact URL string entered
- Supports HTML file, meta tag,
GA4,GTMverification - History breaks if protocol changes
- Ideal for specific departments, users without DNS access
Setting Up DNS Verification: Step-by-Step
We’ll proceed assuming you’re choosing the Domain property to secure the best data quality. This requires DNS verification.
The acronym “DNS” (Domain Name System) often induces anxiety in non-technical users, but the process is straightforward when demystified.
Understanding What You’re Actually Doing
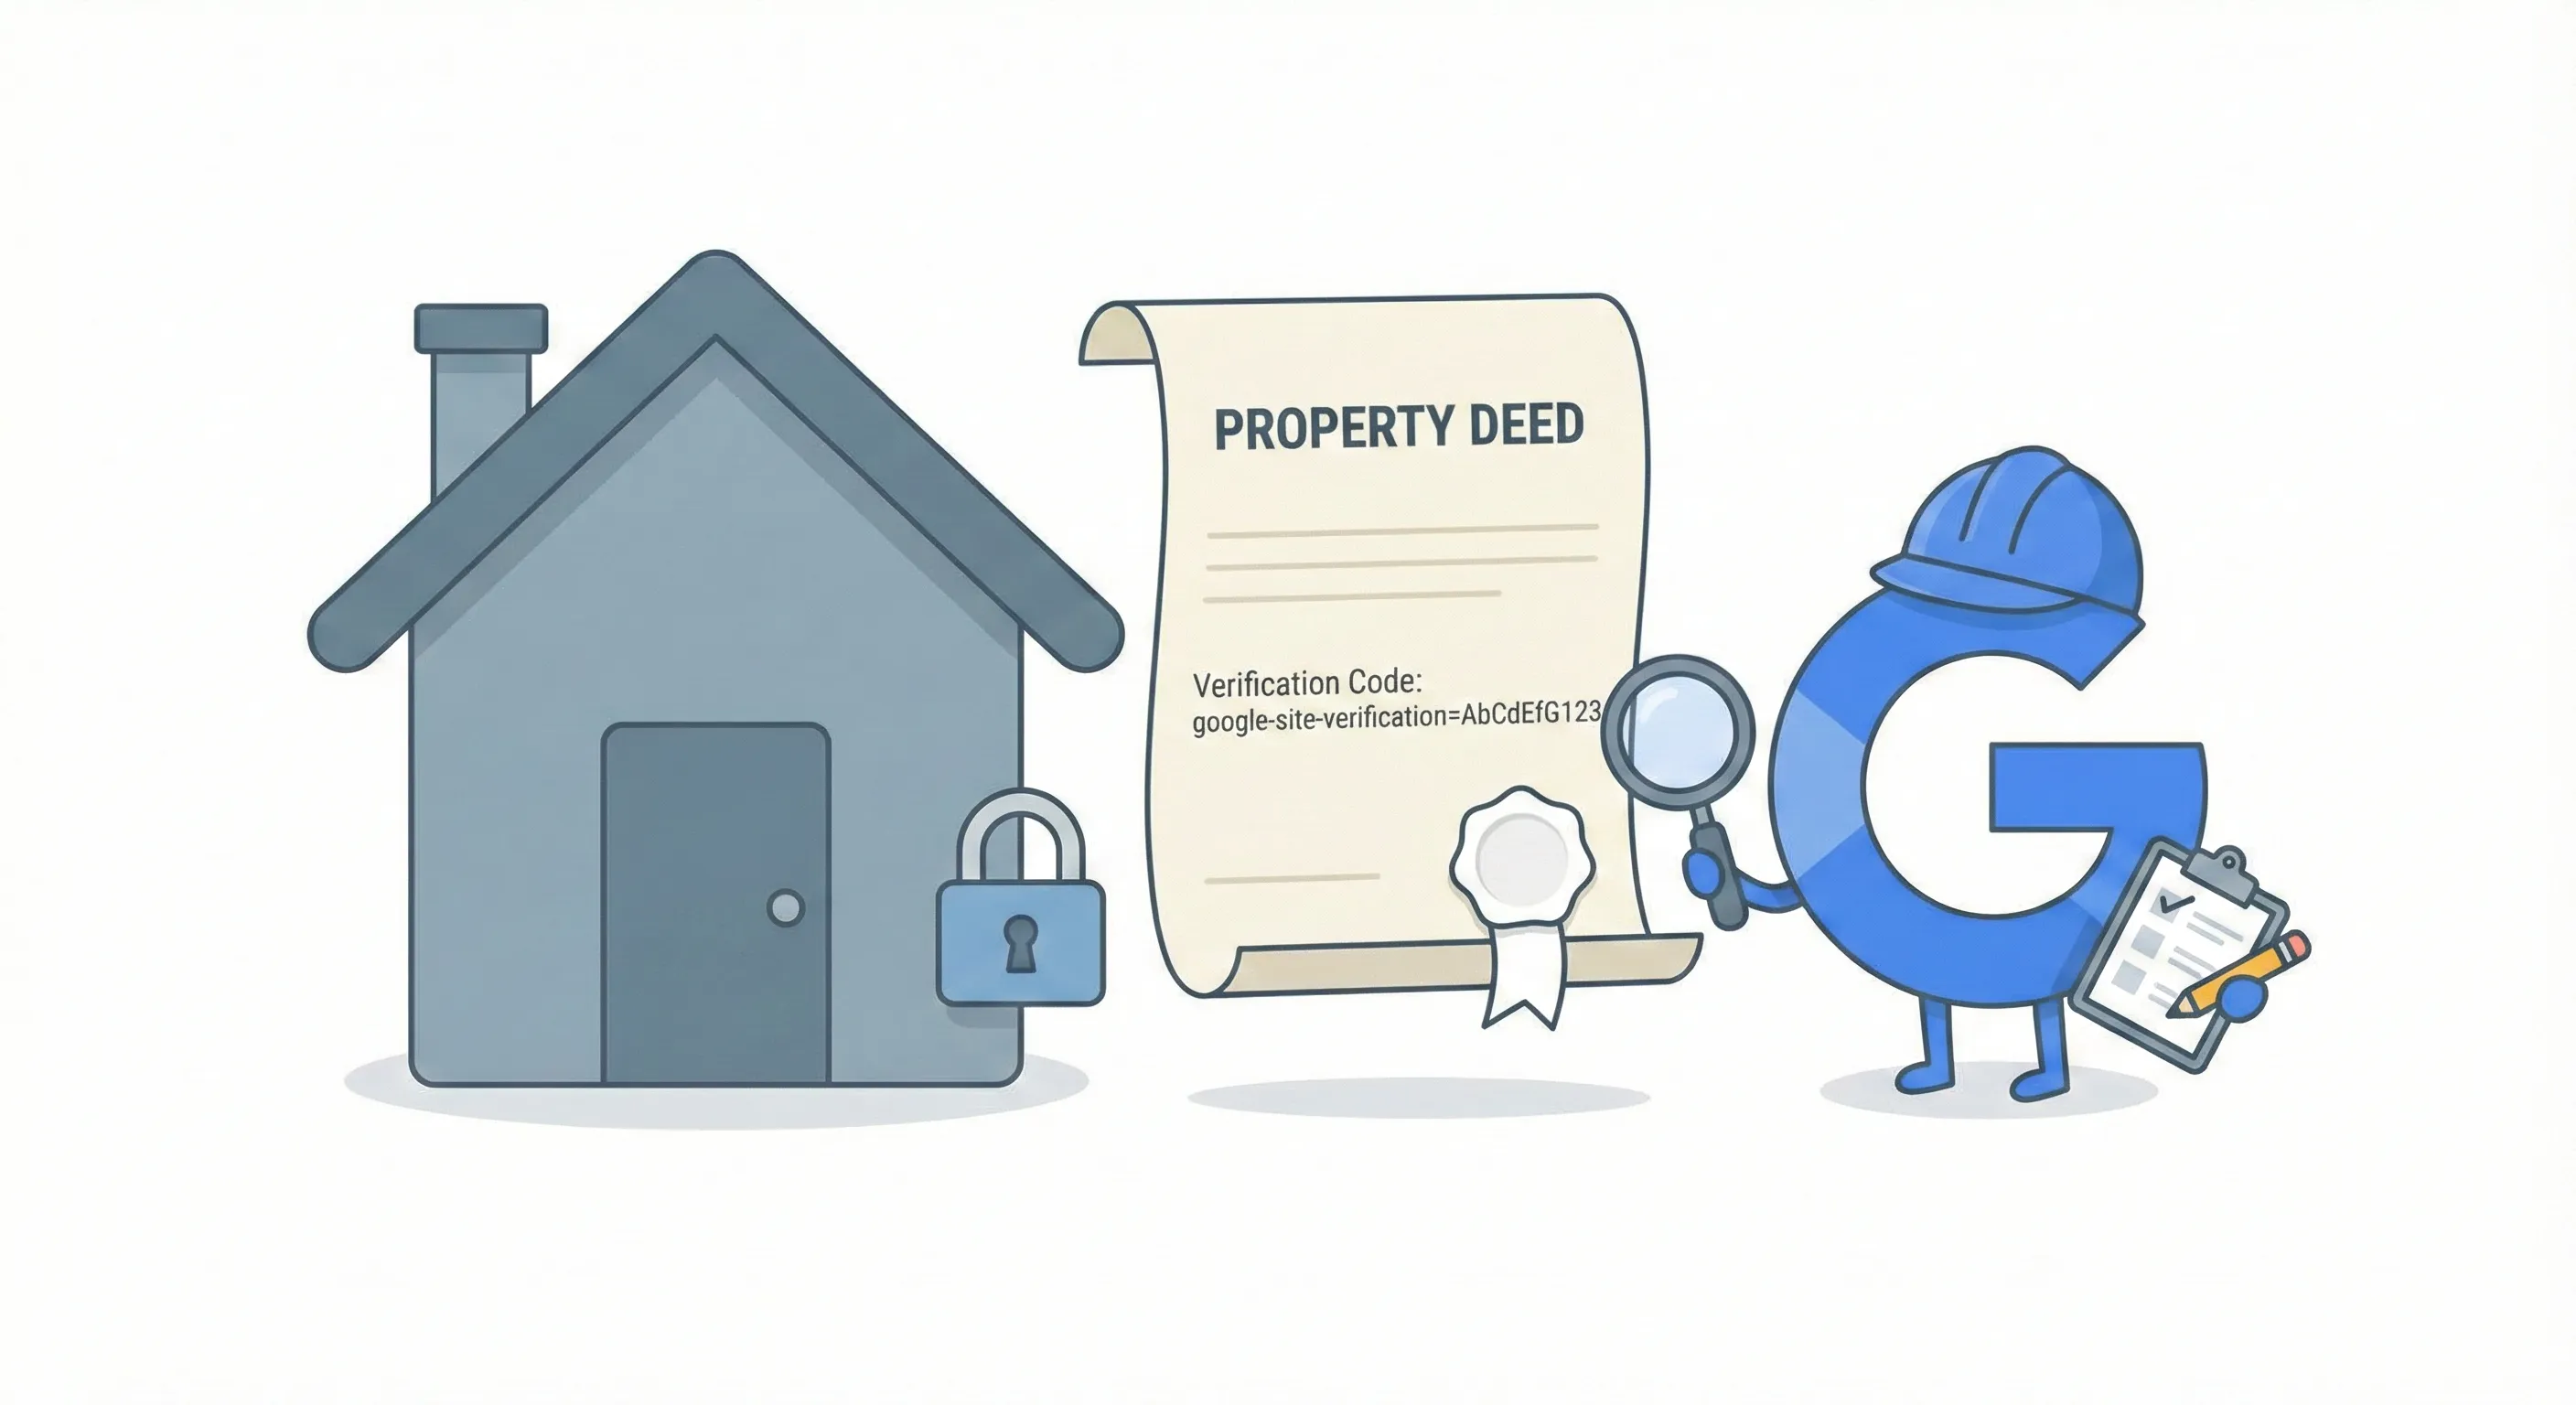
Think of your domain name (example.com) as a house you claim to own. Google is the city inspector who needs to verify ownership. They can’t simply take your word for it. They need to see your name on the property deed.
The DNS is the public registry of deeds for the internet. It translates your human-readable domain name into machine-readable IP addresses.
A TXT Record is a “Note” field in that registry. It doesn’t change where your website lives, how your email works, or how your site functions. It’s simply a text note attached to your domain’s file.
By pasting Google’s unique verification code into a TXT record, you’re effectively pinning a note on your digital front door that says, “I, the owner, authorise Google to inspect this house.” Only the true owner with the keys (login credentials) could pin that note there.
The Verification Process
Step 1: Initiate Domain Verification
In the Domain box (left side) of the Welcome screen, enter your domain name.
Format: Enter example.com without https://, http://, www, or any slashes.
Click CONTINUE.
Step 2: Retrieve the Verification Token
GSC will check if the property is already verified. If not, it displays a modal window titled “Verify domain ownership via DNS record”.
You’ll see a string of random text that looks like: google-site-verification=AbCdEfG…
Click the COPY button next to this string.
Critical: Don’t close this tab. You’ll need to return here to complete the handshake.
Step 3: Add the TXT Record at Your Registrar
You must now log in to your domain registrar (where you bought the domain) to add this record. The interface varies by provider, but the logic is universal: Type, Host, Value.
Registrar-Specific Instructions
GoDaddy
Log in to your GoDaddy account and navigate to your Domain Portfolio.
Select the specific domain you’re verifying.
Click on DNS or Manage DNS.
Click the button labelled Add New Record.
Type: Select TXT from the dropdown menu.
Name (or Host): Enter @. In DNS terminology, the @ symbol represents the root domain.
Value: Paste the verification code you copied from Google (google-site-verification=…).
TTL (Time to Live): Leave as default (1 Hour) or set to the lowest available option (1/2 Hour) to speed up propagation.
Click Save.
Namecheap
Log in and navigate to your Domain List.
Click the Manage button next to your domain.
Select the Advanced DNS tab from the top menu.
Scroll to the Host Records section and click Add New Record.
Type: Select TXT Record.
Host: Enter @.
Value: Paste the Google verification code.
TTL: Automatic.
Click the green checkmark icon to save the record.
Wix
Log in to your Wix dashboard.
Go to Settings > Domains.
Click the Actions icon (three dots) next to the domain and select Manage DNS Records.
Scroll down to the TXT (Text) section and click + Add Record.
Host Name: Leave this field Blank.
Critical: Unlike GoDaddy, Wix often treats @ literally or errors out. Leaving it blank defaults to the root domain.
Value: Paste the Google verification code.
Click Save.
Squarespace
Log in and go to your Domains dashboard.
Click the domain name and select DNS Settings.
Scroll down to Custom Records.
Click Add record.
Type: Select TXT.
Host: Enter @ (if the field allows it) or leave it Blank if @ is not accepted.
Data/Value: Paste the Google verification code.
Click Save.
Step 4: Complete Verification
Return to the Google Search Console tab.
Click the VERIFY button at the bottom of the modal window.
Success: A green notification appears: “Ownership verified.” You can now click Go to Property.
Failure: A red notification appears: “Ownership verification failed.”
When Verification Fails
If verification fails, don’t panic. It rarely means you did something wrong. It usually means the internet is moving slowly.
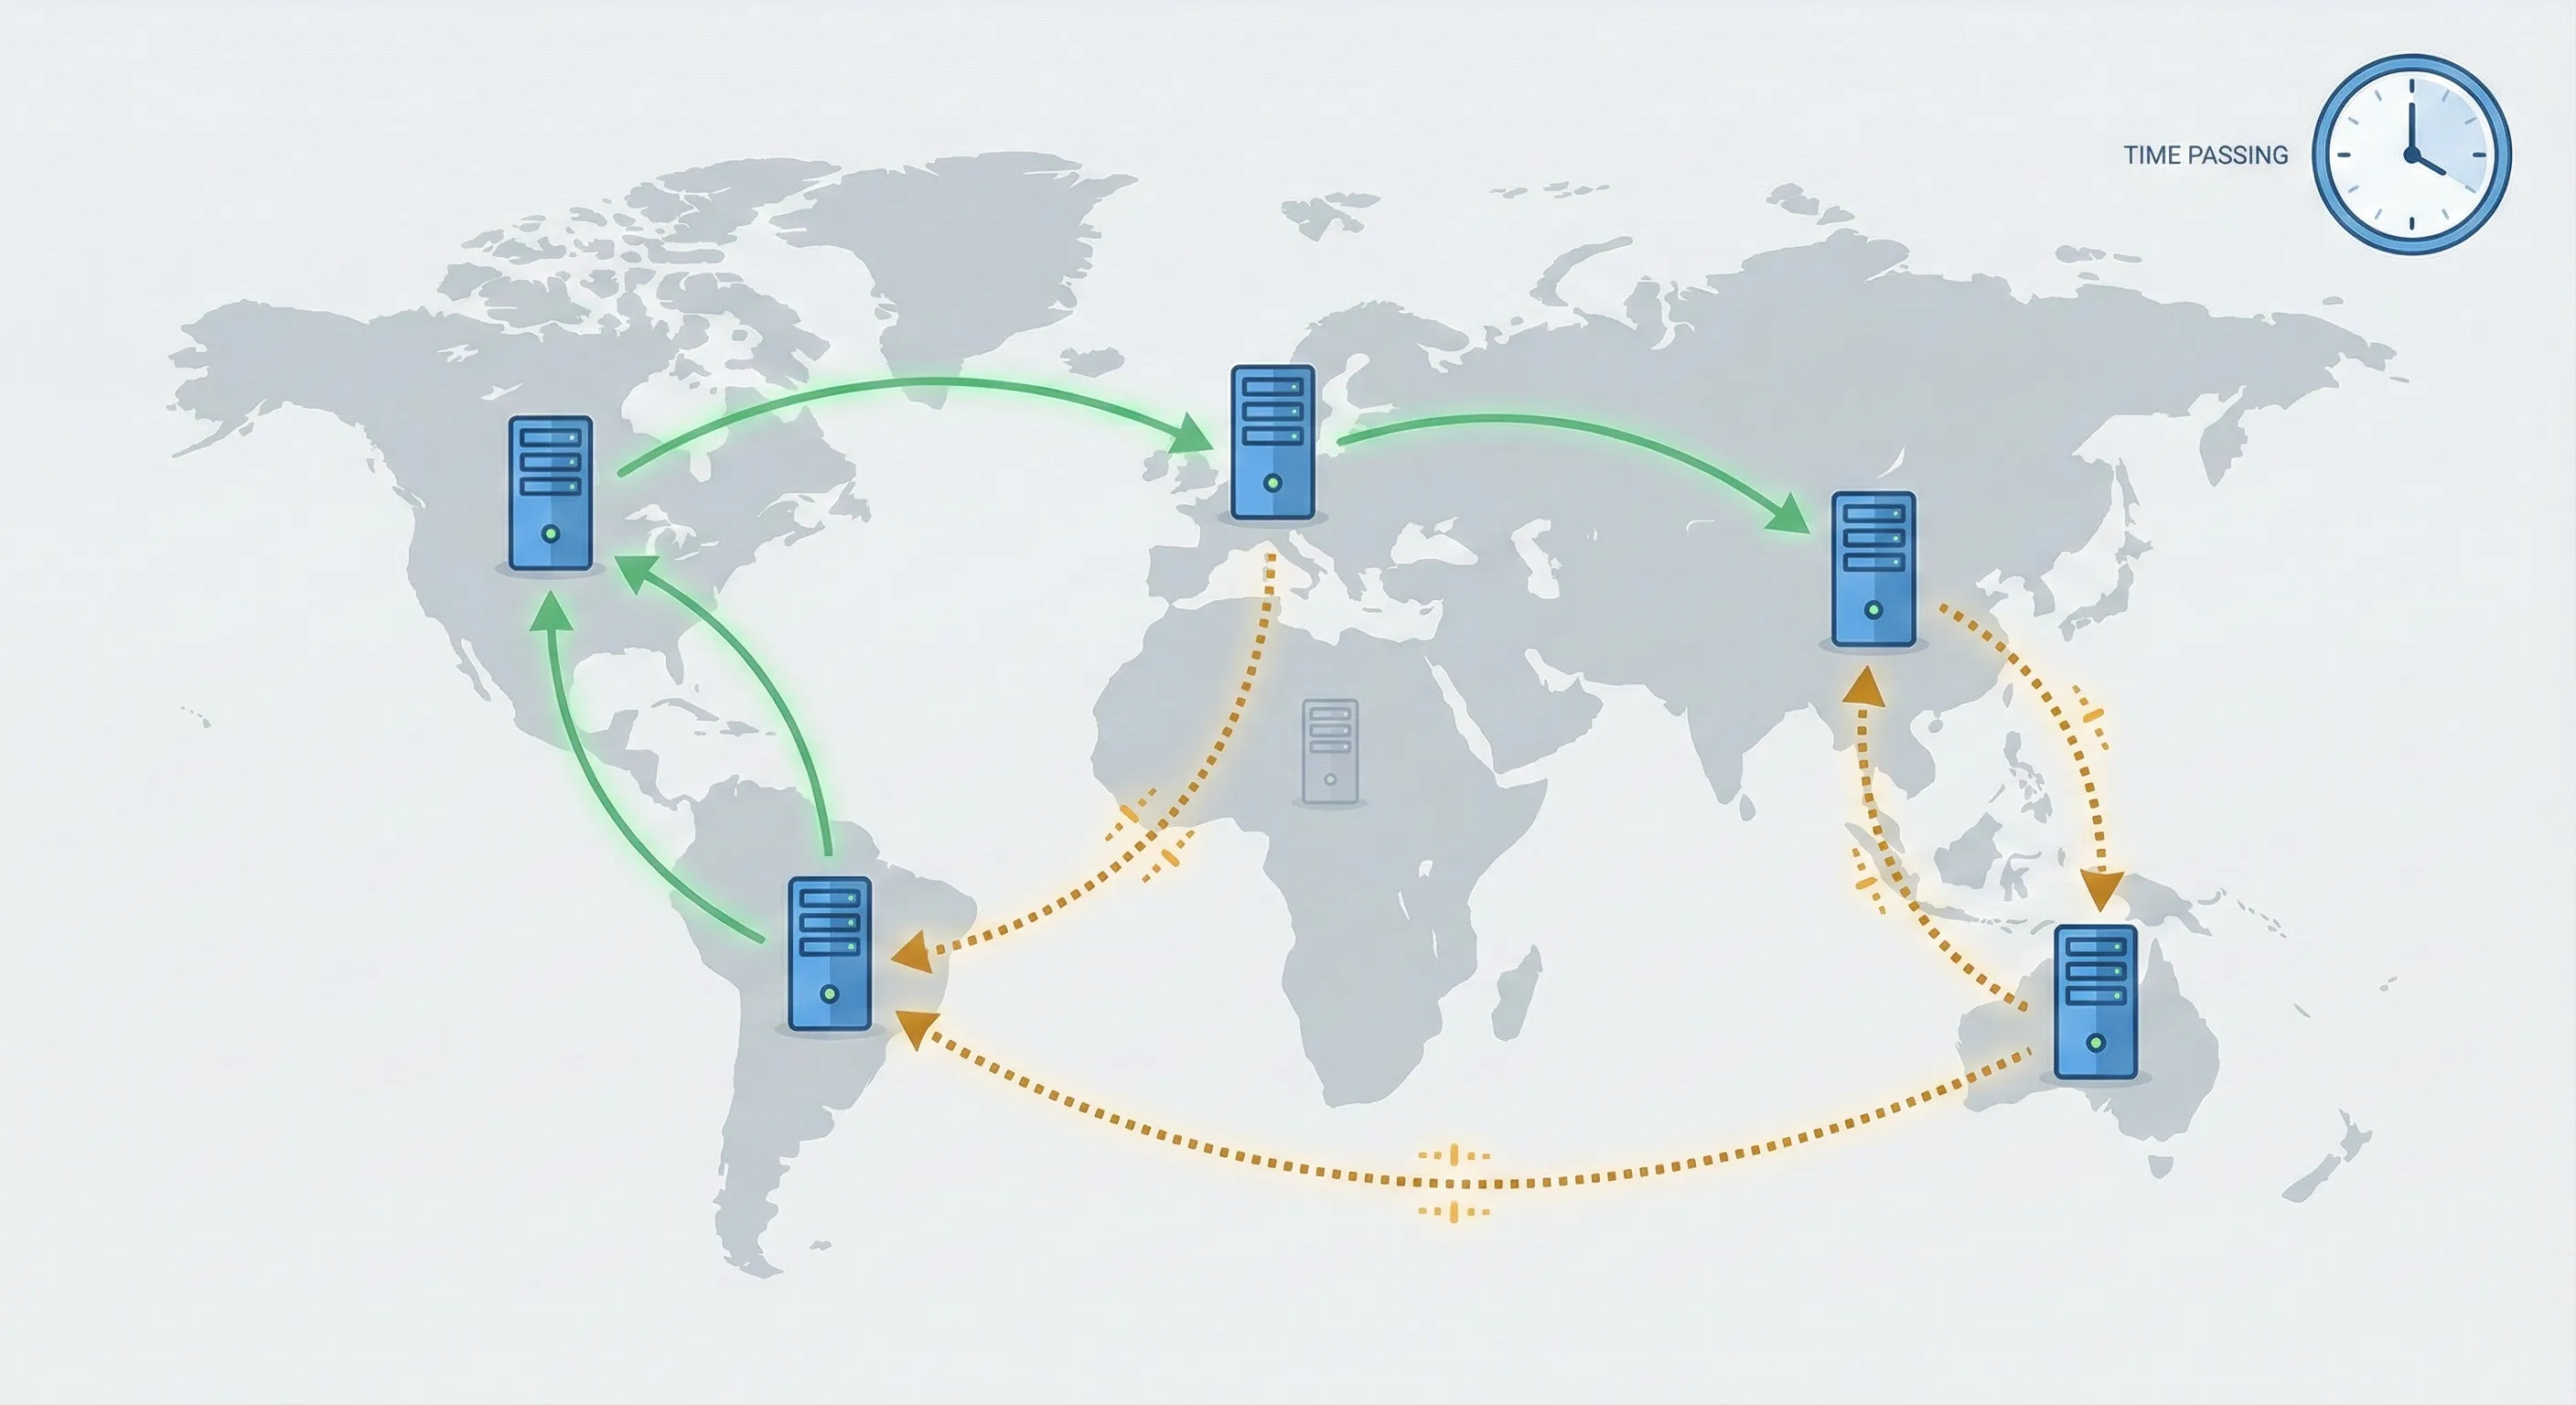
DNS changes aren’t instantaneous. When you save a record at your registrar, that information must propagate to servers around the world. This can take anywhere from a few minutes to 48 hours, though it typically happens within an hour.
Wait 5 to 10 minutes and click VERIFY again.
Ensure you pasted the full code. Ensure you used the correct Host (@ vs Blank).
If it still fails, click Verify later. This saves the property in your list as “Unverified.” You can come back in a few hours, open the property, and click VERIFY again without re-doing the DNS steps.
Alternative Verification Methods (URL Prefix Only)
If DNS verification proves impossible after repeated attempts (you don’t have registrar login, or the interface is too confusing), you can use the URL Prefix method with alternative verification options.
Switching to URL Prefix
Return to the “Add Property” screen.
Select the URL Prefix box (right side).
Enter your exact URL: https://www.yoursite.com (ensure the protocol and subdomain match your live site exactly).
Click CONTINUE.
HTML Tag Method (Best for CMS Users)
This method involves placing a small line of code into your website’s header.
Expand the HTML Tag option.
Copy the meta tag provided: <meta name="google-site-verification" content="..." />
Implementation in WordPress:
Install an SEO plugin like Yoast SEO, RankMath, or All in One SEO (if not already installed).
Navigate to the plugin’s settings (e.g., Yoast > Settings > Site Connections).
Locate the field for Google verification code or Baidu/Bing/Google Webmaster Tools.
Paste the code there and save changes.
Return to GSC and click VERIFY.
Google Analytics Method (The Piggyback Approach)
If you’ve already set up Google Analytics 4 and have “Edit” permissions on that account, you can use it as a verification token.
Select the Google Analytics option.
Click VERIFY.
GSC scans your site’s code for the GA4 tracking snippet. If it finds the snippet and confirms your current Google Account has admin rights, it verifies ownership instantly.
Prerequisite: The GA4 code must be in the <head> section of your page, not the footer.
What Happens After Verification
You’ve successfully navigated the technical setup. You’ve verified your property. However, the dashboard you’re now looking at is likely empty.
The Data Collection Timeline
New users often experience anti-climax. Upon verification, GSC doesn’t display historical data. It begins collecting data from the moment of verification forward.
You’ll likely see a notice: “Processing data, please check again in a day or so.”
This is normal. It typically takes 24 to 48 hours for the first wave of data to populate. Don’t assume the setup failed. Don’t delete and re-add the property, as this resets the data collection clock.
Submit Your Sitemap
While waiting for data, you can take a proactive step to accelerate Google’s crawling: submitting a Sitemap.
A Sitemap (specifically an XML Sitemap) is a digital blueprint listing every page on your site that you want Google to index. By submitting it, you’re handing Google a map rather than waiting for them to explore your site blindly.
Locate Your Sitemap URL:
WordPress (via Yoast/RankMath): Typically https://yoursite.com/sitemap_index.xml
Shopify: https://yoursite.com/sitemap.xml
Squarespace/Wix: https://yoursite.com/sitemap.xml
Submit the Sitemap:
Navigate in GSC: On the left sidebar, under the Indexing section, click Sitemaps.
Enter the specific filename (e.g., sitemap.xml) into the field and click SUBMIT.
Status Check: You should see a status of Success. If you see “Couldn’t fetch,” wait 24 hours. This is often a temporary status for new accounts.
Explore Search Console Insights
In 2024-2025, Google integrated a feature called Search Console Insights directly into the main dashboard. This is designed specifically for non-technical users.
Look for an “Insights” card or a beaker icon at the top of the Overview page.
This view strips away complex spreadsheets and presents narrative data cards: “Your most popular content,” “How people find you,” and “Top search queries.”
For beginners, the standard Performance report can be overwhelming. Insights provides immediate, actionable feedback (e.g., “This blog post is trending up”) without requiring deep analysis.
Common Problems and How to Fix Them
Even with perfect setup, users encounter specific friction points. Understanding these prevents unnecessary panic.
HTTP/HTTPS Confusion
If you chose the URL Prefix method and verified http://yoursite.com, but your site automatically redirects visitors to https://yoursite.com, your GSC reports will show zero traffic.
GSC is precise. It’s measuring traffic to the HTTP version, which is effectively a ghost town.
This is why the Domain property is recommended. If you must use URL Prefix, ensure you verify the HTTPS version.
Accidentally Deleting Verification Tokens
A common error occurs months after setup. A site owner updates their WordPress theme or cleans up DNS records and accidentally deletes the Google TXT record or HTML tag.
Google periodically re-checks verification. If the token is missing, you lose access to the property.
Simply re-add the TXT record or HTML tag using the original method. Data collection usually resumes without loss if caught quickly, but access is temporarily revoked.
User Permissions
If you’re working with an agency or consultant, don’t share your Google password.
Go to Settings > Users and permissions. Click Add User. Enter their email address and give them Full or Restricted access.
Owner access should be reserved for you (the business owner) or trusted partners, as Owners can add and remove other users.
Understanding What These Metrics Actually Mean
The data appearing in Google Search Console measures two distinct things: the outcomes you’re trying to achieve (visibility, traffic from search) and the behaviours that create those outcomes (how people interact with your search results).
Impressions measure visibility—whether you’re appearing in search results at all. If you have zero impressions for your core product or service keywords, you have a fundamental problem: Google doesn’t recognize your site as relevant for those searches. This is an outcome metric that tells you if you’re in the game.
Clicks measure the behaviour of searchers choosing your result over competitors. High impressions with low clicks mean your ranking is decent, but something about your title or description fails to persuade searchers you’re the right choice.
Click-Through Rate reveals how compelling your search result appears. This behaviour metric shows what percentage of people who see your result actually click it. A low CTR for a query where you rank in position 3 suggests your meta description doesn’t match search intent or doesn’t differentiate you from competitors showing in positions 1, 2, 4, and 5.
Average Position indicates where you stand in the competitive hierarchy. Position 1 gets roughly 28% of clicks. Position 10 gets roughly 2%. The difference between position 4 and position 1 isn’t incremental (it’s exponential). This outcome metric shows the result of all your optimisation efforts.
Indexing Status measures whether your technical infrastructure allows Google to access and understand your content. This is a foundational behaviour metric—if Google can’t crawl your site properly, nothing else matters. This is the prerequisite for all other search metrics.
Understanding the difference between outcomes (the results you want) and behaviours (the actions that create results) helps you know where to focus. If your outcome metrics are poor, diagnose which behaviours need to change. If your behaviour metrics are strong but outcomes are weak, you may need to adjust strategy rather than tactics.
Next Steps: From Data to Decisions
By completing this setup, you’ve established visibility into your search presence. But Google Search Console isn’t just a reporting tool—it’s a diagnostic system that should drive specific actions.
The key is knowing which questions to ask at each stage of your journey. Your questions should focus on what you’re trying to achieve (growing search traffic, identifying technical problems, understanding what content resonates) and what behaviours drive those outcomes.
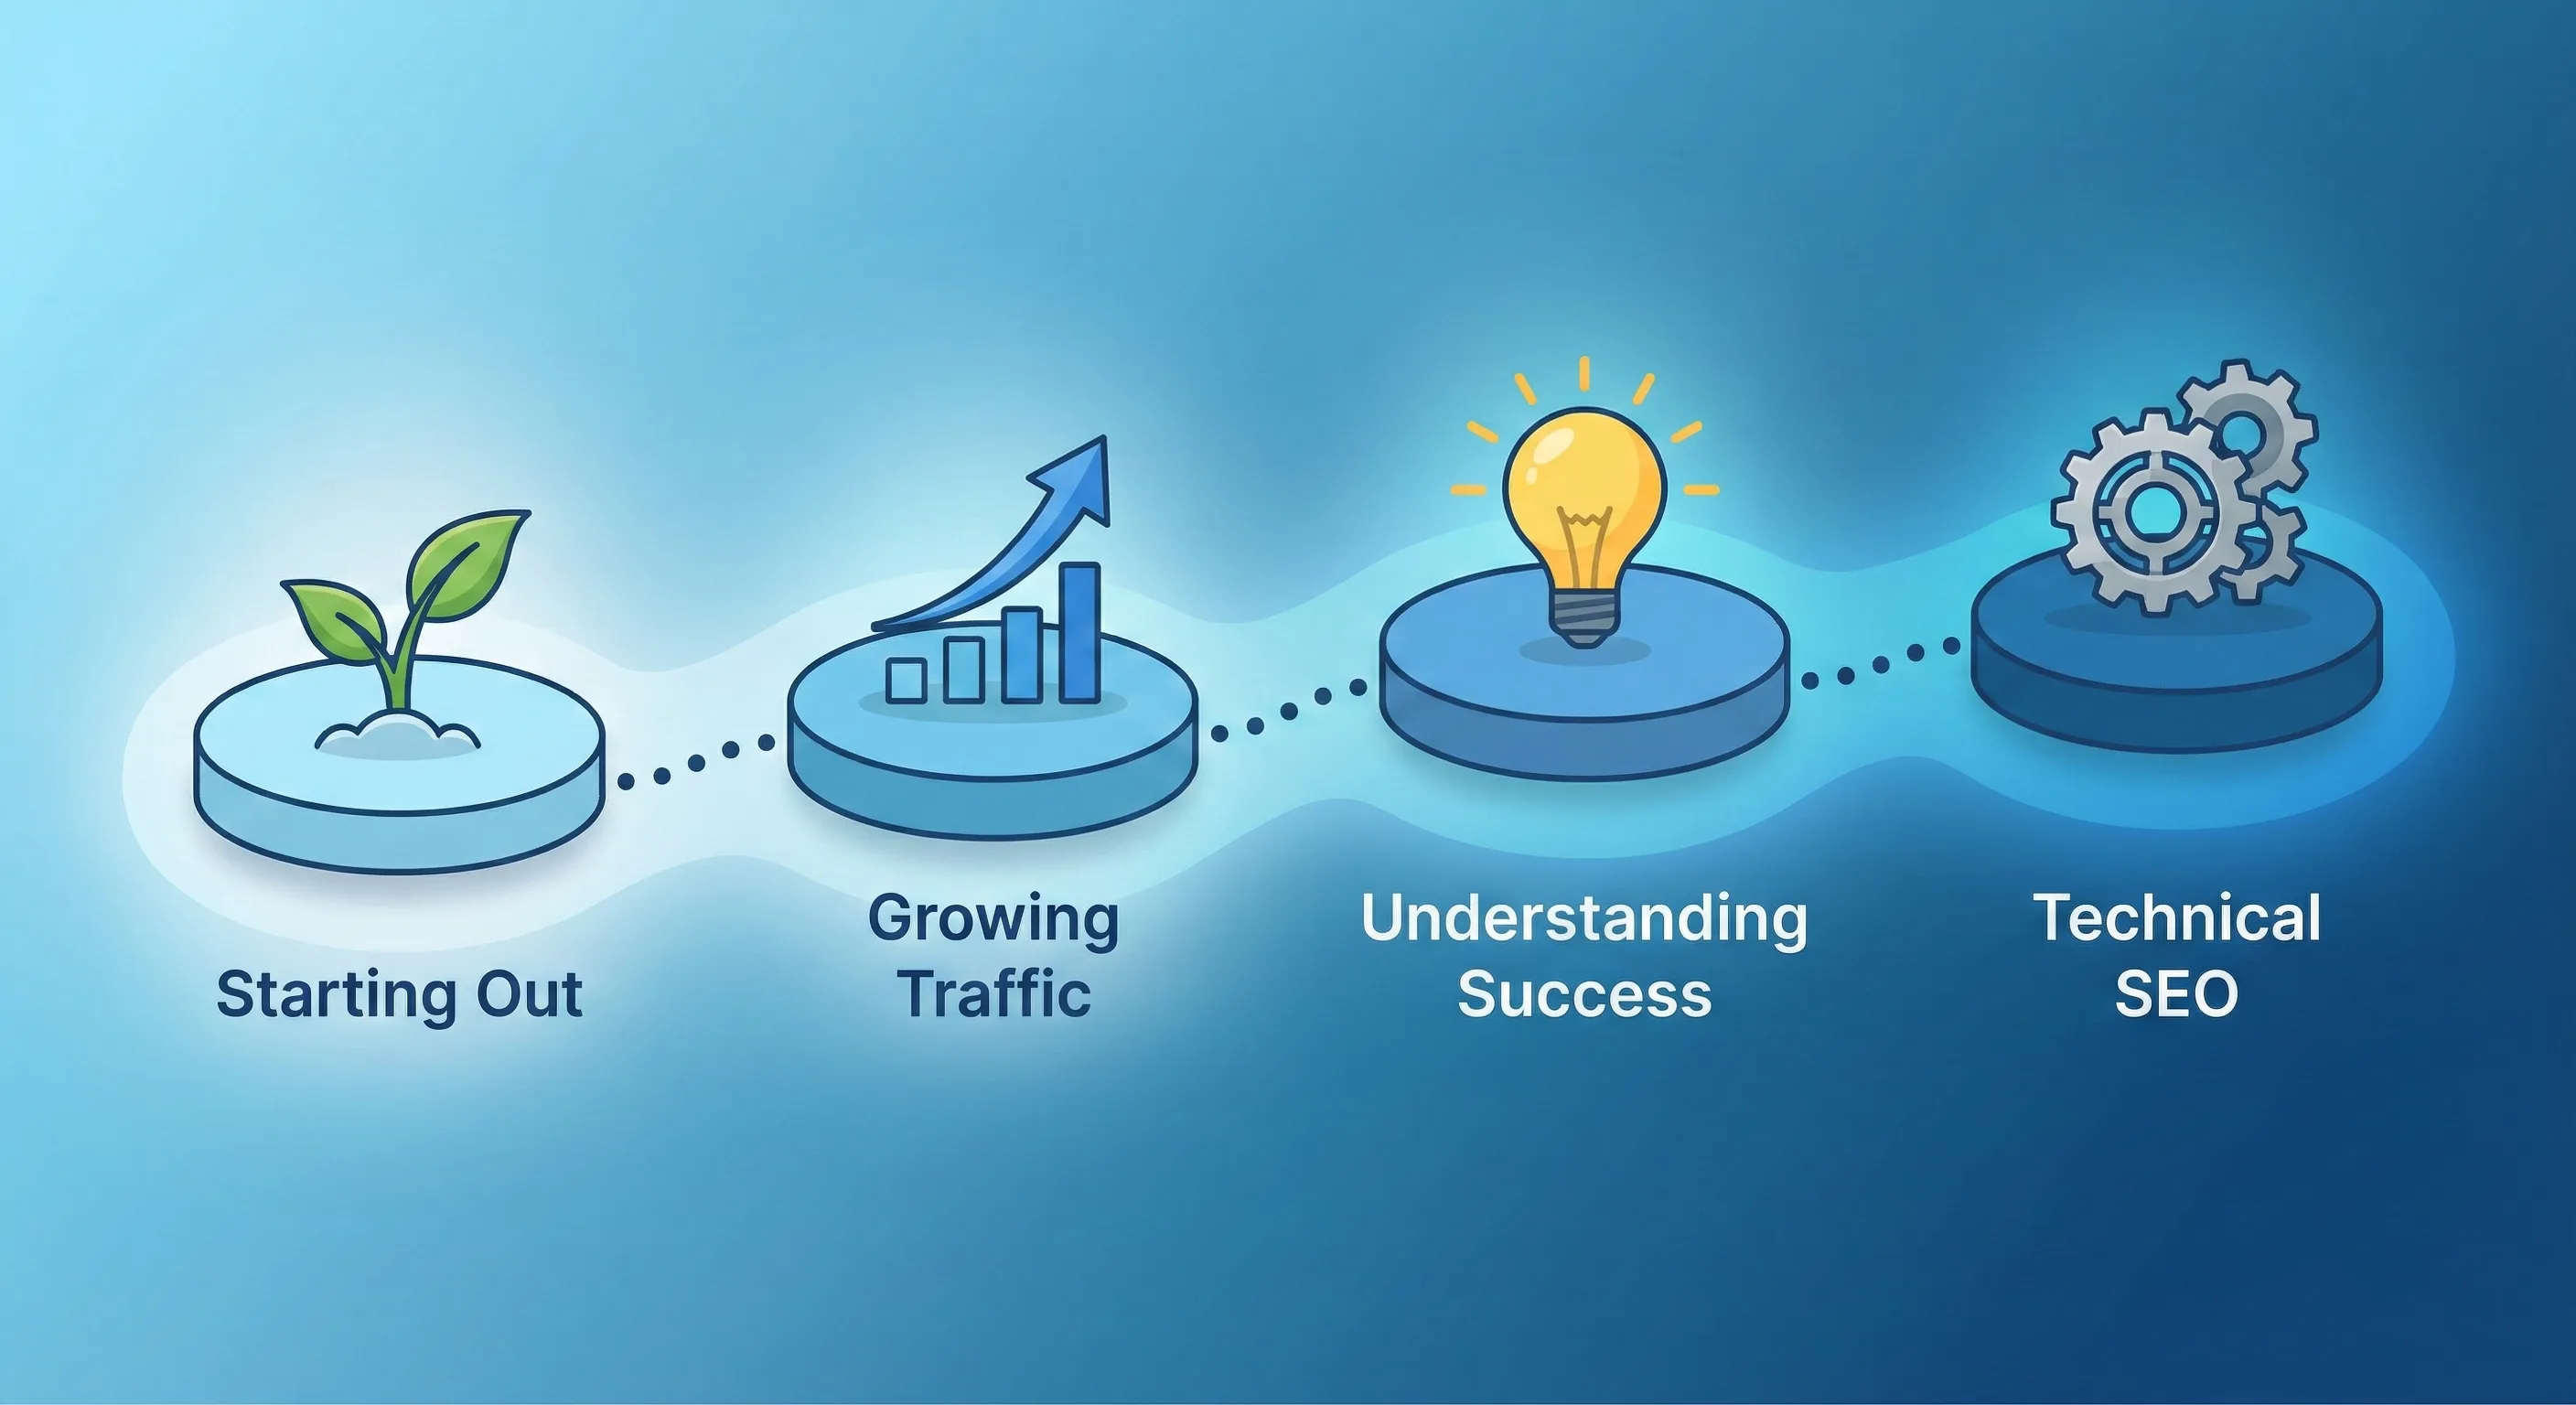
If You’re Just Starting Out
What to check: Focus on the Insights section rather than the full Performance report for your first few weeks.
Why this matters: You’re establishing baseline understanding. Your goal is confirming that Google is successfully crawling your site and indexing your pages.
Action trigger: If you see “Coverage” errors or “Indexing Issues” in your dashboard, these need immediate attention. They mean Google cannot access parts of your site that you want visible in search results. Address these before worrying about rankings or traffic volume.
If You’re Seeing Traffic But Want More
What to check: Once you have a few weeks of data, examine the Performance report. Sort by Impressions to see which queries Google shows your site for, even if people aren’t clicking.
Why this matters: High impressions with low clicks represent opportunity. People are searching for what you offer, but your title or meta description isn’t compelling enough to earn the click.
Action trigger: If you find queries with impressions above 100 but click-through rates below 2%, rewrite those pages’ titles and descriptions to better match search intent. Check back in two weeks to measure improvement. If CTR increases but traffic doesn’t, you may need to improve the content itself to rank higher.
If You Want to Understand What’s Working
What to check: Filter the Performance report by pages that already get traffic. Look for patterns in which content types or topics generate the most clicks and engagement.
Why this matters: Your successful pages reveal what resonates with searchers. This insight should inform your content strategy—create more of what’s working rather than guessing what might work.
Action trigger: If certain content types consistently show high CTR (above 5%) and good average positions (1-5), create more content on similar topics or in similar formats. If other page types show poor performance despite good rankings (high impressions, good position, but low clicks), diagnose why they’re not compelling to searchers. The problem might be misleading titles, unclear value propositions, or content that doesn’t match the search query’s intent.
If You’re Ready for Technical SEO
What to check: Dive into the Coverage report to identify indexing issues. Review the Core Web Vitals report to assess site performance. Check the Mobile Usability report.
Why this matters: Google uses mobile-first indexing and prioritises fast, accessible sites. Technical problems directly impact rankings regardless of content quality. These issues create barriers that prevent you from achieving the outcome you want: search visibility.
Action trigger: If Core Web Vitals show “Poor” status for URLs, prioritise speed optimisation. Slow pages don’t just hurt user experience (they directly impact whether Google shows your pages in search results at all). If Mobile Usability flags issues, fix responsive design problems immediately. If the Coverage report shows “Discovered – currently not indexed,” it means Google found your pages but chose not to include them. This often indicates thin content, duplicate content, or low perceived value. Improve the content quality on these pages or remove them if they’re truly not valuable.
Understanding Search Console Within Your Marketing Foundation
Google Search Console reveals what happens before visitors reach your site—the search queries, impressions, and ranking positions that drive discovery. But it’s one component of a complete measurement infrastructure. Understanding how it connects with Google Analytics 4 (which tracks behaviour after arrival), UTM parameters (which classify traffic sources), and Looker Studio (which synthesises everything into unified reporting) creates a system that answers both “Are people finding us?” and “Are the right people converting?”
How to Build Your Marketing Measurement Foundation shows you how Search Console integrates with your complete measurement infrastructure, connecting search intent data to conversion outcomes, and enabling you to calculate true SEO ROI rather than just tracking rankings.
Link Search Console to Your Analytics
Next Recommended Component: GA4 Integration
Search Console data becomes significantly more valuable when connected to Google Analytics 4. This integration allows you to see search queries alongside conversion data, answering questions like “Which search terms drive buyers, not just browsers?”
In GA4: Go to Admin > Property Settings > Product Links > Search Console Links and connect your verified property.
If You Need Help
Search Console verification is straightforward, but connecting it meaningfully to your broader analytics infrastructure—integrating it with GA4, building cross-platform reports in Looker Studio, and establishing protocols for acting on indexing issues or search opportunity data—requires understanding how these systems work together.
Our Marketing Measurement Foundation service provides complete implementation with Search Console properly integrated into your unified measurement system if you prefer expert setup.
Conclusion
You’ve laid the foundation for search visibility. You’ve moved from blind operation to instrumented measurement.
Google Search Console won’t automatically improve your rankings. What it does is give you diagnostic visibility. You can now see what’s working, what isn’t, and why. You can identify opportunities that you were previously blind to. You can catch technical problems before they cost you months of missed traffic.
The real power comes from asking the right questions: What am I trying to achieve with my search presence? Which behaviours (both from searchers and from Google’s systems) create the outcomes I want? Where are the gaps between what’s happening now and what I need to happen?
The data will start appearing within 24 to 48 hours. When it does, you’ll finally have visibility into how Google Search connects people to your site. You’ll see which queries trigger your pages, where technical obstacles exist, and which opportunities you’re missing.
Tomorrow, check your dashboard. The data will be waiting.