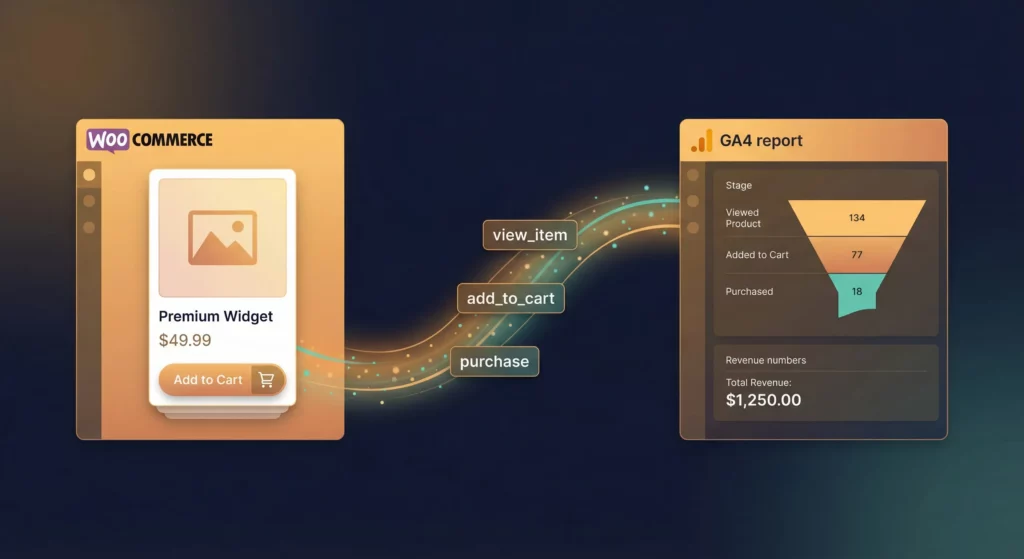
WooCommerce gives you a store. GA4 gives you reports. But without ecommerce tracking, those reports can’t answer the questions that actually matter: which products convert, where customers abandon checkout, and which marketing channels bring buyers rather than browsers. Traffic numbers alone tell you very little about how to improve revenue.
This guide walks you through a complete WooCommerce ecommerce tracking setup – from installing the plugin that creates your data layer through to verifying GA4 is receiving accurate purchase data. Ecommerce tracking is one component of a complete marketing measurement foundation; see How to Build Your Marketing Measurement Foundation for the full picture.
Table of Contents
What Ecommerce Tracking Actually Involves
Ecommerce tracking requires three components working together.
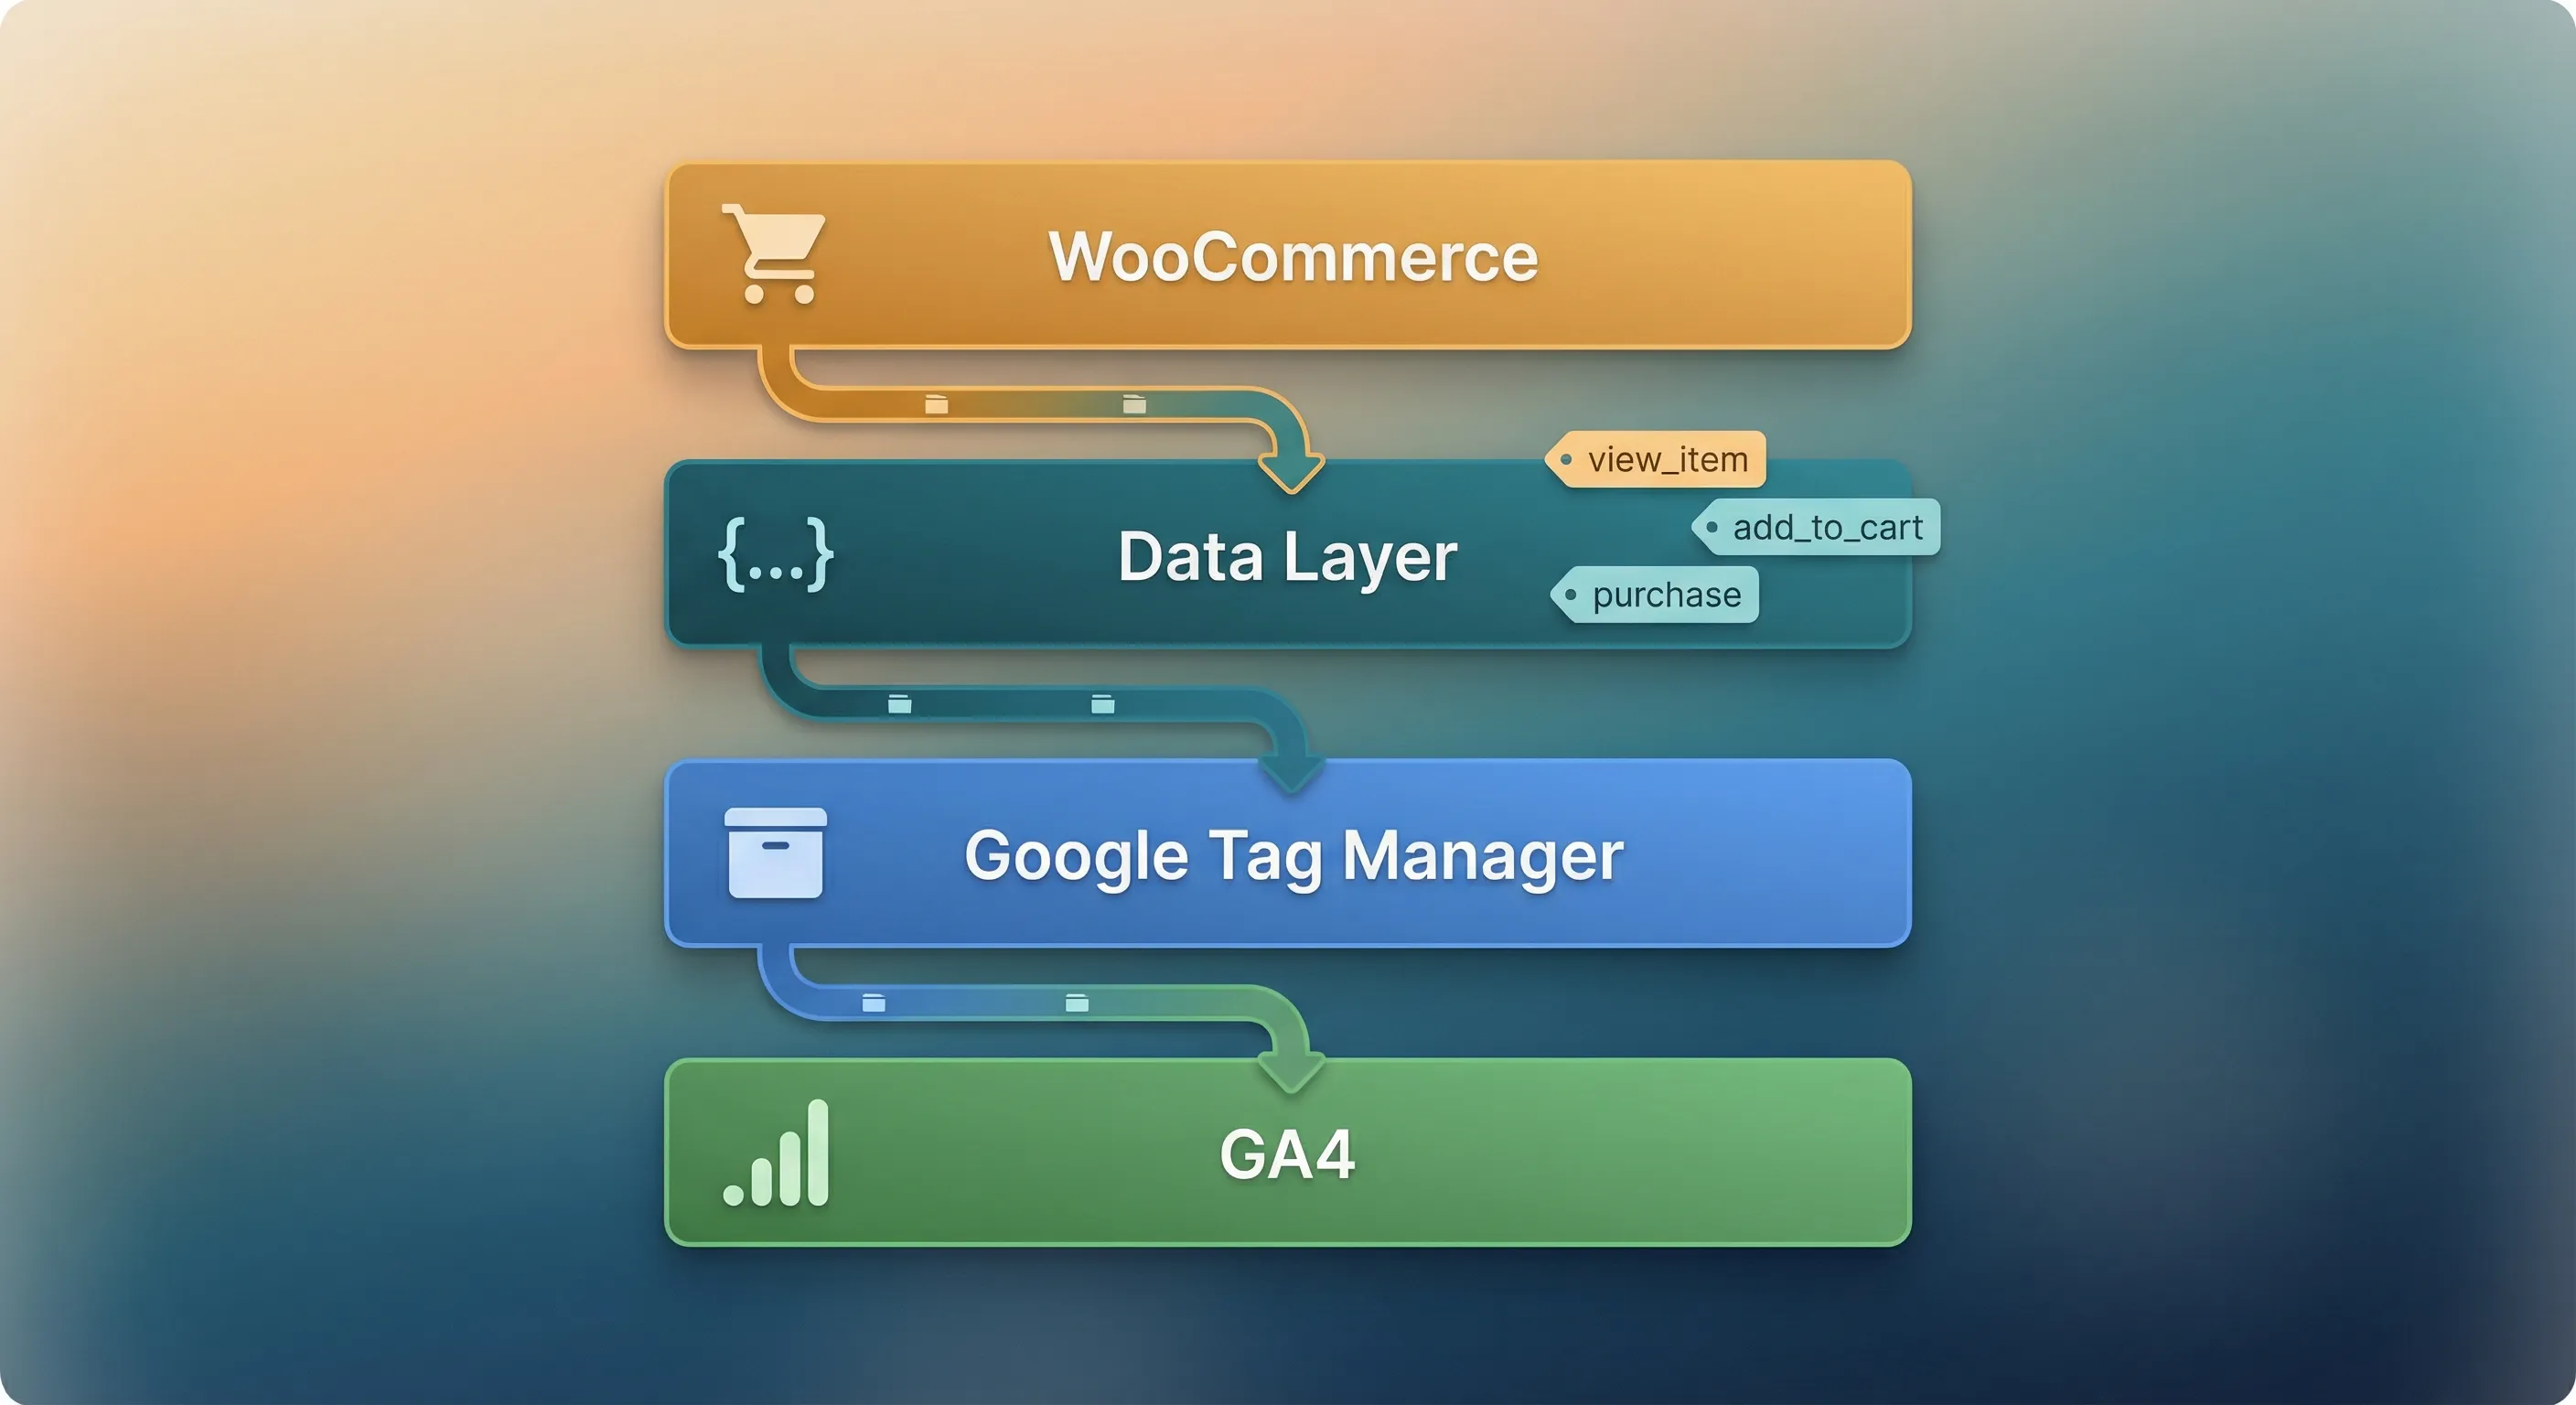
GTM (Google Tag Manager) is the deployment layer. Rather than hardcoding tracking scripts into your theme, GTM loads a lightweight container that you control. You configure what data gets sent, to which platforms, and under which conditions – all from GTM‘s interface without touching your site’s code.
A data layer is the structured communication protocol between your store and your tracking tags. When someone adds a product to their cart, WooCommerce pushes a structured object to window.dataLayer containing the product ID, name, price, quantity, and category. GTM reads that object and routes the data where it needs to go. Without the data layer, GTM has nothing reliable to read.
A GA4 configuration in GTM is the set of tags that listen for data layer events and send them to your GA4 property. This is what actually populates the GA4 ecommerce reports.
For WooCommerce stores, the GTM4WP plugin handles the first two components – installing GTM and creating the data layer – in one place. This guide uses GTM4WP. Other plugins cover similar ground (PixelYourSite and GTM Kit are the main alternatives), but GTM4WP is open source, free, maintained to GA4 standards, and gives you full GTM access without locking features behind a paid tier. If you’re tracking a non-WooCommerce ecommerce store, see GA4 Ecommerce Tracking with GTM and Data Layer for the general implementation.
What You Need Before You Start
- A live
WooCommercestore - A
Google Tag Manageraccount with a container created (free – see How to Install Google Tag Manager) - A
GA4property set up in Google Analytics (see How to Install GA4 on Your Website) - No developer required
Step 1: Install and Configure GTM4WP
Check for Existing Tracking
Before installing, check for double-tagging. This happens when your GTM container or GA4 tag loads twice – once hardcoded in your theme and once from a plugin. Double-tagging creates inflated metrics: near-zero bounce rates and doubled transaction counts.
View the source of any page on your site (Ctrl+U on Windows, Cmd+Option+U on Mac). Search for googletagmanager.com/gtm.js or googletagmanager.com/gtag/js. If either appears in your theme or another plugin like MonsterInsights or Site Kit, disable that tracking before proceeding. GTM4WP needs to be the sole injector of your GTM container.
Create a backup of your database and files before continuing. GTM4WP is stable, but any infrastructure change should be preceded by a backup.
Install the Plugin
Navigate to Plugins > Add New in your WordPress admin. Search for “Google Tag Manager for WordPress”. Verify the author is Thomas Geiger, then click Install Now and Activate.
GTM4WP is lightweight – it operates through PHP hooks during page load rather than creating database tables or background processes.
Configure the Container Snippet
Go to Settings > Google Tag Manager.
Enter your GTM Container ID (GTM-XXXXXXX) in the labelled field. Your Container ID appears in the GTM interface header.
For Container code placement, leave this set to ON (shown as Footer or Codeless depending on your plugin version). GTM4WP uses WordPress‘s wp_body_open hook to inject the GTM snippet in Google’s recommended position: the <noscript> tag immediately after the opening <body> tag, with the <script> loading in the header. This works reliably for 99% of themes.
Note: If you set this to OFF, the plugin remains active and continues injecting the data layer. It only stops injecting the container snippet itself. This is a common source of confusion.
Enable WooCommerce Ecommerce Tracking
Navigate to the Integration tab in GTM4WP settings, then select WooCommerce from the sub-menu. This is where you activate the data layer.
Track Enhanced Ecommerce
Despite the name (a holdover from Universal Analytics), this activates the modern GA4 event schema (view_item, add_to_cart, begin_checkout, purchase). This is the master switch. Check it.
Cart as a First Checkout Step
Optional. If enabled, viewing the /cart/ page triggers a begin_checkout event, making the cart step visible in your checkout funnel.
Cart Content in Data Layer
Enable this. It exposes current cart contents on every page load in a cartContent object within the data layer. This is useful for cart abandonment tracking: if someone adds an item via a side-cart widget and leaves from your homepage without visiting the cart page, the data layer still carries that cart data.
Customer Data in Data Layer
This pushes logged-in user details (ID, role, hashed email) to the data layer, useful for Google Ads Enhanced Conversions or Meta CAPI. Only enable if you’re certain the data is being hashed. Plain-text email in the data layer violates Google’s Terms of Service and GDPR.
Stock Status Attributes
Enables product stock status in the data layer. Useful for analysing whether out-of-stock items still generate views and interest, informing inventory planning.
Exclude Internal Traffic
Navigate to Settings > General. Under “Exclude users”, check Administrator and Shop Manager. This prevents the GTM container from loading when you’re logged in, keeping your internal activity out of your conversion data.
Step 2: Set Up GA4 Ecommerce Tracking in GTM
GTM4WP has built your data layer. Now you need to configure GTM to read it and send the data to GA4. This takes two things: a trigger that listens for ecommerce events, and a tag that sends them to GA4.
Install the Base GA4 Tag (if needed)
If you haven’t already installed your base GA4 Configuration Tag in GTM, do that first. It establishes the connection between GTM and your GA4 property. See How to Install GA4 on Your Website for the steps.
Create the Ecommerce Trigger
Log into your GTM container and navigate to Triggers > New.
Name it CE - GA4 Ecommerce Events. (The CE prefix indicates Custom Event, which helps keep your workspace organised as you add more triggers.)
Click Trigger Configuration and select Custom Event.
Check the Use Regex Matching box next to the Event Name field. In the field, paste this pattern:
view_item|view_item_list|select_item|add_to_cart|remove_from_cart|view_cart|begin_checkout|add_payment_info|add_shipping_info|purchaseThe pipe character (|) acts as OR – this single trigger fires for all ten ecommerce events that GTM4WP pushes to the data layer. Set the trigger to fire on All Custom Events and save.
Create the GA4 Event Tag
Navigate to Tags > New. Click Tag Configuration and select Google Analytics: GA4 Event.
Configuration Tag
Select your existing GA4 Configuration Tag from the dropdown.
Event Name
Click the variable icon (the brick icon) next to the field and select the built-in variable {{Event}}. This makes the tag dynamic: when the data layer pushes purchase, the tag sends purchase to GA4; when it pushes view_item, the tag sends view_item. One tag handles every ecommerce event automatically.
Scroll down to More Settings and expand the Ecommerce section. Check Send Ecommerce data and ensure Data Layer is selected as the source.
This checkbox replaces what used to require dozens of manual variable configurations. Instead of individually mapping item name, price, category, and variant to separate GA4 parameters, GTM reads the entire ecommerce object from the data layer and maps everything in one step.
Click into Triggering and select CE - GA4 Ecommerce Events.
Name the tag GA4 - Ecommerce Events and save.
Publish your GTM container by clicking Submit in the workspace. Nothing goes live until you publish.
Step 3: Verify Your Tracking
Publishing isn’t enough. You need to confirm data is actually flowing correctly. A silent failure is dangerous – reports look populated but the data is wrong: missing taxes, incorrect currency, or dropped product details.
Browser Tools You Need
Google Tag Assistant confirms your GTM container is present and loading. Available at tagassistant.google.com.
Adswerve dataLayer Inspector+ prints data layer contents directly to the Chrome console in readable format. You can see exactly what was pushed, in what order, and what each object looked like at that moment.
GA4 DebugView is the final confirmation step. Even if GTM sends data correctly, GA4 might reject it. DebugView (found in GA4 under Admin > Data display > DebugView) confirms Google’s servers received and processed the event. See our GA4 DebugView guide for how to use it effectively.
Verify the Container
Open your homepage and launch Google Tag Assistant. Confirm you see your GTM-XXXXXXX container. Green or blue status is acceptable (blue means non-standard implementation, which is common with WordPress plugins, but is usually fine).
If you see multiple GTM containers or multiple gtag.js tags loading, stop. Double-tagging is present. Check your theme settings and other plugins.
Verify Product Events
Open Chrome Developer Tools (F12) and go to the Console tab with Adswerve dataLayer Inspector+ enabled. Navigate to a product page.
Look for a dataLayer.push: view_item entry in the console. Expand the object and confirm:
- The
ecommerceobject is present item_idmatches yourWooCommerceSKUpricematches the product price
Then click Add to Cart. A dataLayer.push: add_to_cart event should appear immediately.
If add_to_cart doesn’t fire, try disabling “AJAX add to cart buttons” in WooCommerce settings to force a page reload. If the event fires after that change, your theme’s AJAX implementation is non-standard and blocking GTM4WP‘s listener.
Verify the Purchase Event
Complete a test transaction. Enable Check Payments or Cash on Delivery in WooCommerce to avoid real charges. You must reach the order confirmation page (typically /checkout/order-received/).
On that page, check the console for the purchase event. Then open GA4 DebugView to confirm it arrived.
Two critical checks:
Reload the page. The purchase event must not fire again. GTM4WP has deduplication logic built in – if it fires twice, your revenue data will be inflated from that point on.
Check the totals. The value parameter should equal items + tax + shipping (depending on your plugin configuration).
Troubleshooting Common Problems
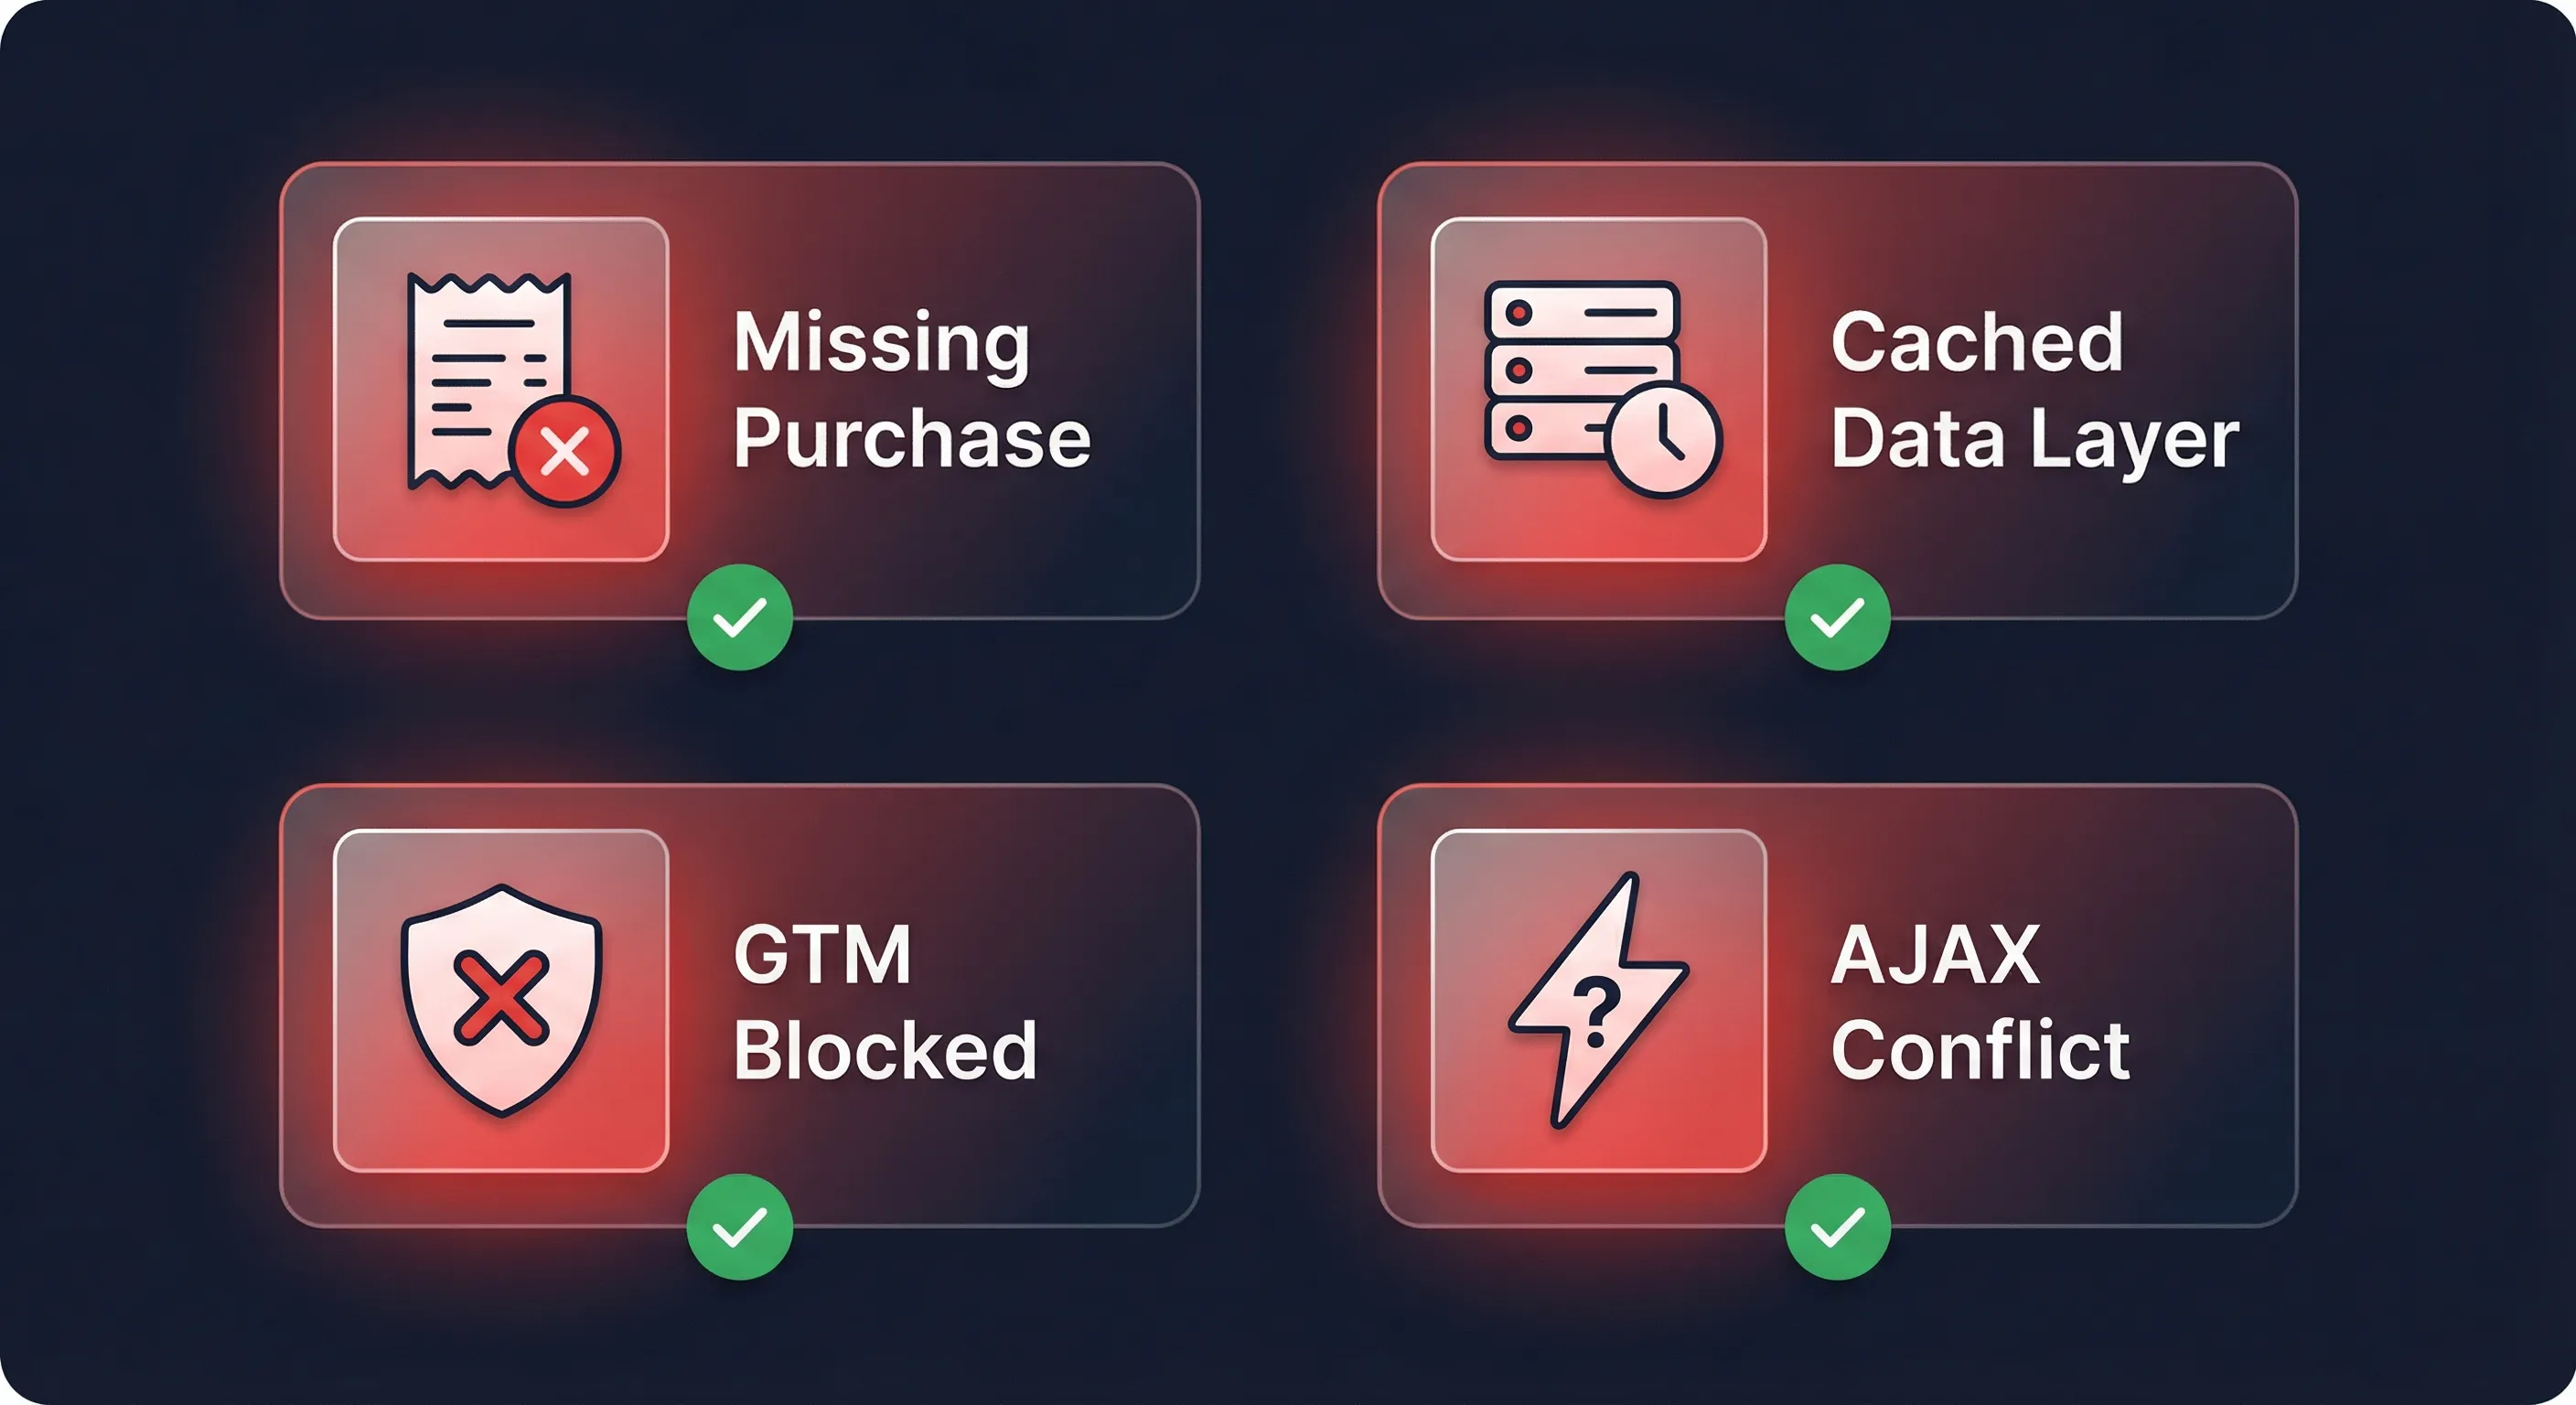
Missing Purchase Events
Symptom: Sales appear in WooCommerce but not in GA4.
Payment gateway redirects.
Some gateways (PayPal Standard, certain Stripe configurations) don’t automatically redirect customers back to your order confirmation page after payment. If someone closes the browser at PayPal’s success screen, the GTM code on your site never runs. Enable “Auto Return” in your payment gateway settings to force the redirect.
Custom thank you pages.
If you use a plugin like CartFlows to replace the default thank you page, GTM4WP may not recognise it as the order endpoint. You may need custom code to hook GTM4WP into that page builder’s logic.
Data Layer Showing Old or Empty Data
Symptom: Data layer variables show undefined or data from previous visitors.
Cause: Caching plugins (WP Rocket, LiteSpeed Cache, Autoptimize) are caching the HTML of your pages including the data layer script. User B is seeing User A’s data layer.
Fix: Exclude your order confirmation page from caching entirely. This is a standard exclusion rule in all major caching plugins – find the page-specific exclusions settings and add your thank you page URL.
GTM Container Blocked
Symptom: GTM container isn’t loading despite correct installation.
Cause: Strict Content Security Policy (CSP) headers on your server are blocking external scripts.
Fix: Whitelist https://www.googletagmanager.com and https://www.google-analytics.com in your CSP headers. This typically requires updating your security plugin settings or server configuration.
AJAX Cart Events Not Firing
Symptom: add_to_cart events fire from product pages but not from quick-add buttons on category pages or mini-cart widgets.
Cause: Your theme uses custom AJAX that doesn’t trigger the standard WooCommerce jQuery events GTM4WP listens for.
Fix: This requires custom JavaScript to listen for your theme’s specific events and manually push to the data layer. Contact your theme developer, or consider switching to a theme that uses standard WooCommerce AJAX patterns.
Analysing Your WooCommerce Data in GA4
With ecommerce tracking in place, you’ve captured two of the three stages of the customer journey.

Review is the middle of the journey – what visitors do with your products. GA4‘s Purchase Journey report shows the full funnel from session start through view_item, add_to_cart, begin_checkout, and purchase, with drop-off rates at each stage. The Checkout Journey report zooms into the checkout steps specifically. These reports tell you where friction exists.
Convert is the transaction itself. GA4‘s Monetisation Overview shows revenue trends and top-selling products. The Ecommerce Purchases report shows items viewed, items added to cart, and items purchased side by side – immediately identifying which products attract attention but fail to convert.
But these reports only answer the full business question – which marketing is driving sales – when your Aware layer is also in place. GA4 automatically associates the session source (where the visitor came from) with every event in that session, including all ecommerce events. If you’ve tagged your marketing links with UTM parameters, you can see which campaign, channel, or source drove a purchase, not just a click. Without UTMs on your marketing links, your ecommerce data has no marketing attribution attached to it.
For the Aware layer: Understand Your Website Traffic Using GA4 covers reading the acquisition reports. The Guide to UTM Parameters covers tagging your marketing links so those reports carry meaningful attribution data.
Once all three stages are tracked, a Looker Studio dashboard makes ongoing monitoring more practical than navigating between GA4 reports. Our WooCommerce Looker Studio Connector connects your GA4 ecommerce data to pre-built dashboards that surface product performance, checkout drop-off, and channel attribution in one view.
Next Steps
Immediate Practical Steps
Verify your setup with a real transaction rather than a test payment – test payments use different payment paths and may not reflect how your live checkout behaves. Check your GA4 ecommerce reports after 24 to 48 hours to confirm data is appearing in Monetisation > Ecommerce Purchases.
Document your GTM container settings. Record which version you published and which tags, triggers, and variables are active. This protects you if a future plugin update causes unexpected behaviour and you need to identify what changed.
If you haven’t already, set up internal traffic filters in GA4 (Admin > Data streams > More tagging settings > Define internal traffic) so your own visits don’t skew conversion rates alongside the GTM4WP admin exclusion.
Understanding the Bigger Picture
Ecommerce tracking answers specific questions about your store’s conversion behaviour, but it sits within a broader measurement system that connects marketing spend to business results. The Actionable Measurement Framework explains the strategic structure behind that system – how to go from raw data to decisions that move revenue. How to Build Your Marketing Measurement Foundation maps out the complete tool stack this tracking fits into.
Continue Building
With the ecommerce foundation in place, two additions significantly improve the quality of your data.
UTM parameters tag your marketing links so GA4 can attribute purchases to specific campaigns and channels. Without them, your ecommerce reports show conversions but not what drove them. See the UTM Parameters Guide.
Consent mode ensures your tracking remains functional and compliant as browser privacy restrictions tighten. Consent-related data loss affects ecommerce attribution directly – if a significant portion of users decline cookies, your purchase data becomes incomplete. See Cookie Consent with Google Tag Manager and What is Signal Loss in Digital Marketing for why this matters.
If You Need Help
Setting up tracking across a live store can surface unexpected conflicts with themes, caching plugins, or payment gateways. Our Marketing Measurement Foundation service covers the complete setup – data layer, GTM configuration, GA4, and verification – so you start with accurate data from day one.
Conclusion
Ecommerce tracking doesn’t improve your store – it removes the guesswork about where to focus. With GTM4WP handling the data layer and GTM routing events to GA4, the complete purchase journey becomes visible: which products attract attention but don’t convert, where customers abandon checkout, and which marketing channels bring people who actually buy.
GTM4WP‘s strict alignment with GA4‘s event schema means this setup won’t break when Google updates their specifications. The separation between data collection (the plugin’s job) and data routing (GTM‘s job) gives you the flexibility to add platforms, implement consent management, or upgrade to server-side tracking without modifying your WordPress installation.
Accurate measurement is the foundation of every useful marketing decision. Without it, you’re optimising based on assumptions. With it, you’re making decisions you can trust.